
This section will help you to start using the Developer Studio for ALEOS Application Framework. It will guide you through the creation of a simple application.
Step 01 The procedure for installing the Developer Studio is straightforward - once the archive file containing the product has been downloaded, it can be expanded anywhere on your file system.
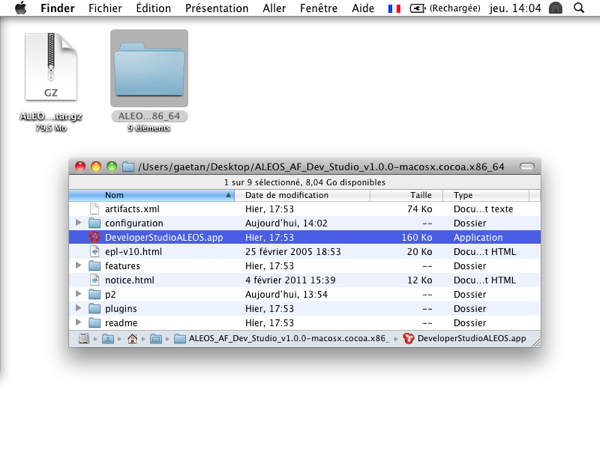
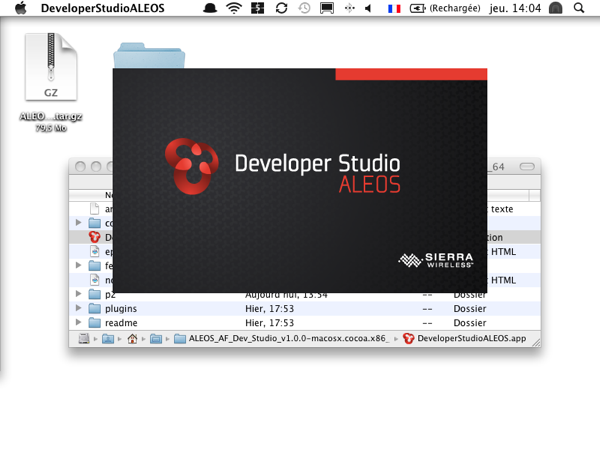
Step 02 To start the Studio, run the executable file included in the expanded archive.
Step 03 By default, the IDE asks for a workspace location. Choose the default location (within the Studio's installation directory).
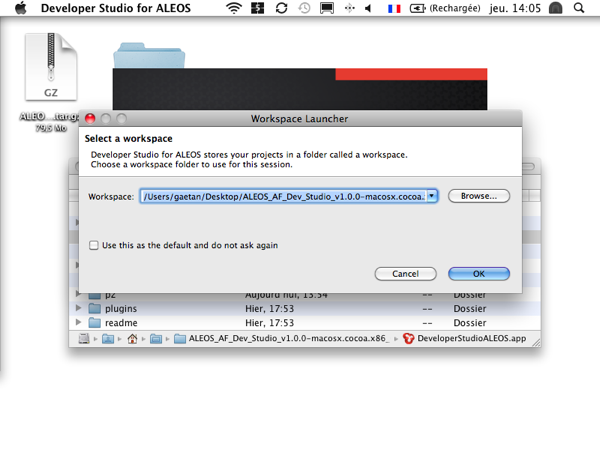
If so, please try to unzip it in a shorter path.
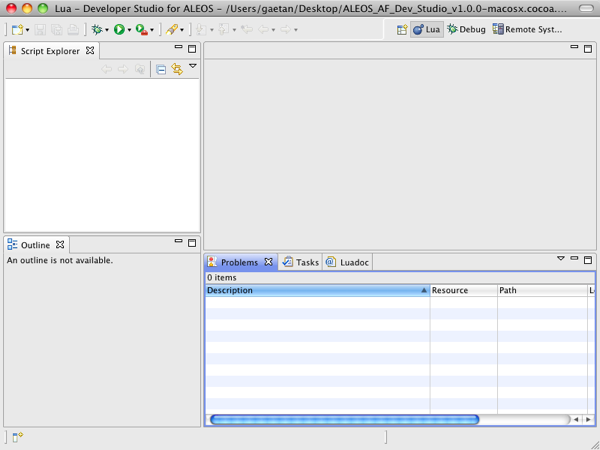
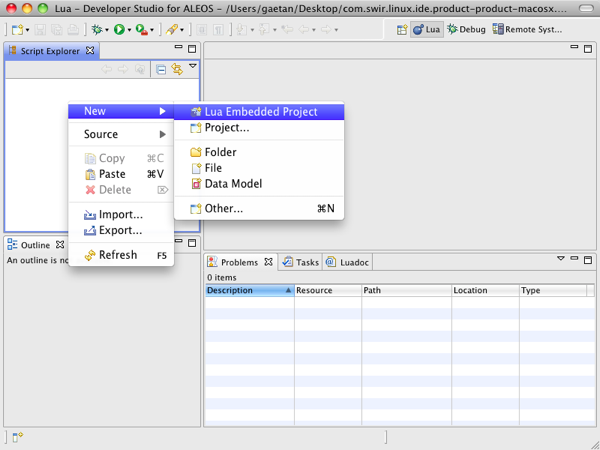
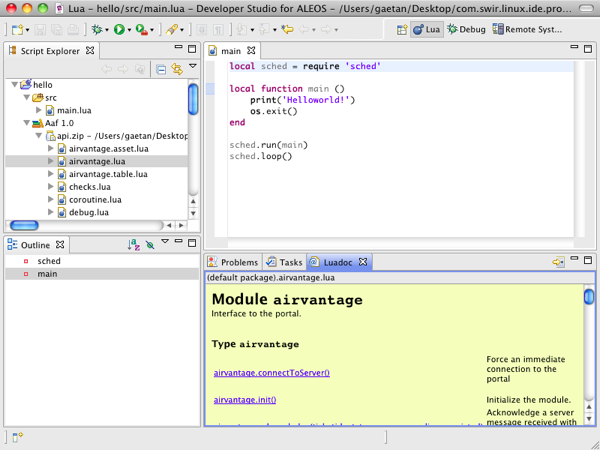
Upon execution, the Developer Studio opens on the Lua perspective. This perspective is dedicated to the management of scripting projects.
Step 01 To create a new project, right click in the Script Explorer view and select New > Lua Embedded Project. The New Embedded Project Wizard automatically opens.
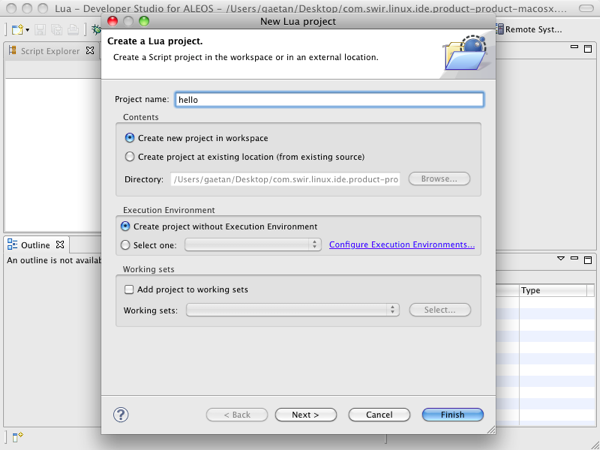
Step 02 The wizard's first step (Lua Embedded Project) allows you to set the project name: for instance, to hello). Once set, click on [Finish].
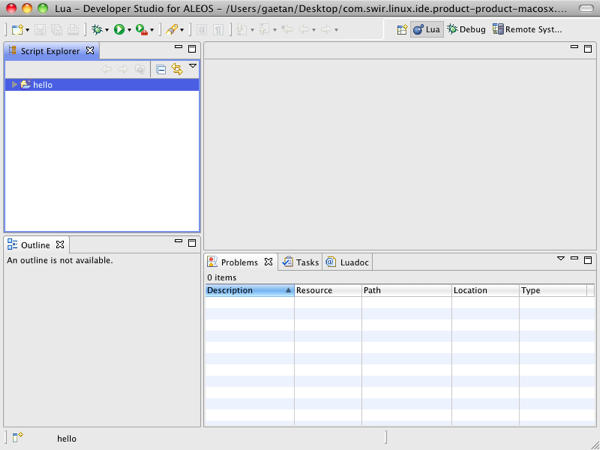
Step 03 The new project now appears in the Script Explorer view:
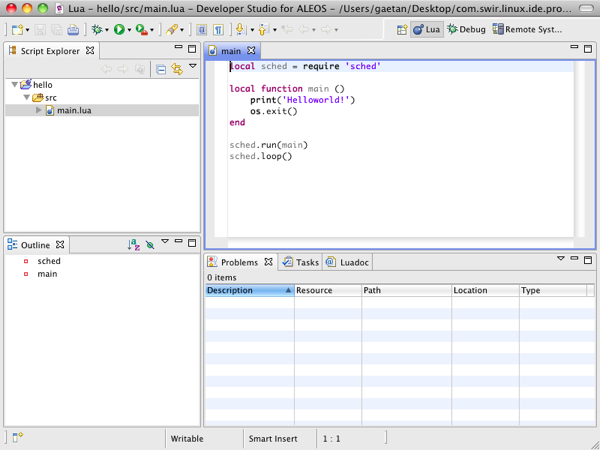
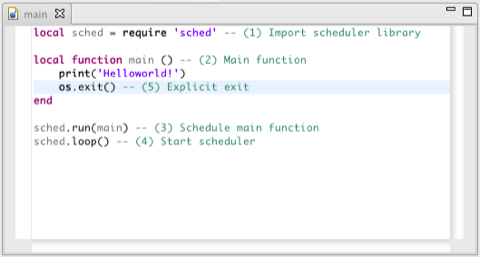
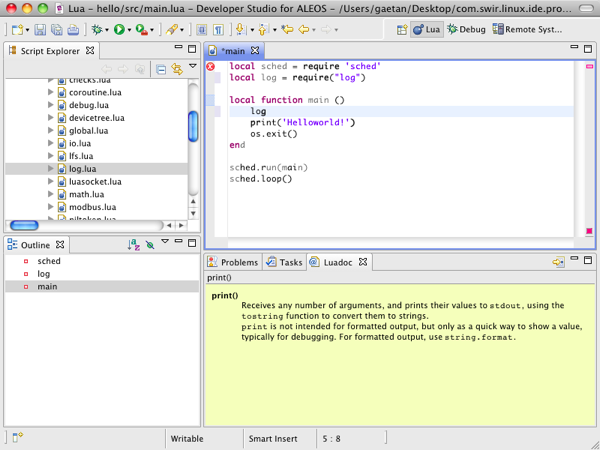
Source files can be edited from the IDE's Editor area. Double click on the main.lua file. The Lua editor opens in the Editor area. The Outline view displays the structure of the source file.
The Execution Environment corresponding to the targeted version of AFF shall be downloaded in order to be used in the Developer Studio. It shall not be expanded.
Step 01 Right click on the project and select Build Path > Add Libraries.

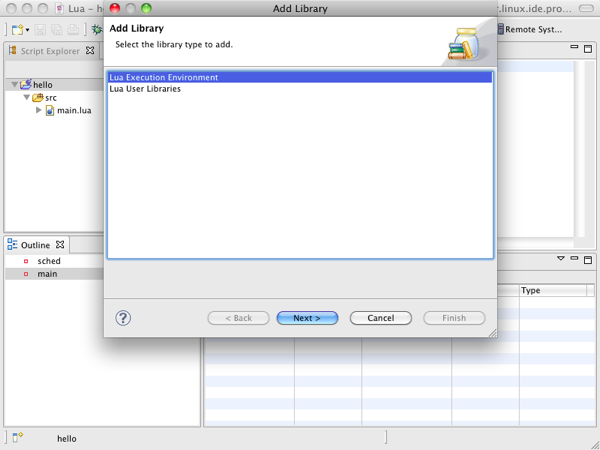
Step 02 Select Lua Execution Environment and click on [Next].
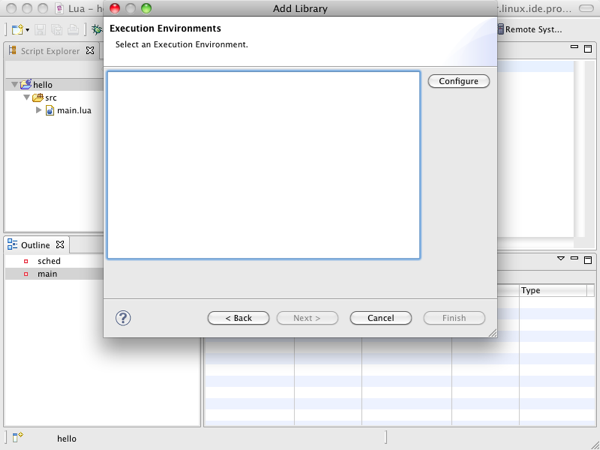
Step 03 Click on [Configure].

Step 04 Click on [Add] and browse the file system to select the execution environment archive file.
The Aleos Application Framework environment archive can be found under the sub-folder Developer Studio in the full package.
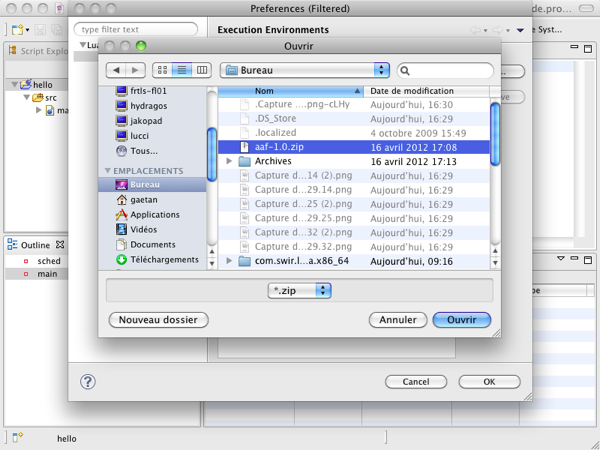
Step 05 Click on [Open].
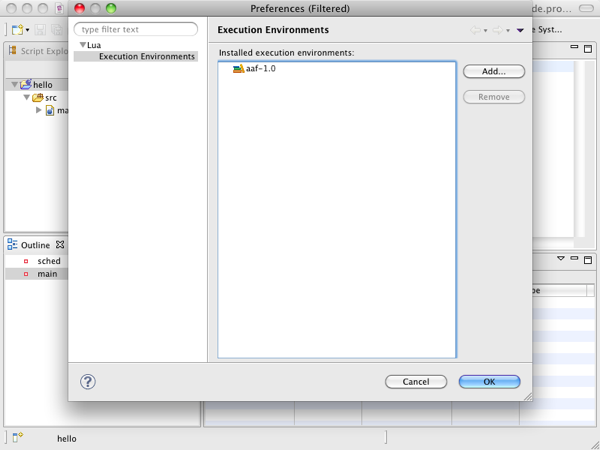
Step 06 Select the Execution Environment for AAF.
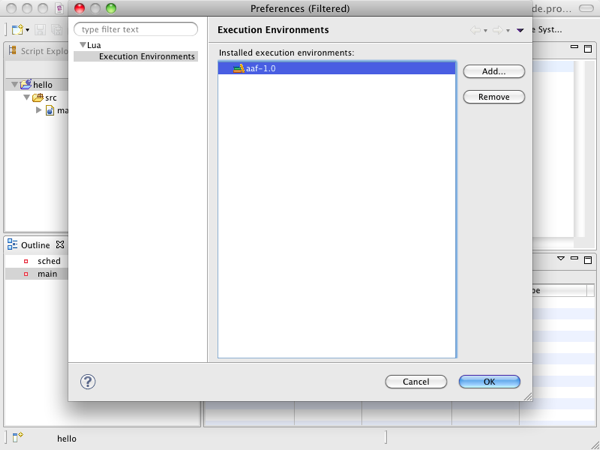
Step 07 Click on [OK].
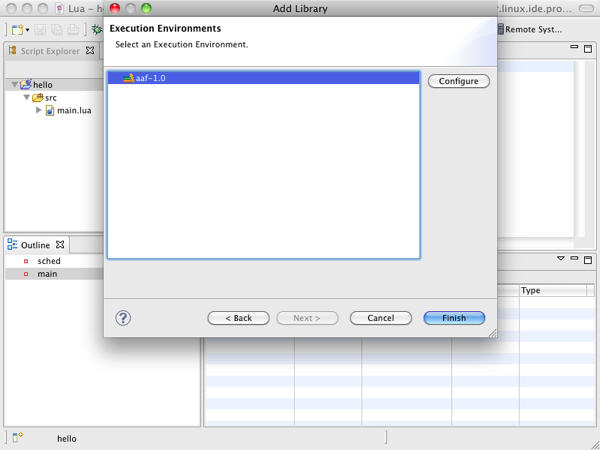
Step 08 Click on [Finish].
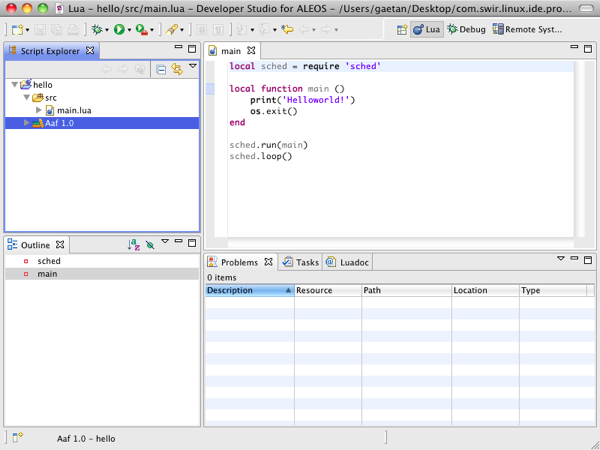
Step 09 The dependency to the execution environment has been added to the project. The execution environment can be unfolded and the various modules can be selected. The corresponding documentation is displayed in the Luadoc view.
Part of this assistance relies on the information provided by the Execution Environment explained in the previous section.
As an example of how content assist can be useful, we will make a simple use of the string library.
Step 1 Type "l" and hit control + espace. The IDE will suggest several possibilities.
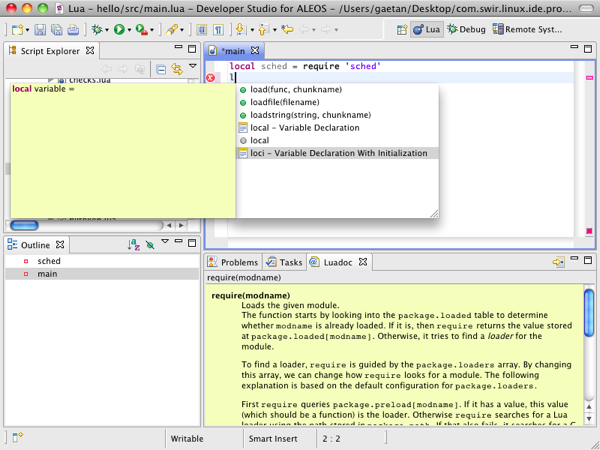
Step 2 choose loci to create a local variable.
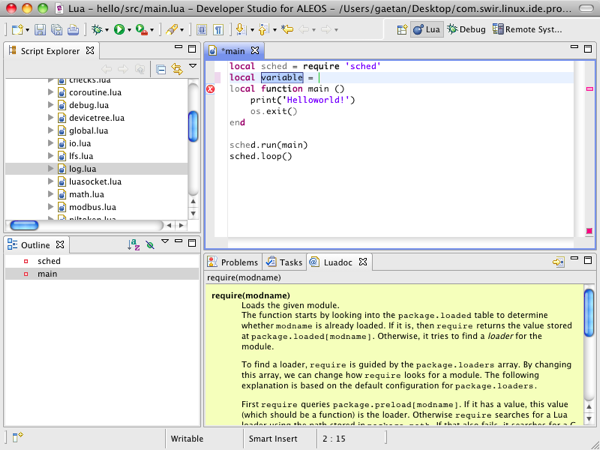
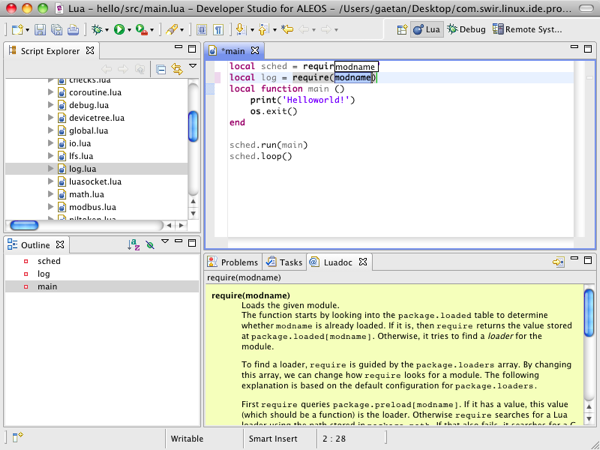
Step 3 The focus is automatically set on the name of the variable. Type "string" and press the tab key to switch the focus on the init value.
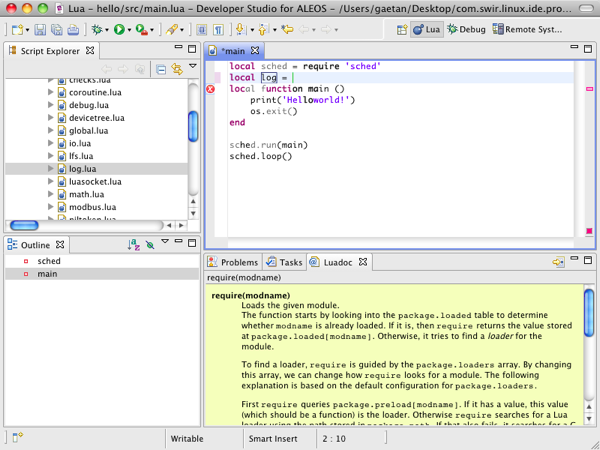
Step 4 Type "r" and hit control + space.
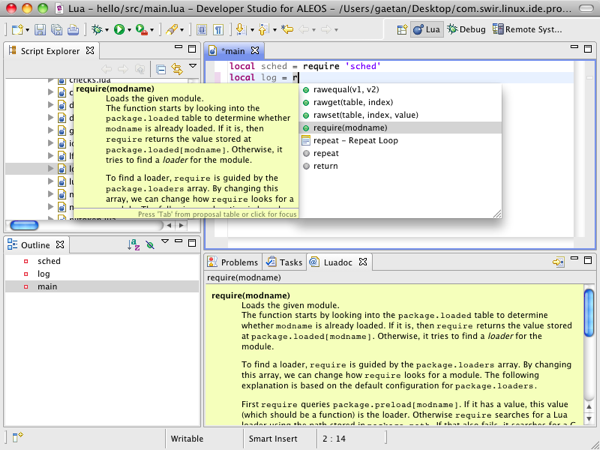
Step 5 Choose require to call the global function that imports modules.
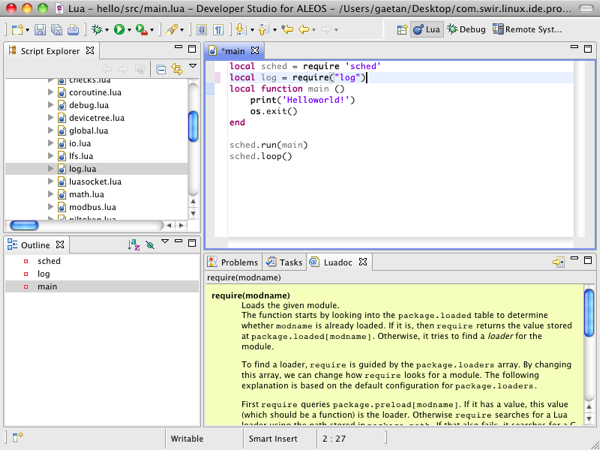
Step 6 Type the string "string" and press tab.
Step 7 In the main function, type "s" and hit control + space.
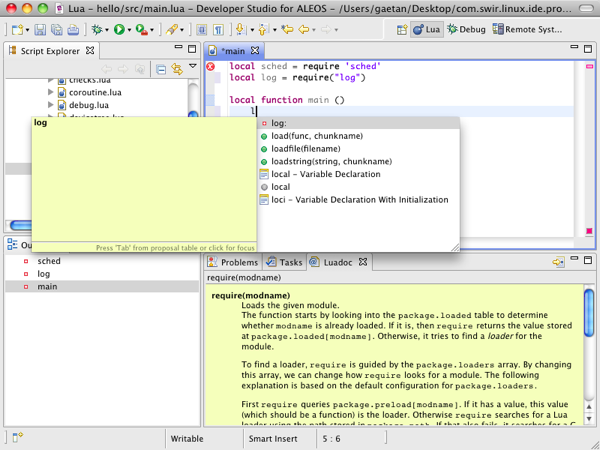
Step 8 Choose the local variable string we just create.
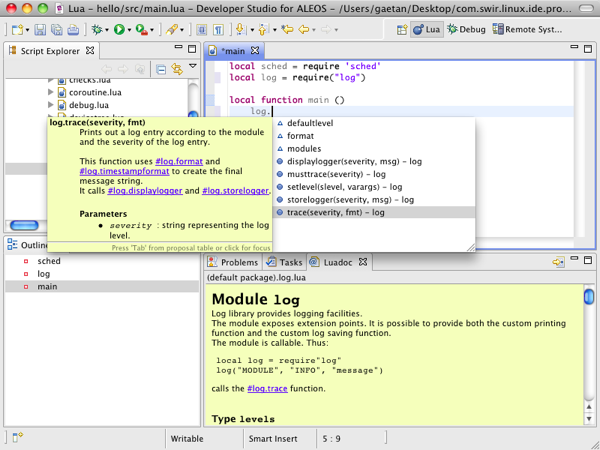
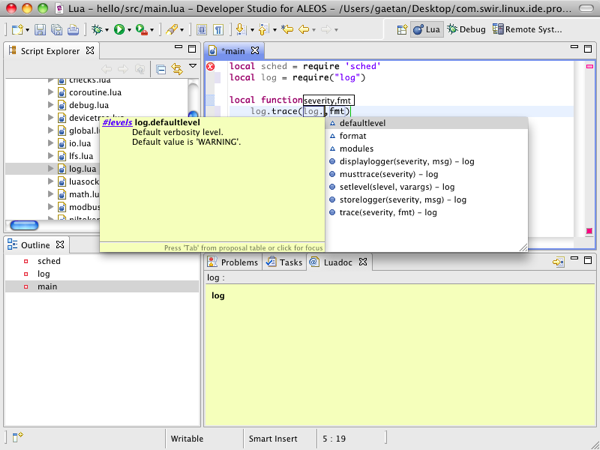
Step 9 type "." to call a function of the string module, hit control + space the IDE will display all the fields and function of the string module.
Step 10 Choose the upper function.
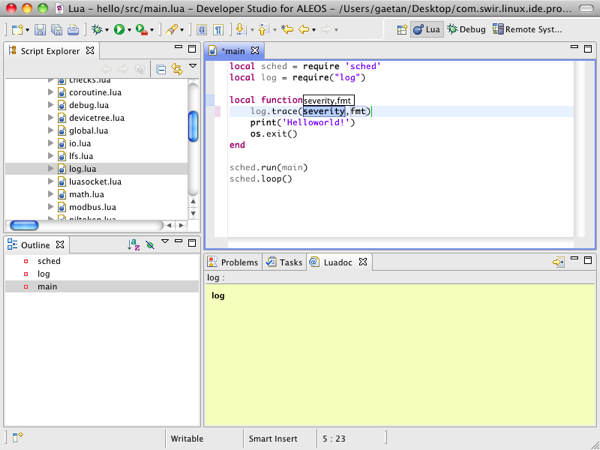
Step 11 For the argument just type the string "UpperHelloWorld".
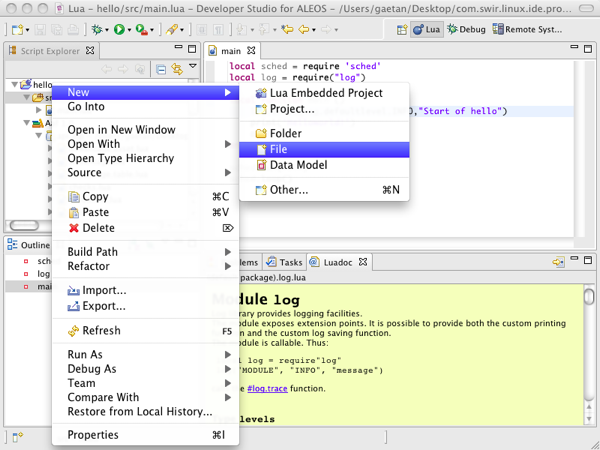
Step 01 In the Script Explorer view, right click on the src folder and select New > File. The New File wizard automatically opens.

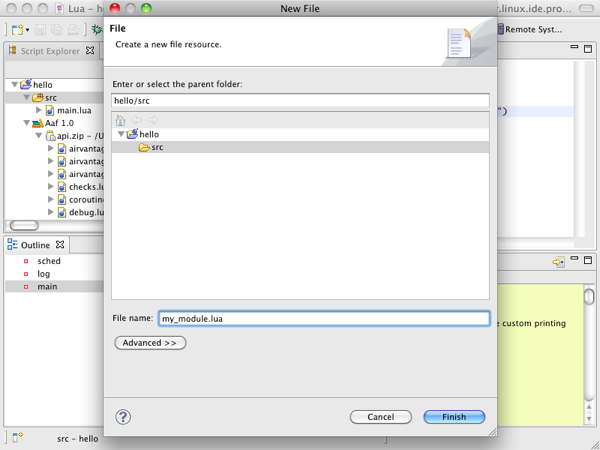
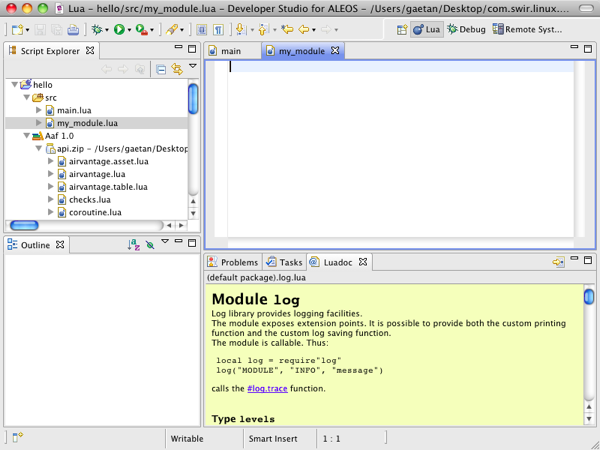
Step 02 The wizard's first step allows you to enter a file name (my_module.lua). Once entered, click on [Finish]. The new file is added to the src project; it automatically opens in the Editor area.
Step 03 Copy-paste the following code in the editor opened on the newly created file and save it (Ctrl + S):
-- Documentation that starts with --- is interpreted as luadoc
-- It provides information that can be used by the IDE
--

local log = require('log')
log.setlevel("INFO", "HELLO")

-- Creation of a new table that will contain the module

---
-- Module that provide helper functions.
-- @module my_module
--

local lib = {}

-- Creation of a new field (hello) in the table
-- This field is fill with a new function

---
-- Function that prints and log hello message
-- @function [parent=#my_module] hello
-- @param #string name The name that will be in the message
-- @return nothing
--
function lib.hello(name)
   print('Hello '..name..'!')
   log.trace("HELLO", "INFO", "\"Hello %s!\", printed", name)
end

-- Creation of a field with a String value

---
-- Default value for the message
-- @field [parent=#my_module] #string default
--
lib.default = "World"

-- creation of another function

---
-- Default function to print hello world
-- @function [parent=#my_module] helloworld
-- @return nothing
--
function lib.helloworld()
   lib.hello(lib.default)
end

-- Return of the table that will be used as a module
return lib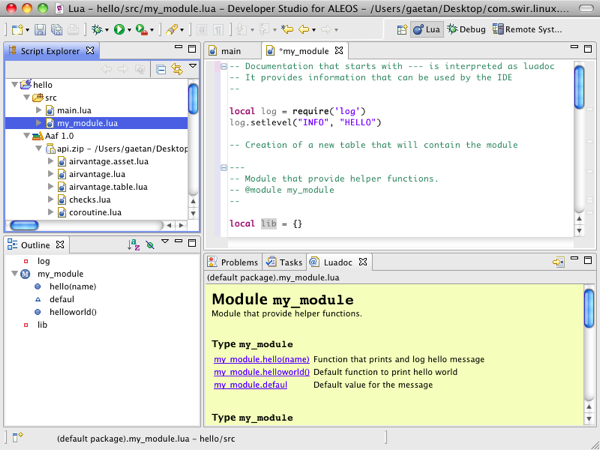
To create a module, a local table must be initiated (1). Fields must then be added to it (2). The local table is eventually returned (3).
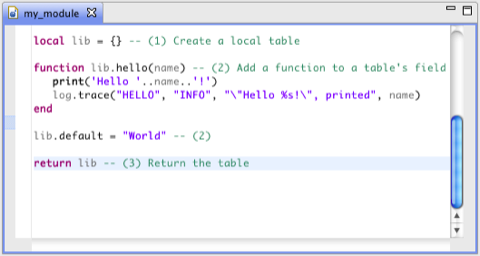
In short, a module is a source file that, when executed, returns a table containing functions and other data.
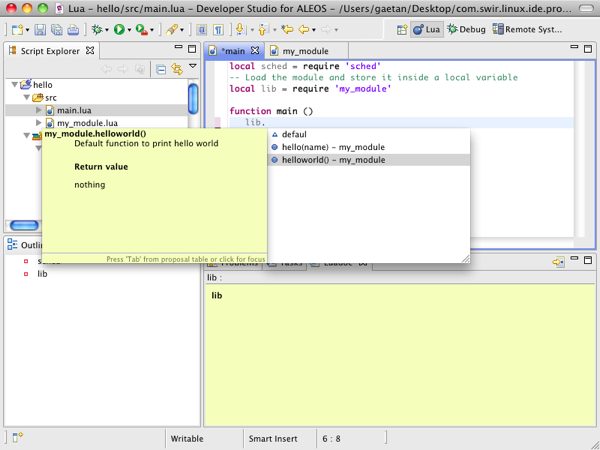
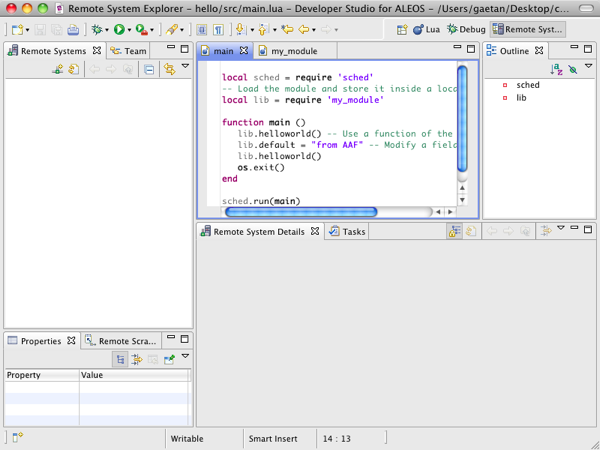
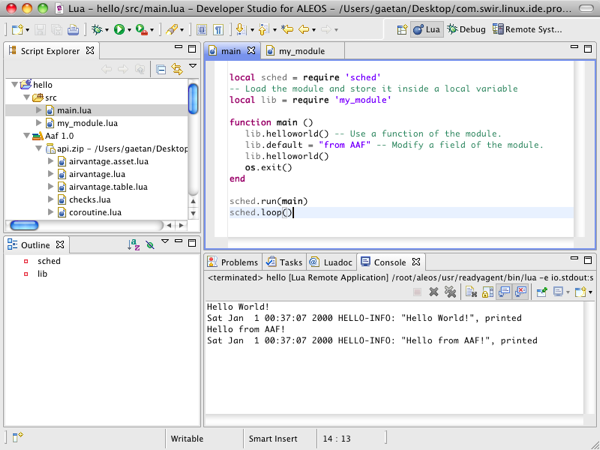
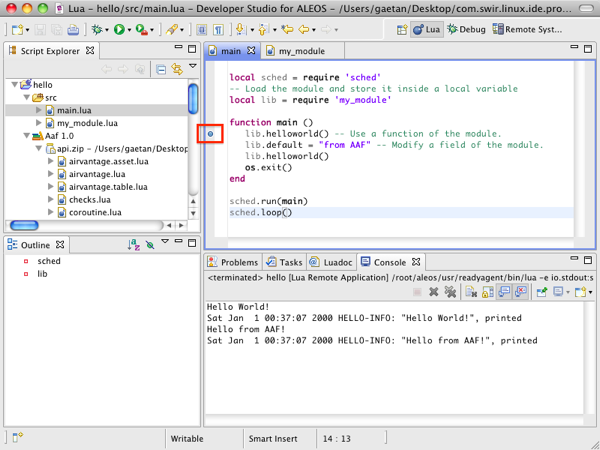
Step 04 Modify the main.lua so that it can use this module (local lib = require 'my_module'). You can use the content assist on lib to call the helper functions in your module.
local sched = require 'sched'
-- Load the module and store it inside a local variable
local lib = require 'my_module'

function main ()
   lib.helloworld() -- Use a function of the module.
   lib.default = "from AAF" -- Modify a field of the module.
   lib.helloworld()
   os.exit()
end

sched.run(main)
sched.loop()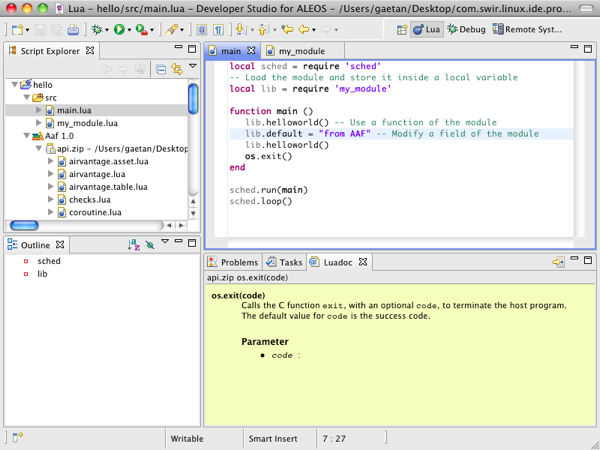
In order to prevent multiple reloading of a module, the require function comes with a cache mechanism.
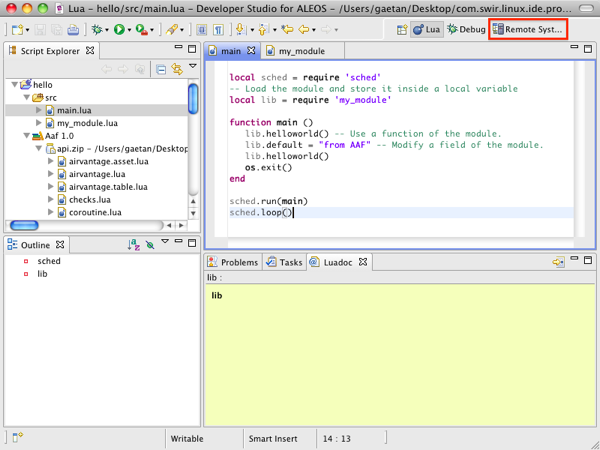
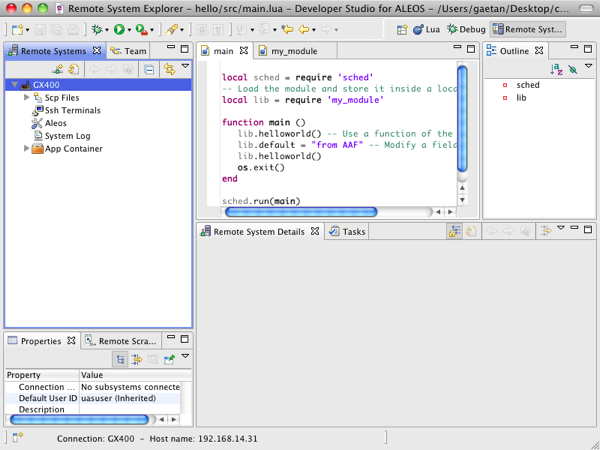
Step 01 Switch to the Remote System Explorer perspective by clicking on the icon in the toolbar.
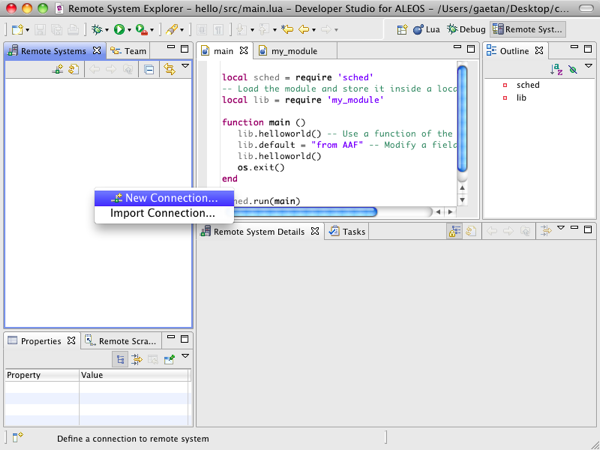
Step 02 Create a new connection: right click in the Remote Systems view and select New Connection. A New Connection wizard automatically opens.
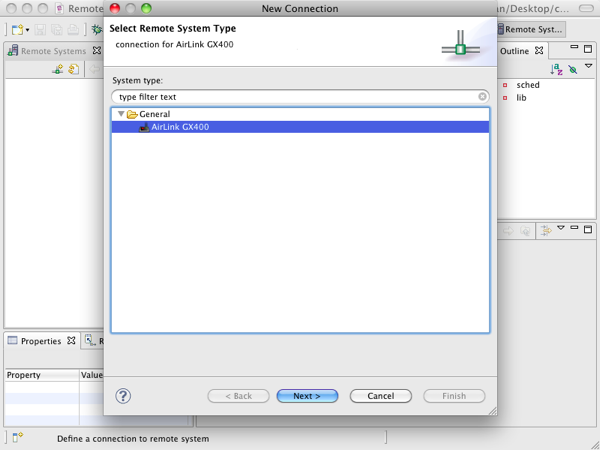
Step 03 The wizard's first step allows you to select the remote system type: select AirLink GX400 (General folder) and click on [Next].
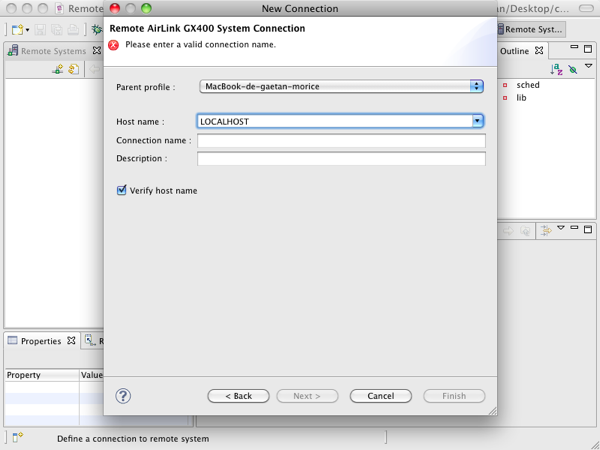
step 04 The wizard's second step allows you to set the host name: set it to the device IP address (by default 192.168.14.31 on USB and 192.168.13.31 on Ethernet).
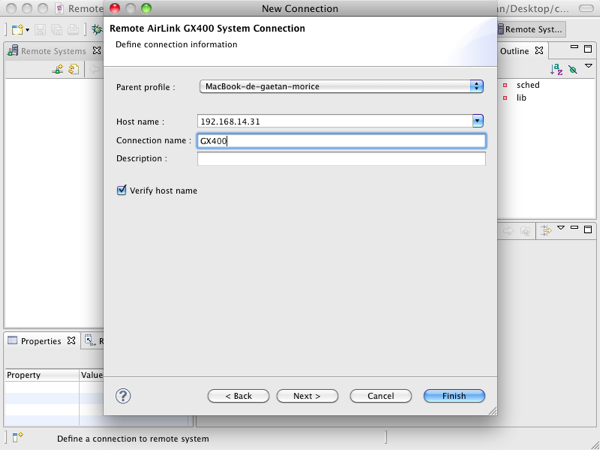
step 05 Click on [Finish]. The new system appears in the Remote System view.
Up to 4.4.1 (included):
By default these credentials are uasuser : sierra12345.
Starting 4.4.2 and 4.5.0 (included):
Sierra Wireless gateways come without an AAF user password. Before using AAF, go to ACEManager, page Admin, Change Password to set up an AAF user password.
If you upgraded from 4.4.1 or earlier version, with a previous password saved in the Developer Studio, you may need to update the password saved in the Developer Studio:
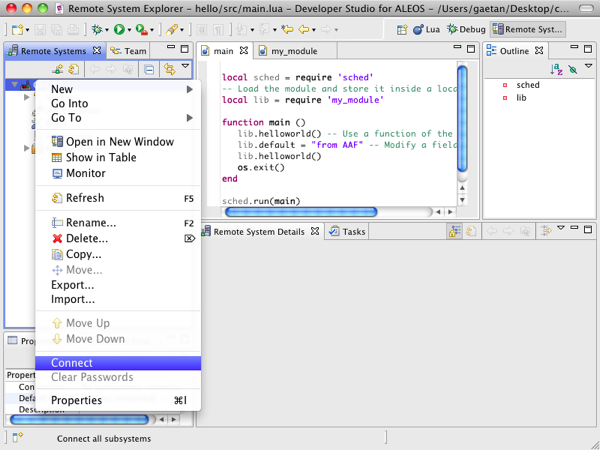
Step 06 Right click on the system icon in the Remote Systems view and select Connect.
Step 07 A modal window opens asking for a user id and password.
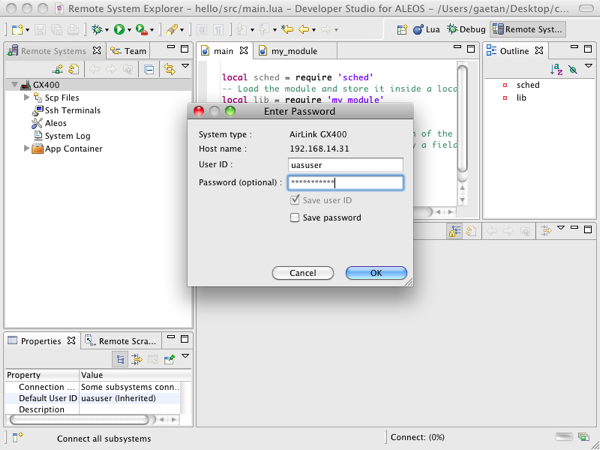
Step 08 Click on [OK]. You are now connected to the device (successful connection is indicated by a green arrow in the system icon).

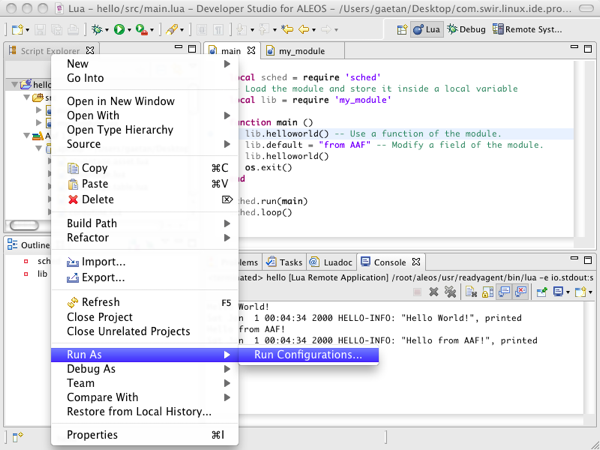
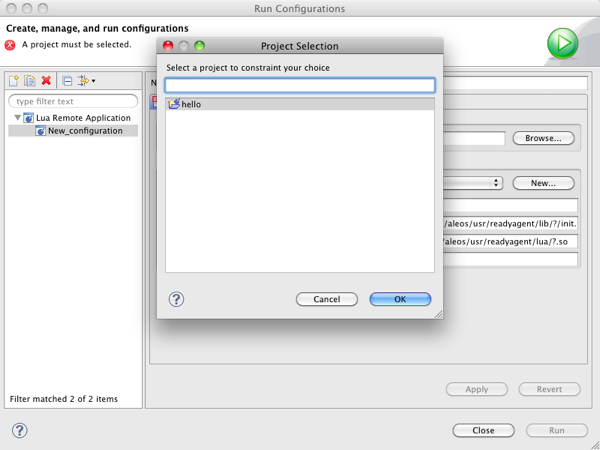
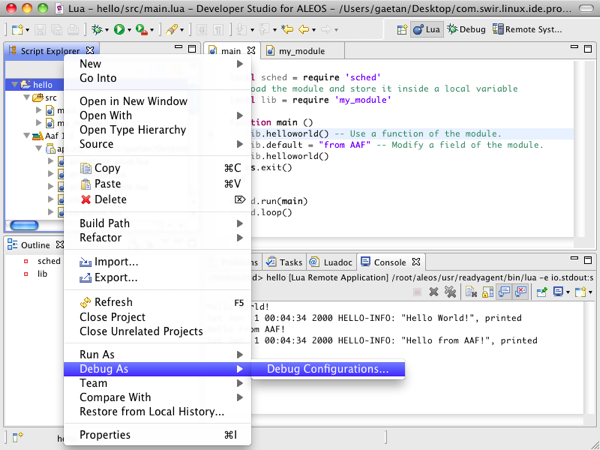
Step 01 Switch back to the Lua Embedded perspective. Right-click on the project and select Run As > Debug Configurations .... A Run Configurations modal window automatically opens.
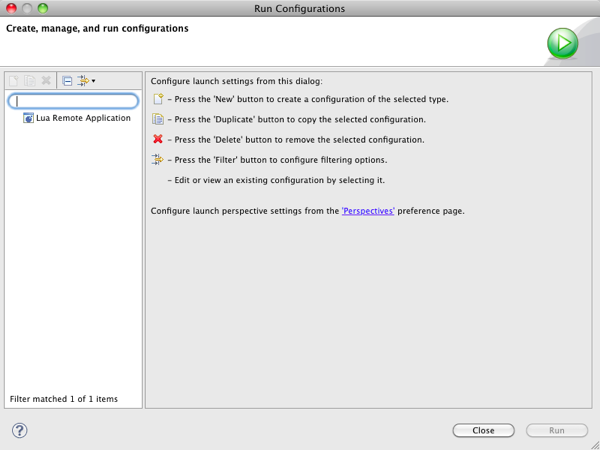
Step 02 Right click on the Lua Remote Application launch type and select New action.
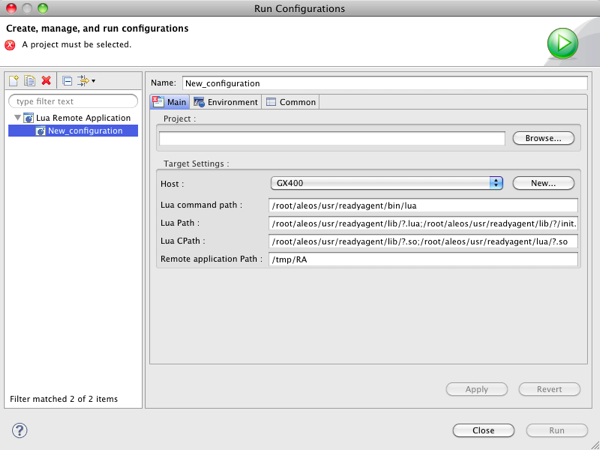
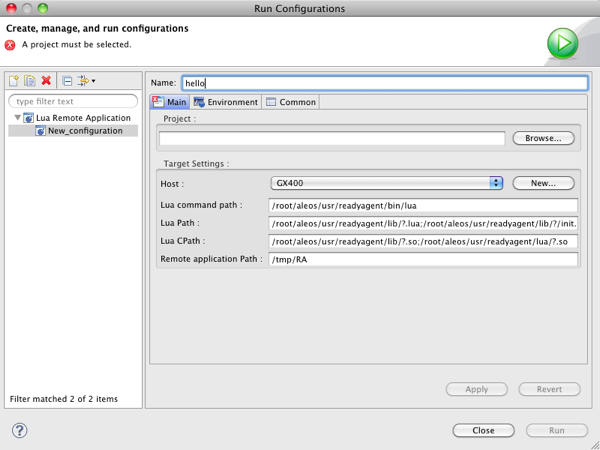
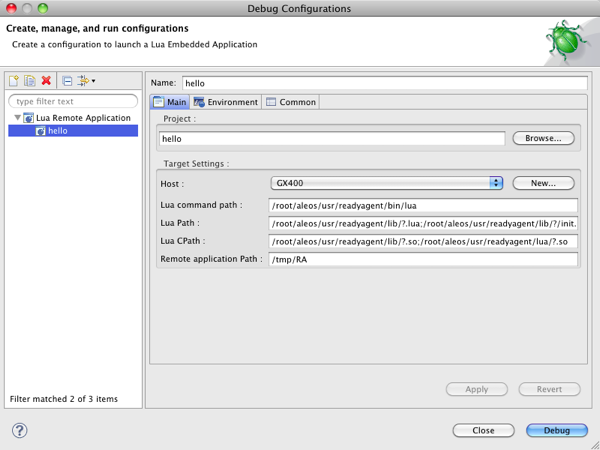
Step 03 Enter a name in the Name field (for instance hello).
Step 04 Select the project by browsing in the Project section and select the connected device in the Host drop-down menu.
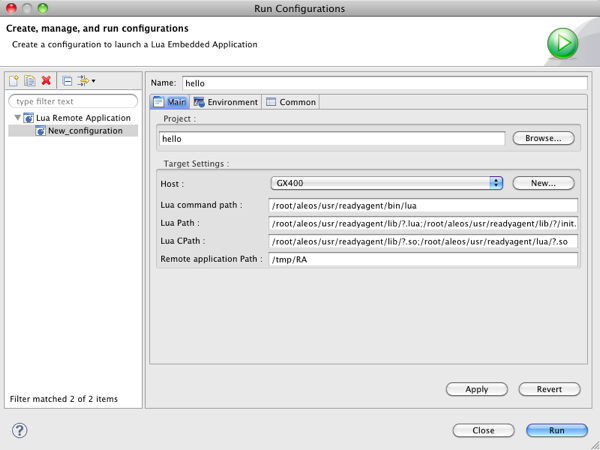
Step 05 Click on [Run]. The application is uploaded into the connected device and executed through a shell. The standard output (and input) is redirected into a console within the IDE.
Step 01 You have to setup a break point in the code in order to stop the debugger. To do so, double click in the left margin of the line where you want the debugger to stop.
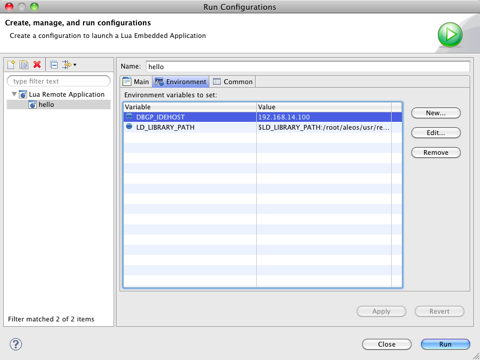
Step 02 Launch the application in debug mode: to do so, right-click on the project and select Debug As > Debug Configurations. A Run Configurations modal window automatically opens.
Step 03 Select the launch configuration previously created to run the application and click on [Debug]. The application is downloaded on the device and started in debug mode.
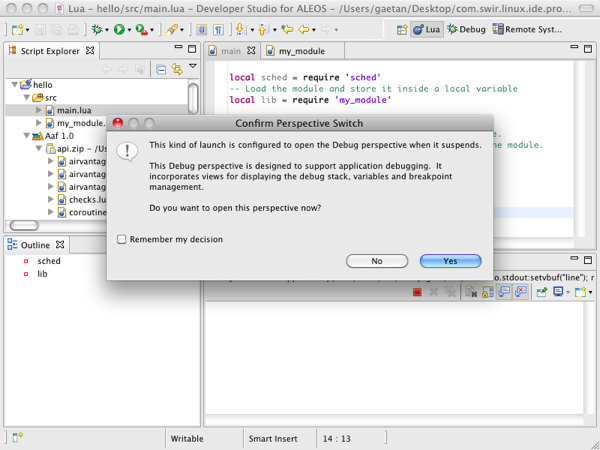
Step 04 The IDE asks you if you want to switch to the debug perspective - accept by clicking on [Yes].
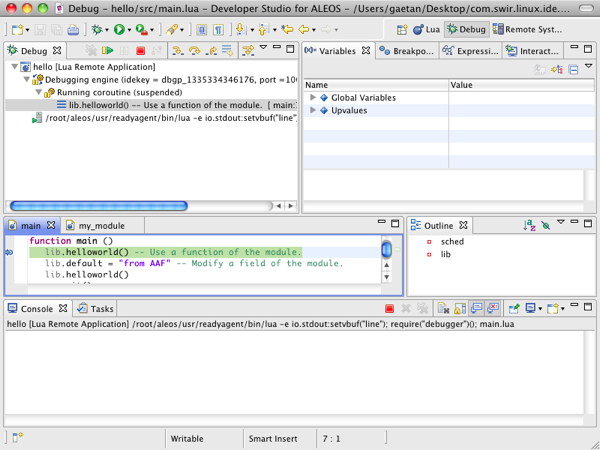
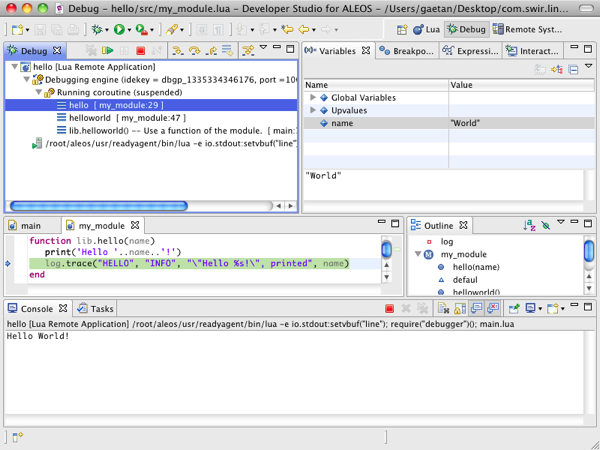
Step 05 Use the debug perspective to execute your application step by step and step into the called functions.
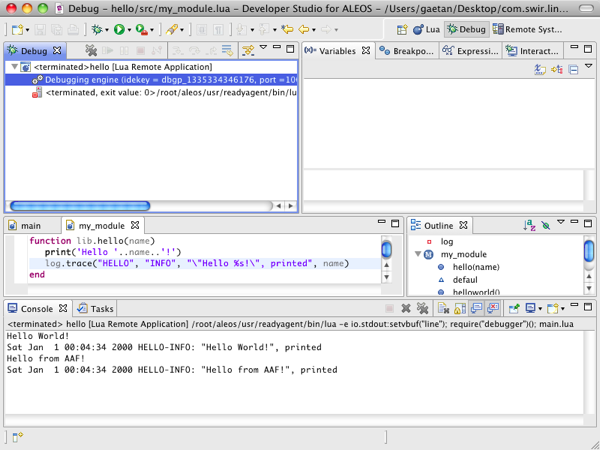
Step 05 Resume the execution of the application. It will automatically finish.
Step 01 Modify the main function of the application in the main.lua file so that the application can run in a infinite loop (replace the content of the file with the following code) :
local sched = require 'sched'
local lib = require 'my_module'

local function main ()
    lib.helloworld()
    lib.default = "from ALEOS EAF"
    while true do
       lib.helloworld()
       sched.wait(2)
    end
end

sched.run(main)
sched.loop()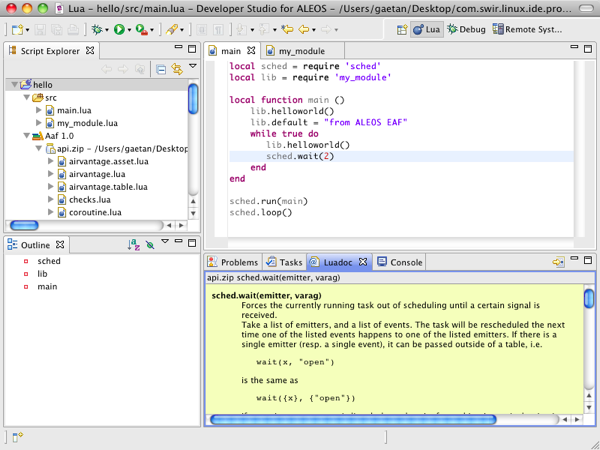
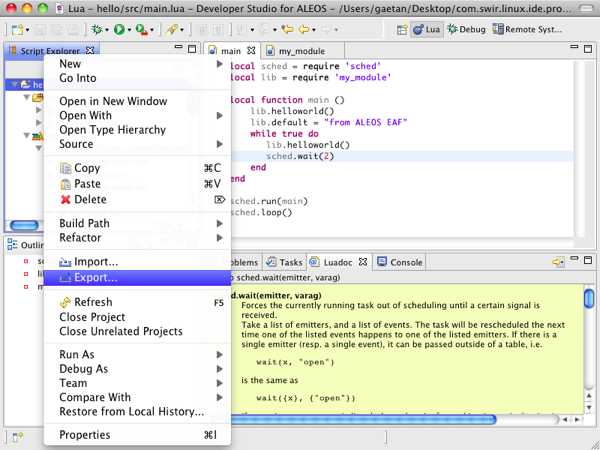
Step 02 Right click on the project and select Export... to open the Export Wizard.
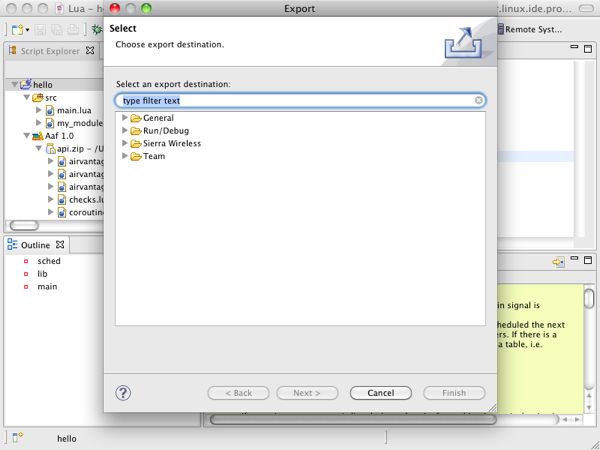
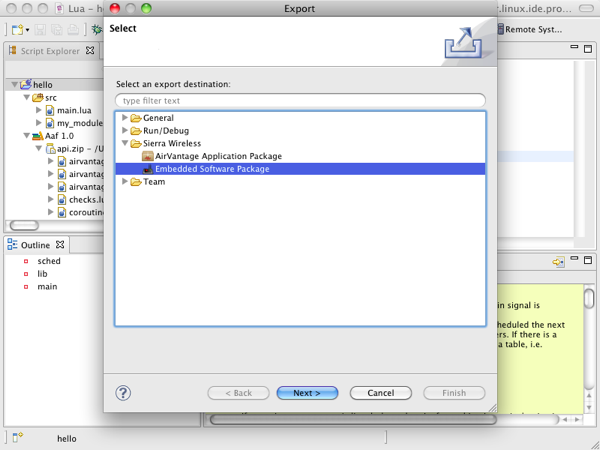
Step 03 Select Sierra Wireless > Local Application Package. Click on [Next] to open the installation wizard.

Step 04 Enter the version of the application, for instance 0.1. Select Host destination and the device on witch you want to perform the installation.
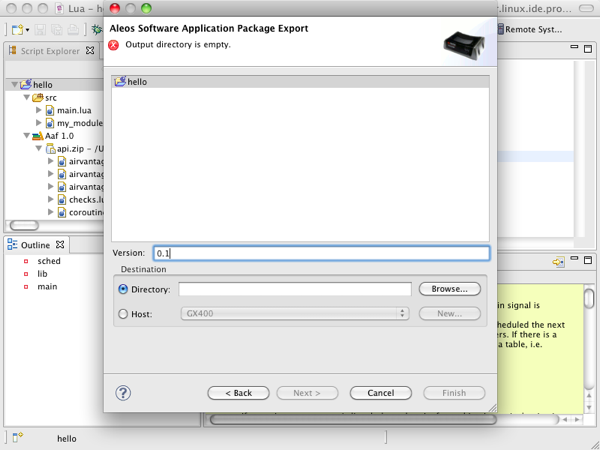
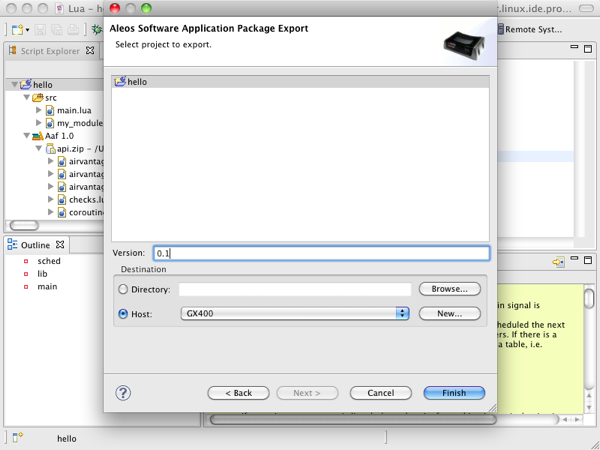
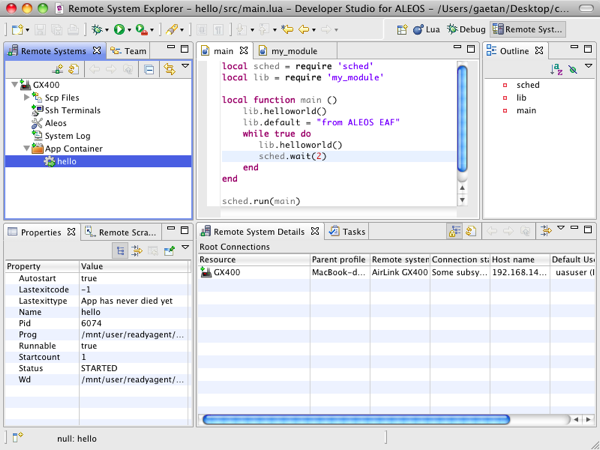
Step 05 Click on [Finish]. The application will be downloaded to the device and installed into the Application Container. Switch to the Remote System Perspective and in the Remote System view unfold the App Container service to see the running application (decorated with a green arrow).
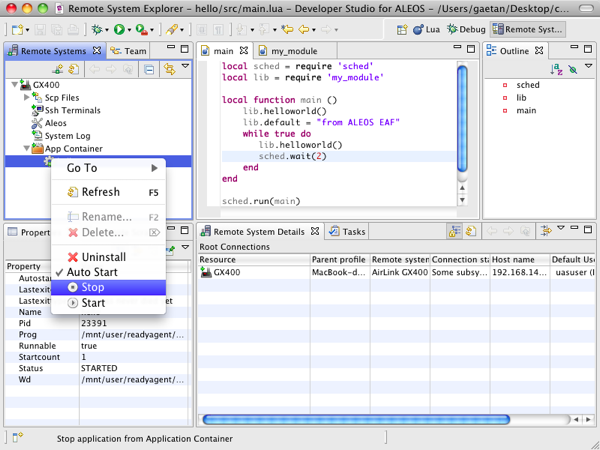
Step 06 Right-click on the application to have access to a set of commands about the life-cycle of the application:
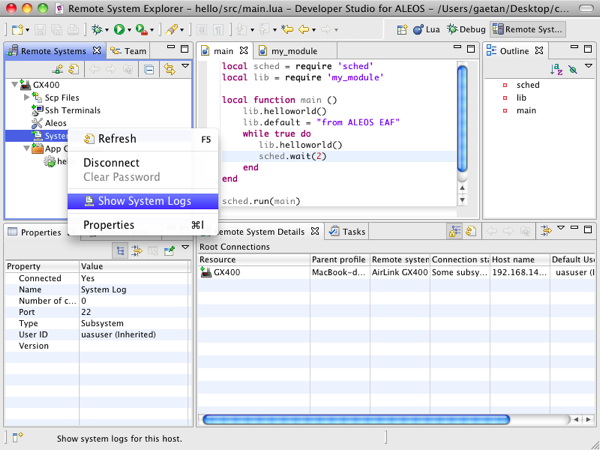
Step 07 Right-click on the System log service and select Show System Logs to open the System Log view that show all the logs
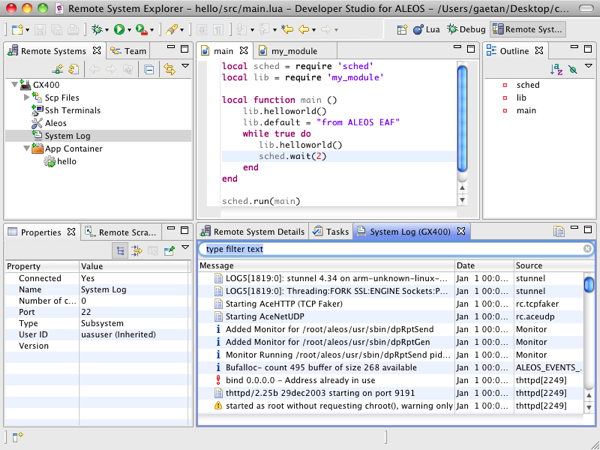
Step 08 In the filter field of this view, enter "HELLO". All entries logged by the running application and including this character string are displayed in the view.

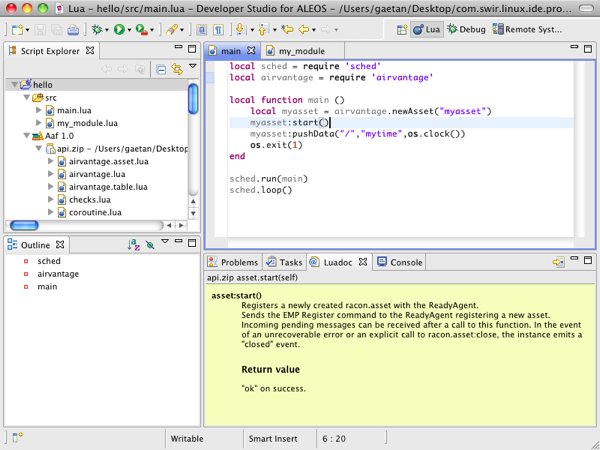
Step 01 Modify the main function of the application in the main.lua file so that the application use the airvantage library to send data (replace the content of the file with the following code) :
local sched = require 'sched'
local airvantage = require 'airvantage'

local function main ()
	local myasset = airvantage.newAsset("myasset")
	myasset:start()
	myasset:pushData("/","mytime",os.clock())
	os.exit(1)
end

sched.run(main)
sched.loop()If you don't set timestamp data in your embedded application, the AirVantage Operating Portal will set the timestamp as the current date when data is received.
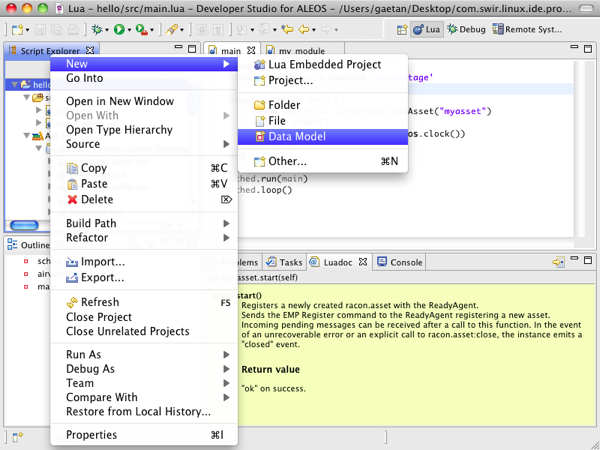
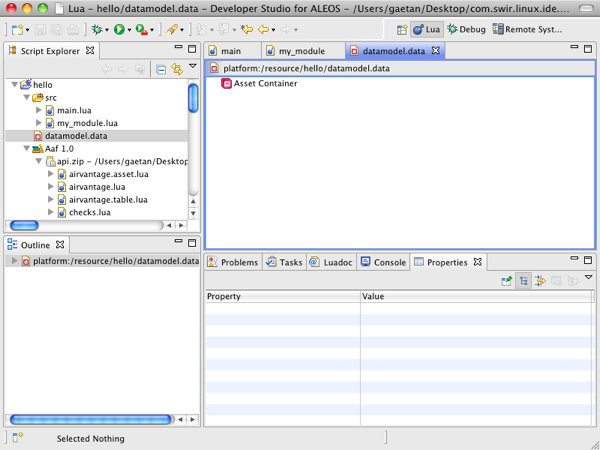
Step 02 Right click on the project and select New > Data Model to open the New Data Model Wizard.
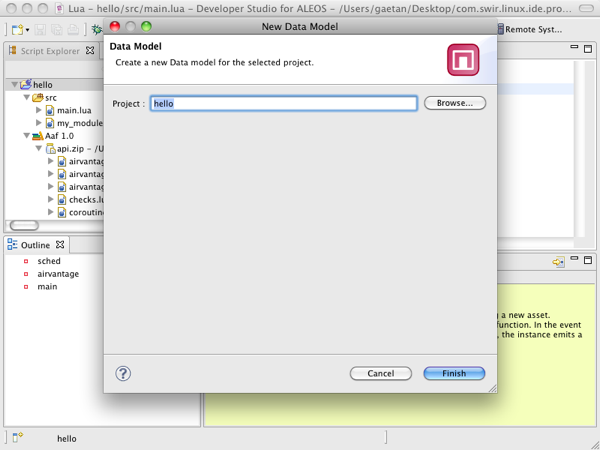
Step 03 Select the hello project and click on [Finish]. It will add a datamodel.data file to the project, open it in the dedicated editor and open a Properties view.
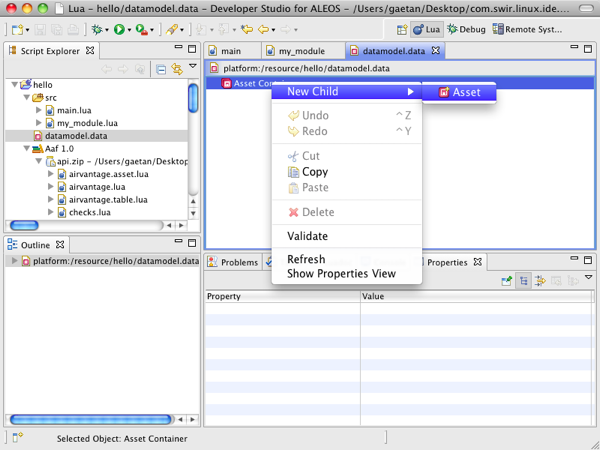
Step 04 To describe the asset created in the main.lua file, right-click on the Asset Container and select New Child > Asset.

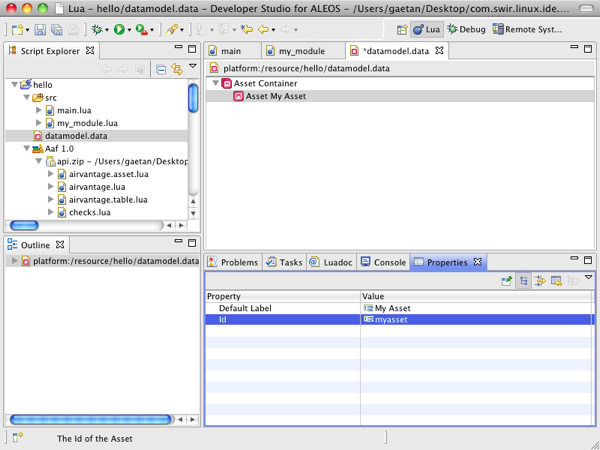
Step 05 Select the new Asset node in the model and edit the elated properties in the Properties view:
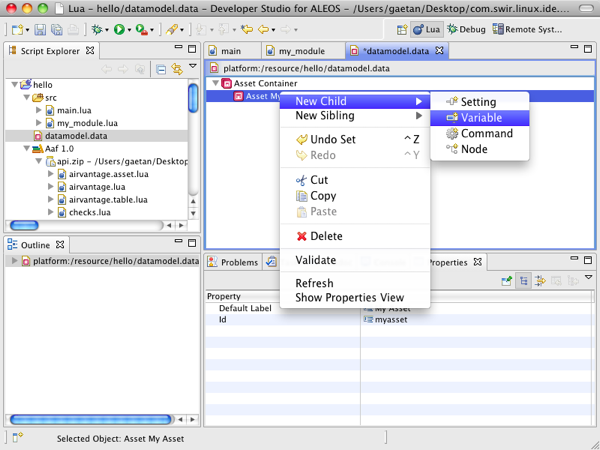
Step 06 To add a variable to this asset, right-click on the Asset node and select New Child > Variable.
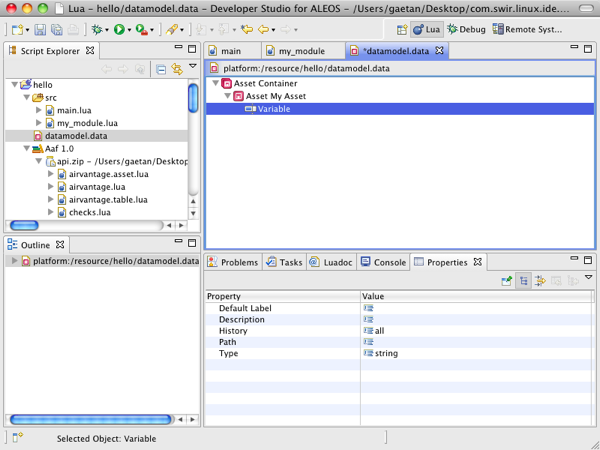
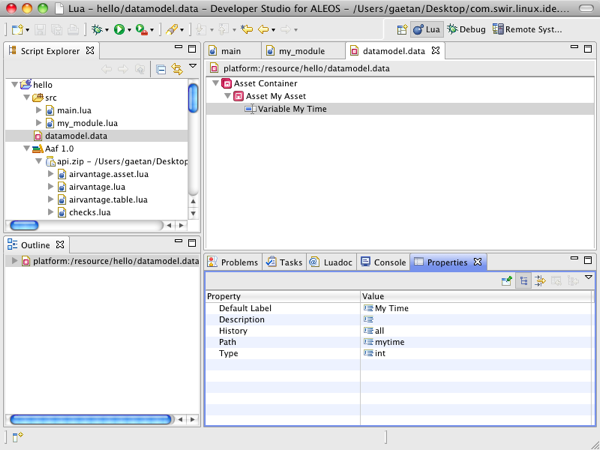
Step 07 Select the new Variable node in the model and edit the elated properties in the Properties view:
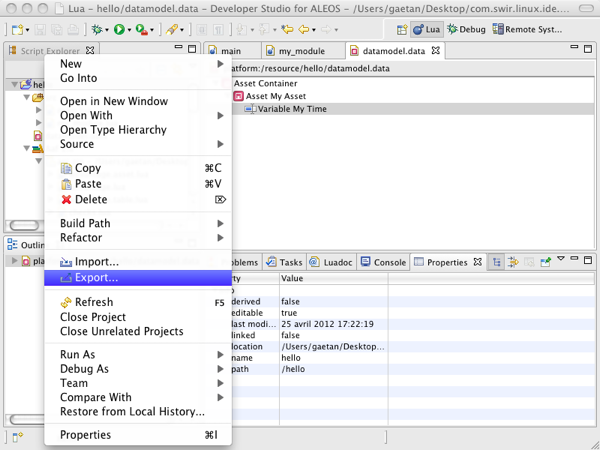
Step 07 To open the export wizard, select the hello project, right-click and select Export....

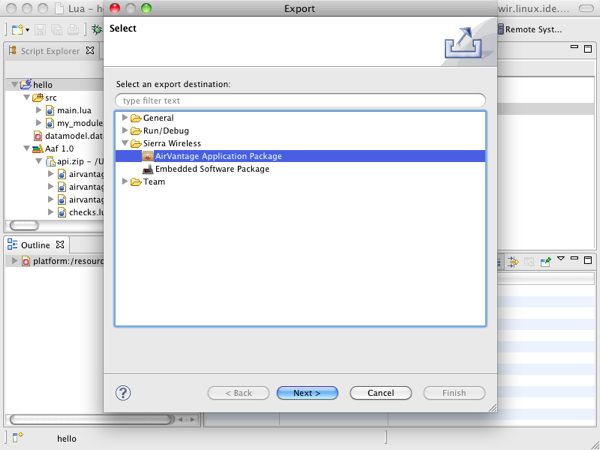
Step 08 Select Sierra Wireless > AirVantage Application Package. Click on [Next] to open the export application wizard.
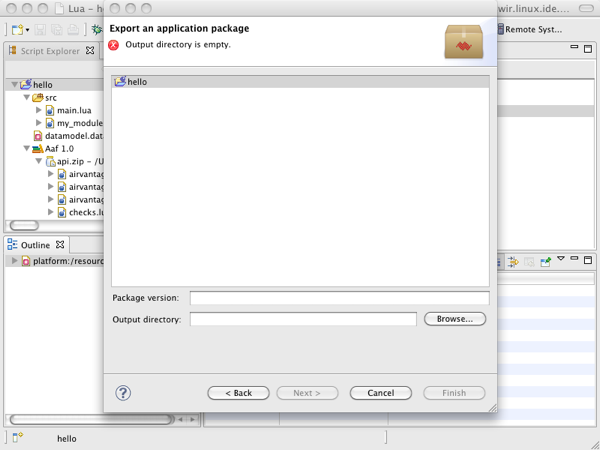
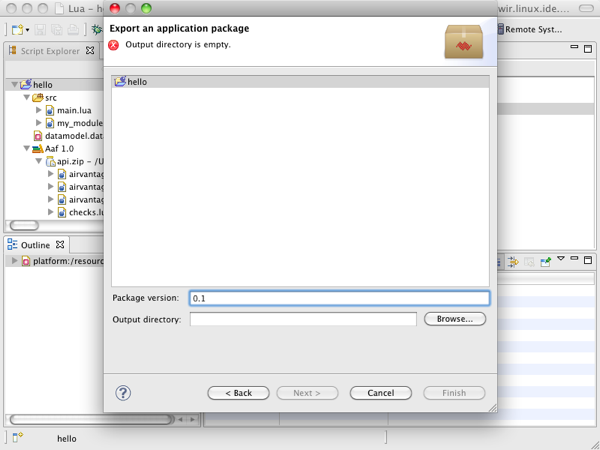
Step 09 Enter the version of the application, for instance 0.1 and select the output directory by clicking on [Browse].

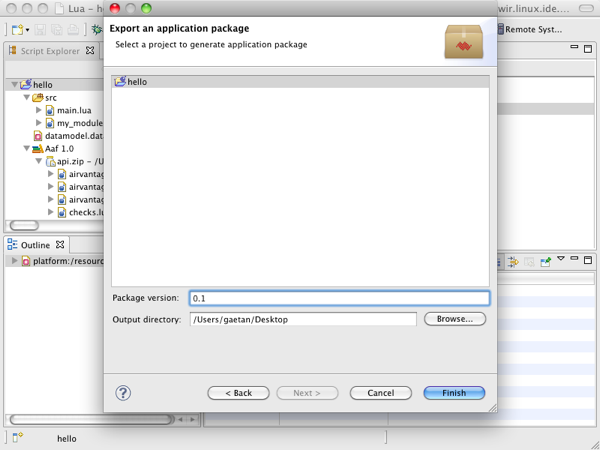
Step 10 To perform the creation of the package click on [Finish].