Configuring Container Applications
Table of Contents
 Initializing Table Of Contents...
Overview
Container applications allow you to deploy Open Container Initiative (OCI)-compatible containers to the router to run applications or computational workloads locally. This way, you can extend the functionality of the router or run applications in the router without impacting router behavior.
Common container application use cases include data acquisition, IIoT, and data store and forward, among many others.
OCI container support enables the use of many Docker-based images and registries.
Early Adopter
The Container Application support is currently in the Early Adopter phase and is targeted to technical customers who wish to deploy container applications into production environments. Early adopter customers should understand and be comfortable with the current solution limitations, listed below, if they are going to be used in production.
Limitations
- Pulling a multi-architecture image from a registry is not currently supported.
- Image WORKINGDIR is not respected.
- Downloading images with large layers (in relation to the router’s available memory) from a Docker registry may fail due to consuming too much memory.
- Container logs, when full, are reset.
- Container logs cannot be retrieved from ALMS.
- The container must be launched at least once in order to assign port forwarding rules, DHCP assignment, and other network parameters.
- Serial port cannot be mounted into a container.
- SD-Card for the AirLink XR60 is not currently supported.
- Container applications will not support:
- Privileged access to AirLink OS
- Direct access to the radio module
- Direct access to the CAN bus
Support Statement
Semtech will provide support for the container application framework but is not responsible for the support or troubleshooting of the users’ container application(s). It is the responsibility of the end customer to verify the container application functions as expected on Semtech routers.
While Semtech will endeavor to maintain compatibility and resource availability between AirLink OS versions, container applications should be tested and verified to ensure they function as expected on new versions prior to upgrade or deployment.
License Requirements
Using container applications in production environments requires an Edge Compute add-on license per router. Please contact your Semtech partner for more information.
An Edge Compute add-on license is not required in the following situations:
- When using the container application to run an Edge Application separately licensed by Semtech
- When used solely in non-production environments, such as during the development of container applications, or proof of concepts, or for testing purposes
Router resources and CPU architecture
The following memory and flash resources are available to container applications on the AirLink routers listed below. The container image must be built for the associated CPU architecture.
Resource availability is subject to change between AirLink OS releases.
| AIRLINK ROUTER | MEMORY | FLASH | CPU |
|---|---|---|---|
| XR60 | 1.2 GB | 750 MB | Quad-core ARMv8 64-bit |
| XR80 | 200 MB | 750 MB | Quad-core ARMv8 64-bit |
| XR90 | 200 MB | 750 MB | Quad-core ARMv8 64-bit |
| RX55 Wi-Fi Plus* | 200 MB | 2.8 GB | Dual-core ARMv7 32-bit |
*The non-WiFi Plus RX55 models have limited resourcing and are not recommended for container applications. Container application support for these devices will be removed in a future release.
Configuring Container Applications
You can configure container applications in the following sections under Container Applications (Early Adopter).
General Status
Under General Status, you can Enable container applications on the router and view container status.

Enable Container Applications
To enable the router to pull the application image and allow applications to run, you must enable the container applications feature on the router.
To enable container applications:
- Go to Apps > Container Applications > General Status.
Click ENABLE. The switch should display Enabled.
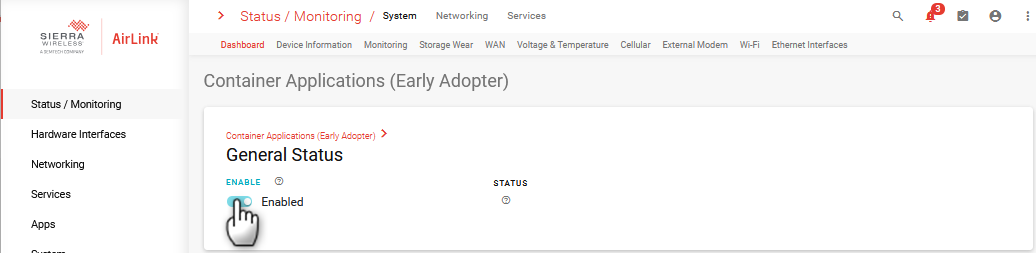
Click SAVE.

Containers Status
Under Containers Status you can create and run the container application.
In the CONTAINER LIST table, you can view container parameters, retrieve container logs and manually stop and start the container.
- Autostart–Enable automatically starting the container when the router reboots
- Name–The name of the container application
- Image–The container image
- Volumes–Names of the volumes that the container is using
- LAN Segment–The LAN Segment on which the container is configured to run
- Status
- Logs–Click to download container logs
- Action–Click to manually stop or start the container

Create Container Application
To create the container application:
Go to Container Applications > Containers Status.

Click CREATE CONTAINER APPLICATION. The Create Container Application menu appears.
Configure the settings as described below and then click CREATE.

| SETTING | DESCRIPTION | DEFAULT SETTING | RANGE |
|---|---|---|---|
| NAME | Name for the container application | blank | n/a |
| AUTOSTART | Enable automatically starting the container when the router reboots. | Enabled | Enabled, Disabled |
| RESTART POLICY |
Select the restart behavior when the container stops.
|
On-Failure Restart | On-Failure Restart, No Restart |
| RESTART MAX RETRIES |
Set the maximum number of automatic restart attempts. When this number is exceeded, the container will not restart automatically. The current number of restart attempts is reset after a router reboot. The restart delay is fixed at 1 minute. |
10 | 1–100 |
| IMAGE |
Select the container image from the locally available images. |
blank | Any locally available images, or click CREATE to enter an image reference and registry configuration |
| VOLUMES |
Select the volume from the locally available volumes. |
blank | Any available volumes, or click CREATE to create a container volume |
| LAN SEGMENT |
Select the LAN Segment that the container will run on. |
Default-LAN | Any available LAN Segments, or click CREATE to create a LAN Segment |
| COMMAND |
Leave blank to start the application using the ENTRYPOINT and/or CMD specified in the container image. Optionally, enter a command to start the application, overriding any commands in the container image. |
blank | n/a |
| IPV4 AUTO ASSIGNMENT |
Enable to perform a DHCP request once when the container starts. |
On | On, Off |
| IPV6 AUTO ASSIGNMENT |
Enable to perform a router solicitation once when the container starts. |
On | On, Off |

Images
Under Images, you can install images on the router by pulling from a registry or local upload (using the UPLOAD NEW APPLICATION IMAGE button).
FREE SPACE ON CONTAINER FLASH PARTITION reports the remaining free space on the partition.
In the IMAGES table, you can view image parameters, see status information, and manage the image.
- Repository:Tag–The image’s repository and image reference. The repository is displayed as localhost/ if the image was uploaded locally.
- Image ID–The unique identifier for the container image
- Size On Disk–Size of the layers used by the image. Because layers can be shared by several images, the total size of all image and used space on the container partition may differ.
- Status–Status of the image. For more information, you can download the logs in the CONTAINER LIST table.
- Action–Click to retry a failed pull, delete the image, or see additional information

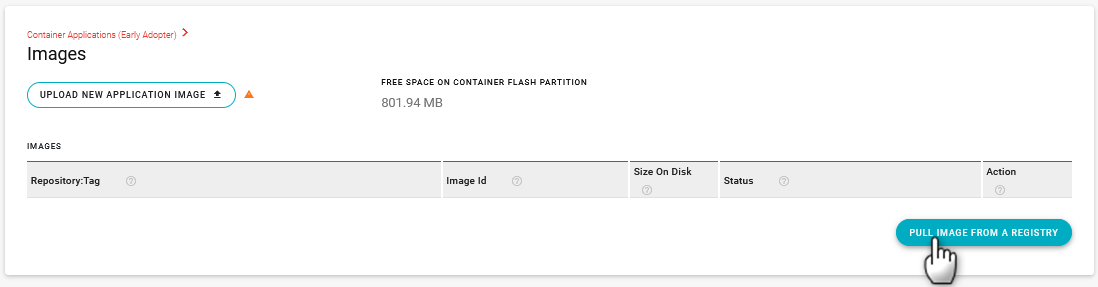
Pull the Application Image
To pull an image from the registry:
- Go to Container Applications > Images.
Click PULL IMAGE FROM A REGISTRY. The Create Pull Image From A Registry menu appears.
Enter the IMAGE REFERENCE. The reference is the path to the image file in the registry.
Under SELECT REGISTRY CONFIGURATION, click x and select the Registry Configuration name.
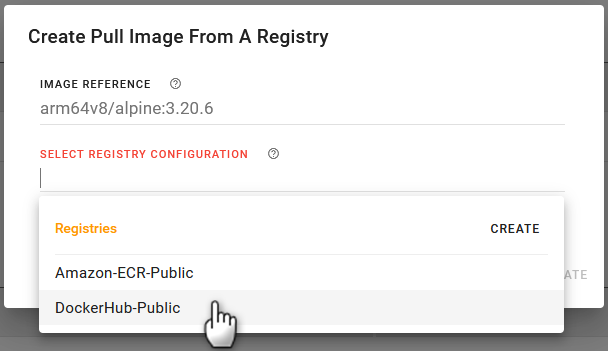
Click CREATE.
Click SAVE.


The router begins pulling the application image (you can view progress in the Status column).

Upload the Application Image
In certain scenarios (debugging, for example), you may need to upload the application image locally (that is, using a laptop connected directly to the router). The image must be in a .tar file.
To upload the image locally:
Go to Container Applications > Images.
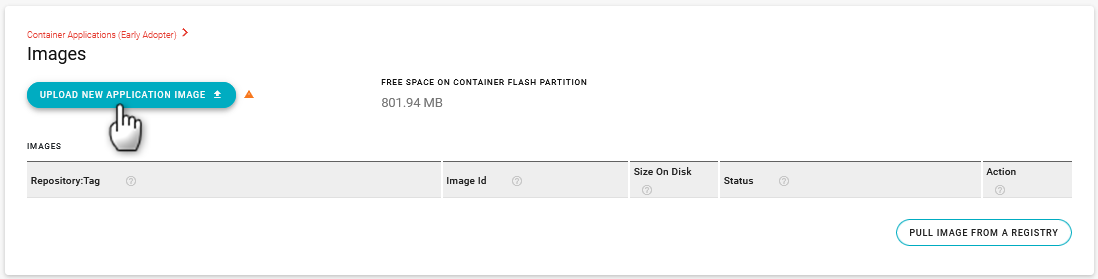
Click UPLOAD NEW APPLICATION IMAGE.
Upload the image .tar file.
Verify that the image upload was successful, and the image is listed in the IMAGES table.

- Uploading the image can take several minutes, depending on image size.
- Images uploaded locally cannot be included in templates. If you need to deploy containers across a fleet of routers using templates, you must pull the image from a repository.
Registry Access
Under Registry Access, you can configure a link to the image registry from which the router can obtain container images.
The SECURE PULL setting enables or disables pulling an image from a registry with an HTTP URL, or to skip HTTPS certificate verification.
In the REGISTRY ACCESS CONFIGURATIONS TABLE, you can view information about your configured repositories.
- Name–The idenfier of the registry access configuration
- URL–The URL of the registry
- Authentication Mode–The registry access authentication mode. none means that the server is publically available; basic means that access to the server is controlled by HTTP basic authentication, requiring username and password.
- Certificate–Name of the certificate used to validate an HTTPS connection to the registry.

Configuring Registry Access (If Required)
To get the application image from a remote source, the router must access the registry where the image resides. The router is pre-configured to access the Amazon-ECR-Public registry and the DockerHub-Public registries, as shown in the REGISTRY ACCESS CONFIGURATIONS table.
When using a private APN network, ensure that the router can DNS resolve the FQDN where the application image is hosted and can communicate (outbound initiated) to the resolved URL using HTTPS (on port TCP/443).
To configure registry access:
If required, disable SECURE PULL to allow pulling an image from a registry with an HTTP URL, or to skip HTTPS certificate verification. Note: Do not disable SECURE PULL in a production deployment, as it can lead to using untrusted sources.
Click CREATE REGISTRY ACCESS CONFIGURATION. The Create Registry menu appears.
Enter the registry NAME. This name cannot be edited after the registry is created.
Enter the full URL to the registry.
Select the AUTHENTICATION MODE: None (default–the server enables public access) or Basic (the server uses access control based on HTTP basic authentication).
If you have selected Basic for the AUTHENTICATION MODE, enter the USERNAME and PASSWORD. If required, select the CERTIFICATE to validate HTTPS connection. You can select an existing certificate (see Security > Certificates) or create/upload a new Registry Server certificate.

Volumes
Container volumes can be used to create persistent directories that can be used within a container or shared across containers. A volume can also be used to deliver configuration to the container outside of an image update.
There are two types of container volumes.
- A configuration volume will have a .tar file associated with it, that will be untarred into the volume after upload. This volume should generally not be used for other data.
- A data volume, where persistent container data should be stored. No tar file is associated with this volume type.

Create the Container Volume
To create the container volume:
Go to Apps > Container Applications > Volumes.
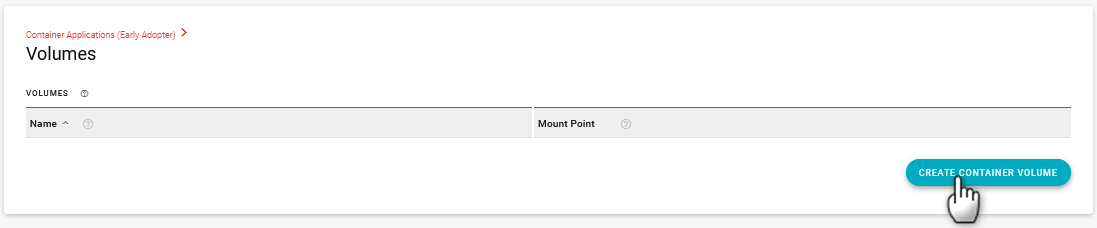
Click CREATE CONTAINER VOLUME. The Create Container Volume menu appears.
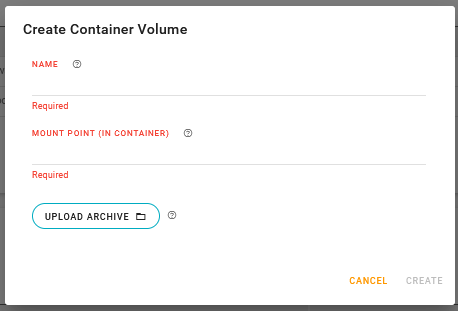
Enter a NAME; config, for example.
Enter the MOUNT POINT for the volume. This will be used when mounting the volume into the directory. For example, using /data for the mount point will result in this volume being mounted to /data within the container.
For a configuration volume, upload the .tar file.
The maximum upload file size is 64 KB per file.
Click CREATE.
Verify that the volume appears in the VOLUMES table.


Verifying the Container is Working
You can use the AirLink OS interface to verify that you have installed and started the container.
To verify the container is working:
- In the CONTAINER LIST table, start the container manually.
- Check that the Status is Running.
Updating a Container to a New Version
To update a container image on the router to a newer version, you must:
- Pull the new image from the registry or upload it to the router directly.
- Edit the container configuration to reference the new image.
The system will automatically stop the container and restart it to use the new image.
This update can be done in one operation using a template if the router obtains the new container image using a registry pull.