Searching...
Configuring Ethernet Interfaces
The AirLink router is equipped with one or more Ethernet ports (depending on the router model) that can be enabled or disabled as needed. When the port is disabled, the connected device cannot connect via Ethernet, and ARP queries do not receive responses on the port.
The AirLink XR90 has five Ethernet ports. These are labeled 1 to 3 on the main chassis and XP1 and XP1 on the two cartridges. By default, all Ethernet ports are configured as LAN interfaces; however, it is possible to configure ports as WAN interfaces (see below).
You cannot configure static IP for an Ethernet WAN interface in AirLink OS version 2.0. The WAN IP address can only be assigned by a DHCP server.

Configuring an Ethernet interface
- ENABLE or disable the interface.
- MTU: When the interface is part of a LAN Zone, MTU is set to Auto. When in WAN mode, you can manually configure MTU if you have VPN issues, and as directed by your service provider.
- LINK MODE: Configures the Ethernet port speed and duplex setting. Most of the time you can leave the default setting and the device you are connecting automatically negotiates the speed and duplex setting with the AirLink router. However, if the connected device has a fixed setting, use this field to change the AirLink router setting to match that of the connected device. You may need to lower link speed to reduce power consumption for applications where the router runs from battery power, or to be compatible with devices that do not support auto negotiation.
5000baseT/Full and 2500baseT/Full are only for Ethernet 1 (5G). Although you can select these modes for other Ethernet interfaces, AirLink OS notifies you of a configuration error after saving.
Changing the Ethernet interface mode
To enable an Ethernet interface for WAN:
- Go to Hardware Interfaces > General > Configuration. By default, all Ethernet interfaces are part of the Default-LAN bridge.
On the row for the desired Ethernet port, click X to clear the default Bridge setting.
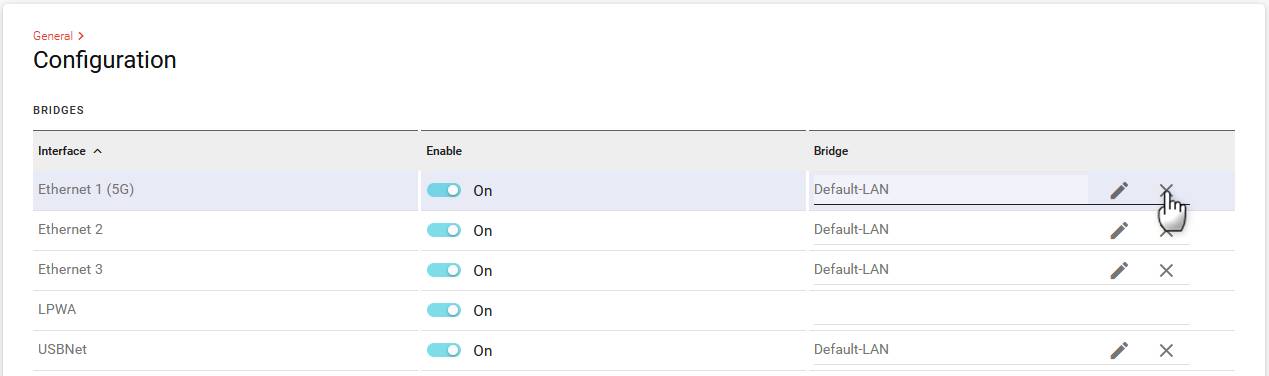
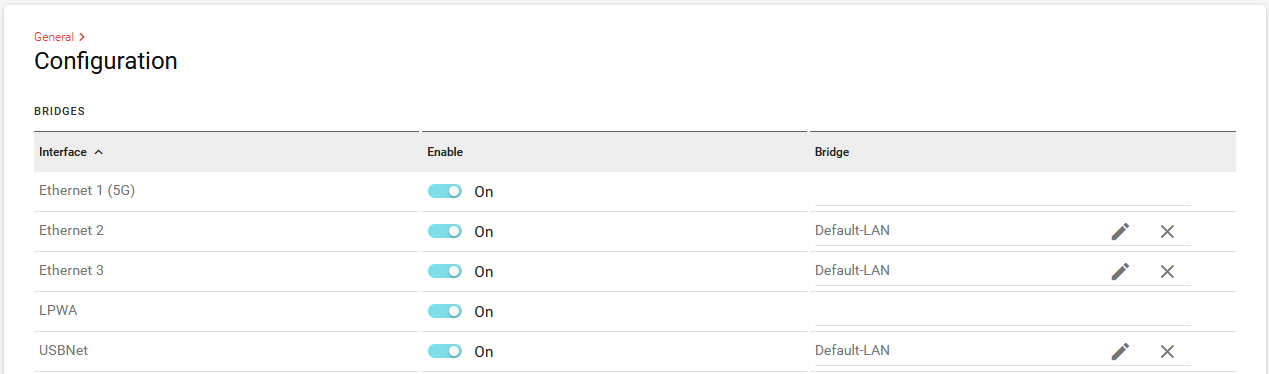
Click SAVE. The Bridge for that interface is now blank.
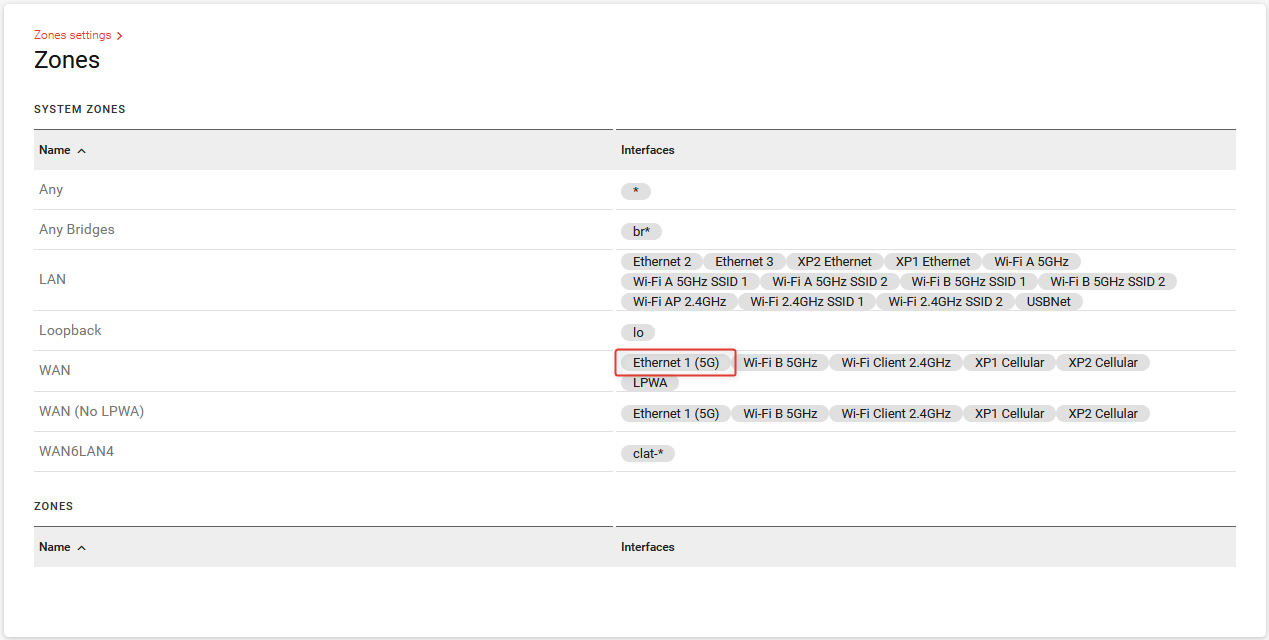
Check Networking > Zones Settings > Zones. The Ethernet port is now in the WAN zone.
Connect a WAN source to the newly configured Ethernet port.
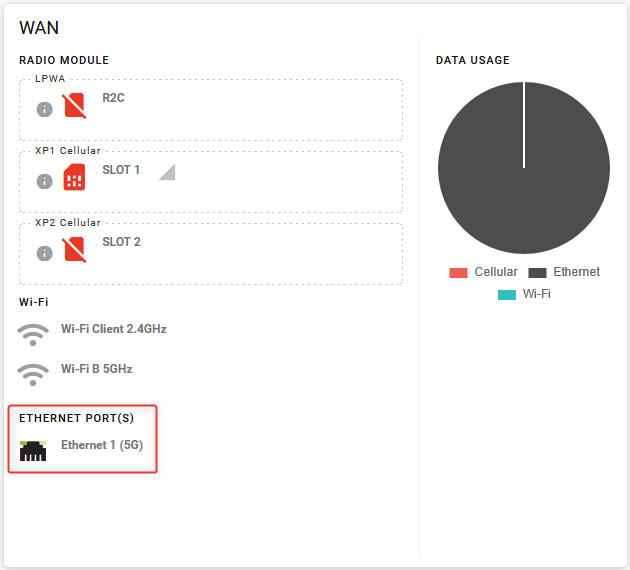
Confirm the configuration in the Status/Monitoring dashboard. The configured Ethernet port should appear as a WAN interface.