Searching...
Configuring USB Interfaces
The AirLink router is equipped with a USB 3.1 Type-C Gen 1 (SuperSpeed 5 Gbps) port. This page describes how to:
- configure the USB interface
- create a USB network connection on a Windows or MacOS computer.
Configuring a USB Interface
- ENABLE or disable the interface. The USB interface is enabled by default.
- LAN SEGMENT: Edit the LAN segment (click
 ) or select a different LAN segment (click
  ) for the interface.
 ) or select a different LAN segment (click
  ) for the interface.
To use the USB interface in WAN mode, click
- MTU AUTO DETECT is always On when USB is connected to a LAN segment.
- MTU: When the interface is part of a LAN segment, MTU is set to Auto. When in WAN mode, you can manually configure MTU if you have packet loss due to network fragmentation issues, and as directed by your service provider.

Configuring a USB Network Connection to a Computer
The XR system in the examples below has the default LAN address set to 192.168.80.0/24 and IPv6 is enabled.
Windows 10
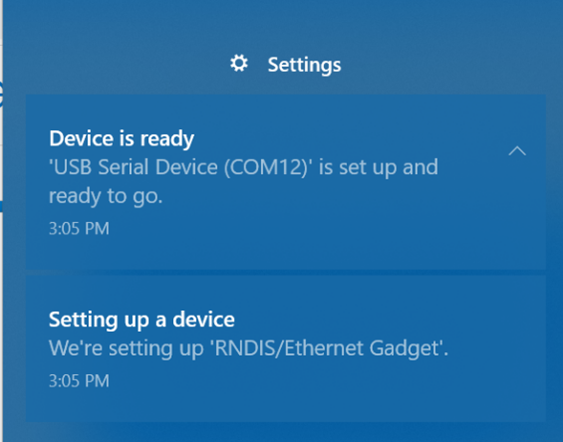
- Plug in a data-capable USB-C cable between your Windows 10 computer and the XR router. Your computer will require an Internet connection to proceed. (Note: Some USB-C cables are power-only, and will not work for a data exchange).
Your Windows 10 computer indicates that it is setting up a virtual COM port, and confirms when the installation is complete. You can verify the status in the Notification Center.
Go to Windows Updates and check for Optional Updates and select the Acer Incorporated – Other Hardware – USB Ethernet/RNDIS Gadget. (This may not be available if your computer uses an internal corporate Windows update server.)
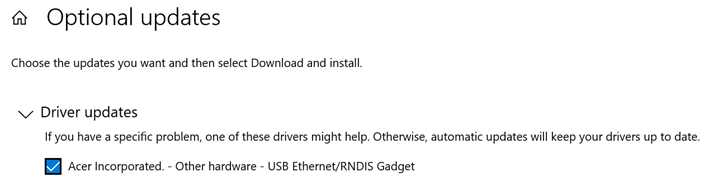
Note: The USB Ethernet/RNDIS Gadget can also be downloaded from Microsoft.
After this initial setup, you can use the Device Manager to verify the presence of the “USB Ethernet RNDIS Gadget” in the Network Adapters list.
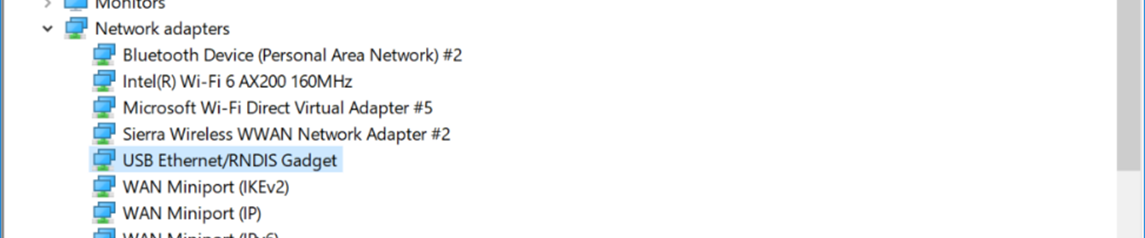
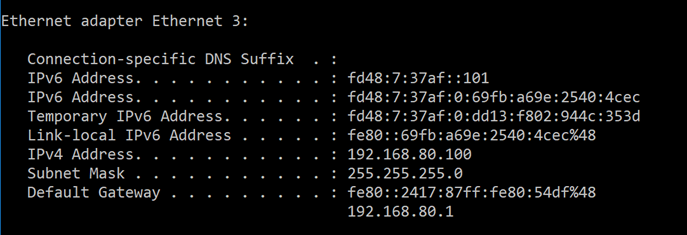
To confirm that the network is available and the adapter has been assigned address(es), open a Command prompt window and type ipconfig.


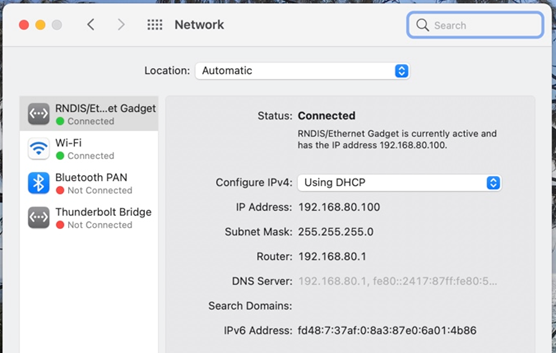
MacOS Big Sur (tested on 11.2.3)
- Plug in a data-capable USB-C cable between your MacOS computer and the XR router. Your computer will require an Internet connection to proceed. (Note: some USB-C cables are power-only, and will not work for a data exchange).
In System Preferences, open the Network center and verify that the RNDIS/Ethernet Gadget appears and is connected.