 Searching...
Creating User Accounts
AirLink OS supports login using secure LDAP, RADIUS, and TACACS+ authentication schemes. This enables enterprise IT managers to centrally manage access to AirLink routers and produce an audit trail showing which users logged into specific devices and when.
Notes:
- You can configure any or all of these schemes at the same time. When more than one scheme is configured, the authentication is successful if at least one of the schemes authenticates the user.
- Successful authentication can take time. For example, if you have all three authentication schemes enabled, AirLink OS first attempts to reach the LDAP server. If it is unable to reach the LDAP server in the configured timeout period, it abandons the attempt and tries to reach the RADIUS server. If that server is unreachable after the timeout period, it then tries to reach the TACACS+ server. If none of the servers are reachable in the configured timeout periods, AirLink OS falls back to the local user name and password authentication.
- LDAP, RADIUS, and TACACS+ provide authentication of user credentials but do not check authorization (account expiration date, user rights, etc.). All users authenticated using the LDAP, RADIUS, and TACACS+ servers have administrative rights and can modify the AirLink router settings. Ensure that LDAP, RADIUS, and TACACS+ users are authorized to modify device settings.
- LDAP, RADIUS, and TACACS+ are supported for AirLink OS logins, but are not supported by other AirLink router services such as Telnet, SSH, PPPoE, etc.
For instructions on configuring these authentication schemes, see:
- Local account (local login using password authentication)
- LDAP Authentication
- RADIUS Authentication
- TACACS+ Authentication
Local User Accounts
The router is configured with a default “admin” Local account. You can add more users who can access the router configuration using a local LAN connection.
You can add new Local users only when logged in as “admin”.
For information about changing the default “admin” account password, see Changing the Default Password.
To add a new Local user:
- Go to System > User Accounts > Local.

- Under USERS, click CREATE USER.
In Create User, enter the following:
- A user NAME
- A PASSWORD at least 10 characters long and meeting a minimum of 3 criteria as follows:
- at least 1 uppercase letter
- at least 1 lowercase letter
- at least 1 digit
- at least 1 non-alphanumeric character.
- EMAIL (optional)
- PHONE number (optional)
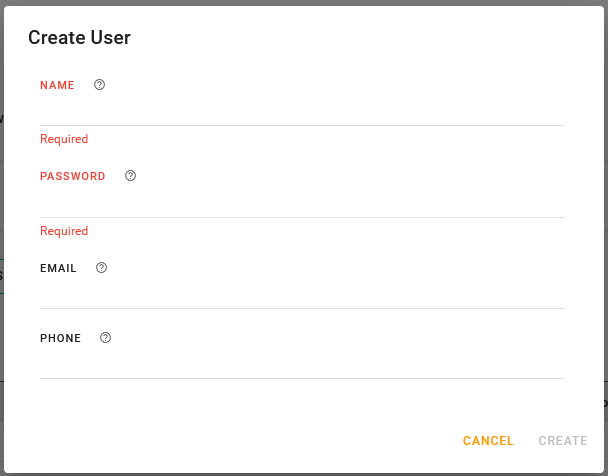
Click CREATE.


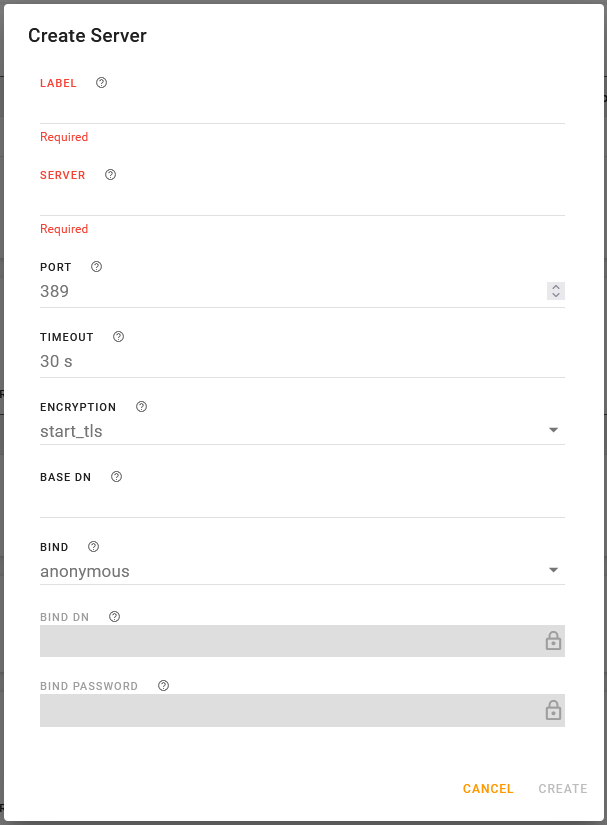
LDAP Authentication
Lightweight Directory Access Protocol (LDAP) is a network protocol for accessing and manipulating information stored in a directory. It is suitable for using with information that must be easily available and accessible, and does not change frequently. AirLink routers support LDAP version 3.
To configure LDAP:
- Go to System > User Accounts > LDAP.
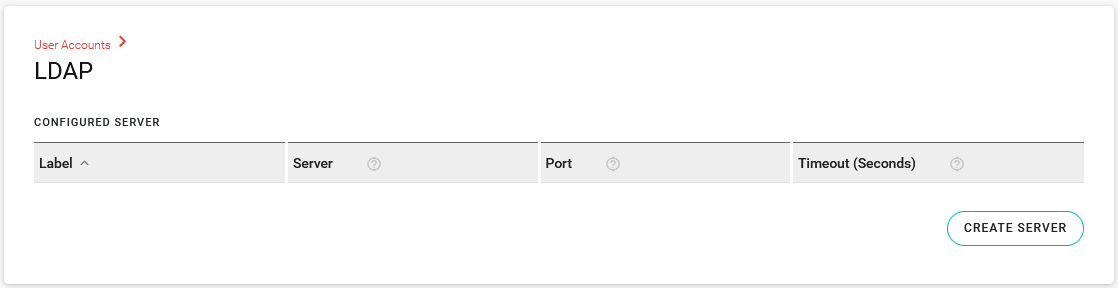
- Under CONFIGURED SERVER, click CREATE SERVER.
- In Create Server, configure the settings described in the table below.
- Click CREATE.


- The server you configure here will also be available under Services > Web > Authentication. If the server label does not appear, click the desired field under Services > Web > Authentication and select the server to enable it.
- To edit the server configuration, click the end of the table row and select Edit.
- To delete the server configuration, click the end of the table row and select Delete.
- You cannot delete the server if it is being used elsewhere in the router configuration. For example, it may be part of a Wi-Fi interface configuration, or enabled in Services > Web > Authentication. To delete the server, you must first disable it where it is being used in the router configuration.
| SETTING | DESCRIPTION | RANGE |
|---|---|---|
| LABEL | Enter a name for the LDAP server | n/a |
| SERVER |
Enter the LDAP server IP address or resolvable domain name.
|
n/a |
| PORT | Enter the Port number | 1–65535 (default is TCP port 389) |
| TIMEOUT |
Enter the time limit for the server to respond.
|
1–60 seconds (default is 30) |
| ENCRYPTION | Select the encryption type. |
|
| BASE DN | The Base DN is the path in the LDAP tree to the list of users (for example, dc=semtech,dc=com). This is where the LDAP protocol searches for a matching user to authenticate. | n/a |
| BIND | Select how the LDAP search is done. |
|
| BIND DN |
This setting is available when BIND is set to explicit. Enter the full path of the user authorized to perform requests in the LDAP database (for example, cn=admin,dc=semtech,dc=com) |
n/a |
| BIND PASSWORD |
This setting is available when BIND is set to explicit. Enter the password associated with the Bind DN user. |
n/a |
RADIUS Authentication
Remote Authentication Dial In User Service (RADIUS) uses UDP and checks authentication credentials using a shared key.
To configure RADIUS:
- Go to System > User Accounts > RADIUS.
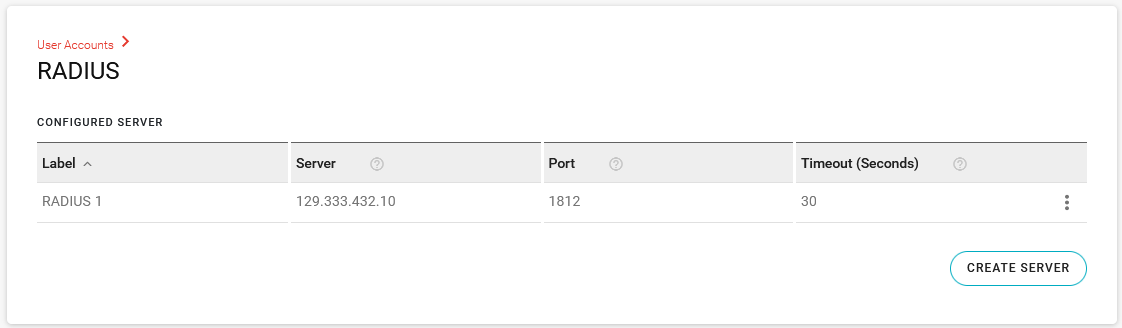
- Under CONFIGURED SERVER, click CREATE SERVER.
- In Create Server, configure the settings described in the table below.
- Click CREATE.


- The server you configure here will also be available under Services > Web > Authentication. If the server label does not appear, click the desired field under Services > Web > Authentication and select the server to enable it.
- You can configure multiple RADIUS servers, which will be available to select as a backup RADIUS authentication server for a Wi-Fi access point using WPA2-Enterprise security mode.
- To edit the server configuration, click the end of the table row and select Edit.
- To delete the server configuration, click the end of the table row and select Delete.
- You cannot delete the server if it is being used elsewhere in the router configuration. For example, it may be part of a Wi-Fi interface configuration, or enabled in Services > Web > Authentication. To delete the server, you must first disable it where it is being used in the router configuration.
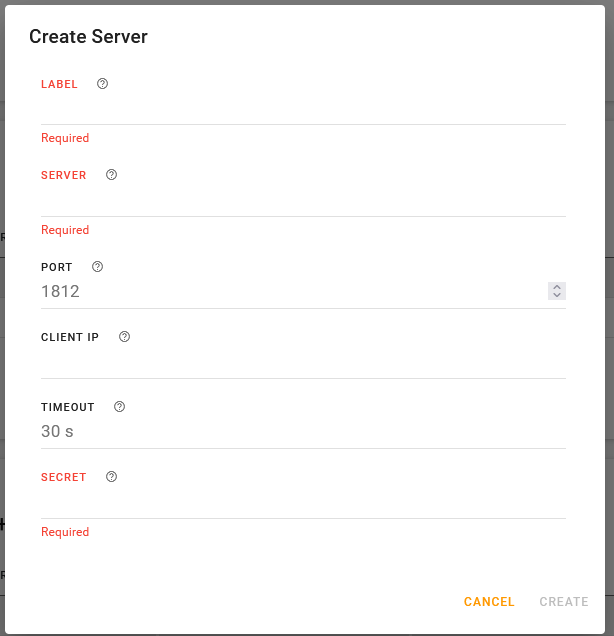
| SETTING | DESCRIPTION | RANGE |
|---|---|---|
| LABEL | Enter a name for the LDAP server | n/a |
| SERVER |
Enter the RADIUS server IP address or resolvable domain name. |
n/a |
| PORT | Enter the Port number | 1–65535 (default is UDP port 1812) |
| CLIENT IP | Enter the optional RADIUS client IPv4 address. The router will use this as the IP source address when making RADIUS requests. Use this setting if a RADIUS server or VPN tunnel requires a specific source IP address for the RADIUS client. | IPv4 address |
| TIMEOUT |
Enter the time limit for the server to respond.
|
1–60 seconds (default is 30) |
| SECRET | Enter the shared secret for configured server. | n/a |
TACACS+ Authentication
Terminal Access Controller Access-Control System Plus (TACACS+) uses TCP protocol and encrypts the entire packet, except the header.
To configure TACACS+:
- Go to System > User Accounts > TACACS+.
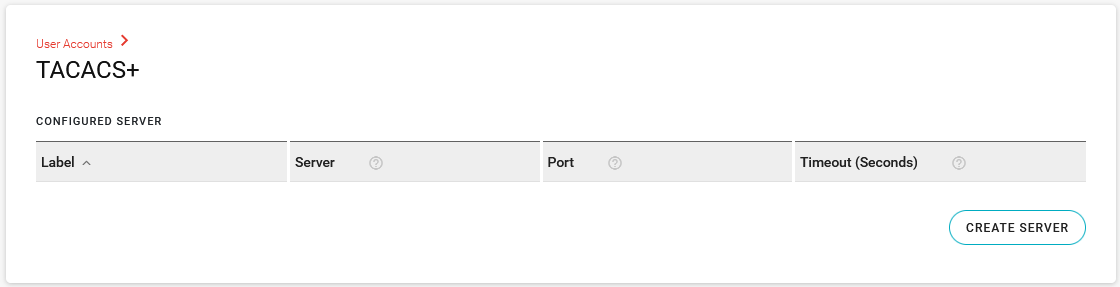
- Under CONFIGURED SERVER, click CREATE SERVER.
- In Create Server, configure the settings described in the table below.
- Click CREATE.


- The server you configure here will also be available under Services > Web > Authentication. If the server label does not appear, click the desired field under Services > Web > Authentication and select the server to enable it.
- To edit the server configuration, click the end of the table row and select Edit.
- To delete the server configuration, click the end of the table row and select Delete.
- You cannot delete the server if it is being used elsewhere in the router configuration. For example, it may be part of a Wi-Fi interface configuration, or enabled in Services > Web > Authentication. To delete the server, you must first disable it where it is being used in the router configuration.
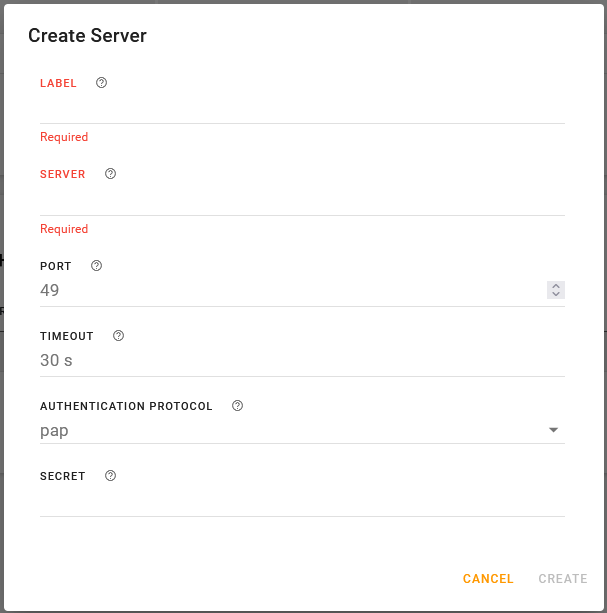
| SETTING | DESCRIPTION | RANGE |
|---|---|---|
| LABEL | Enter a name for the TACACS+ server | n/a |
| SERVER |
Enter the TACACS+ server IP address or resolvable domain name.
|
n/a |
| PORT | Enter the Port number | 1–65535 (default is port 49) |
| TIMEOUT |
Enter the time limit for the server to respond.
|
1–60 seconds (default is 30) |
| AUTHENTICATION PROTOCOL | Select the type of bind used for authentication. |
|
| SECRET | Enter the shared secret for configured server. | n/a |