Using MQTT on GX440
 Searching...
This article is about using AirVantage API for AirLink devices. It will focus on a device: the famous GX440.


Prerequisite
- The Developer Studio for ALEOS must be installed and configured.
- Have a basic knownlege of MQTT. See the other tutorial about MQTT for airvantage: MQTT API .
Step 1: Setup Hardware
- Your device has been registered in AirVantage and a first communication has been done. Follow this tutorial .

- The Developer Studio for ALEOS must be installed and configured.
Step 2: Design your application
An application model aims to explain to AirVantage how to deal with the device about communication and authentication and managing the data: variable, settings or commands. If you don’t supply such information, the server will ignore all the communication from your device. In this step, we are going to see how to create this application and release it on AirVantage and associate it to your system.
Define your data
- First of all, to be able to send and receive data, you have to describe your data to AirVantage. Here is the description, you just need to change the type value with a unique identifier for your application and the name and revision with the appropriate values for your use case.
- You can modify the
<data>area. Once it matches your needs, save everything as model.app.
Don’t modify the asset id as it is used in the code source application or modify it accordingly.
<?xml version="1.0" encoding="ISO-8859-1"?>
<app:application
        xmlns:app="http://www.sierrawireless.com/airvantage/application/1.0"
        type="com.test.airvantage.sl.app"
        name="AirVantage Greenhouse"
        revision="0.0.1">
  <capabilities>

    <communication>
      <protocol comm-id="IMEI" type="MQTT" />
    </communication>

    <data>
      <encoding type="MQTT">
        <asset default-label="Greenhouse" id="machine">
          <variable default-label="Temperature" path="temperature"
                                                type="double"/>
          <variable default-label="Luminosity" path="luminosity"
                                               type="double"/>
          <setting default-label="Threshold" path="threshold"
                                             type="int"/>
        </asset>
      </encoding>
    </data>
  </capabilities>
</app:application>
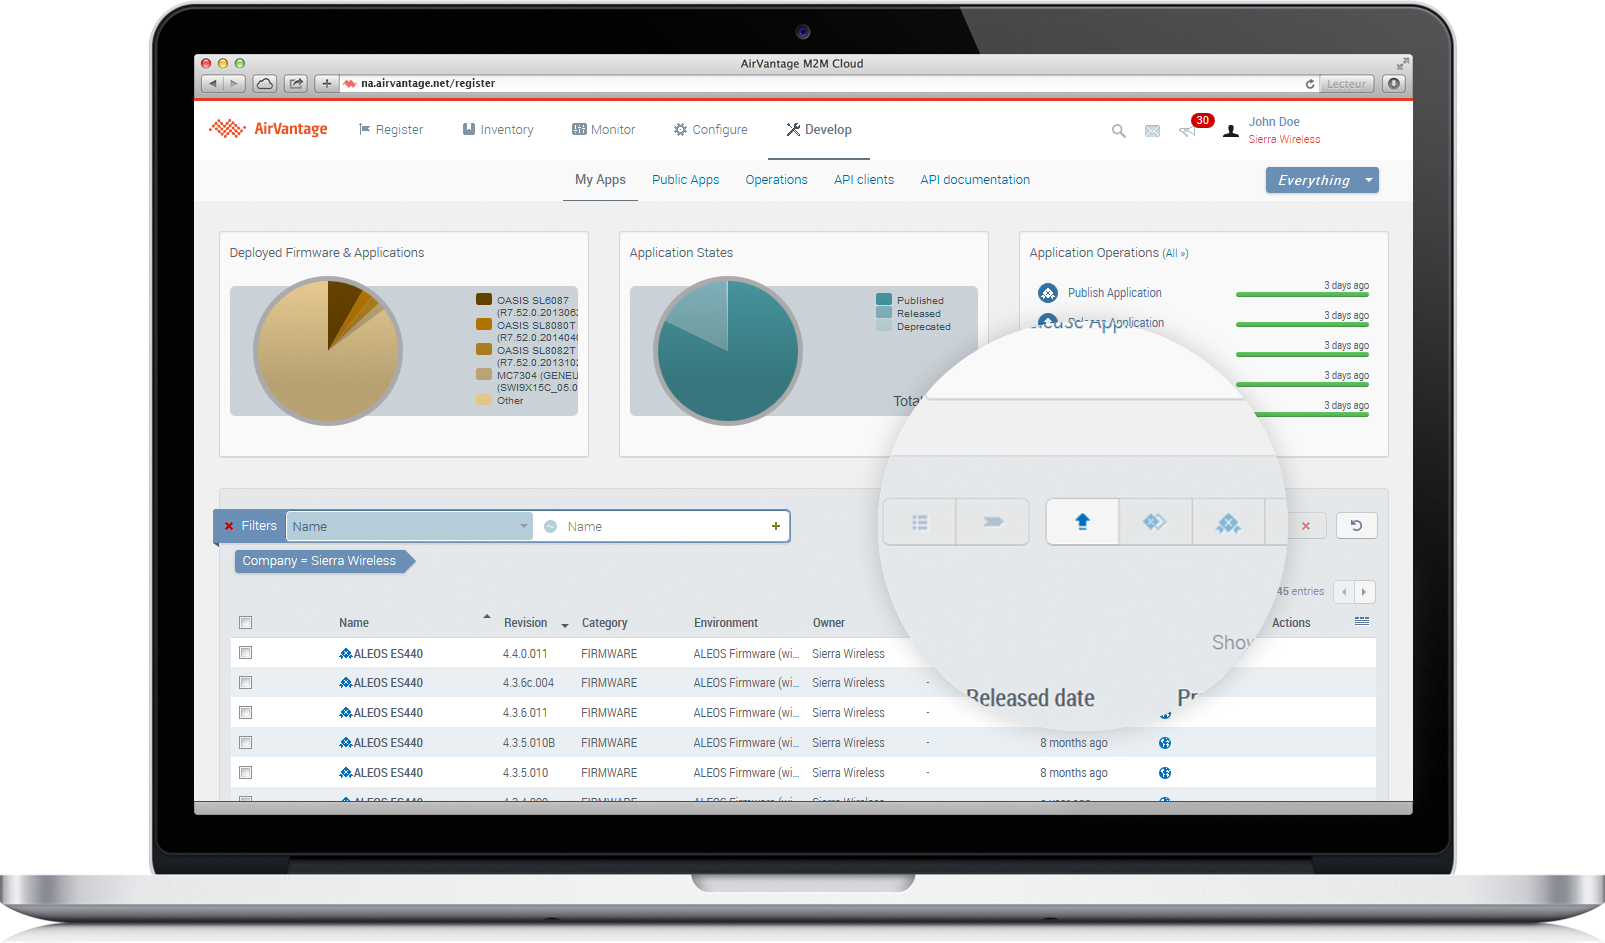
Create your application package
- Zip this file, mine is named model.app.zip
- Go on Develop Activity > My Apps
- Click on the Release button
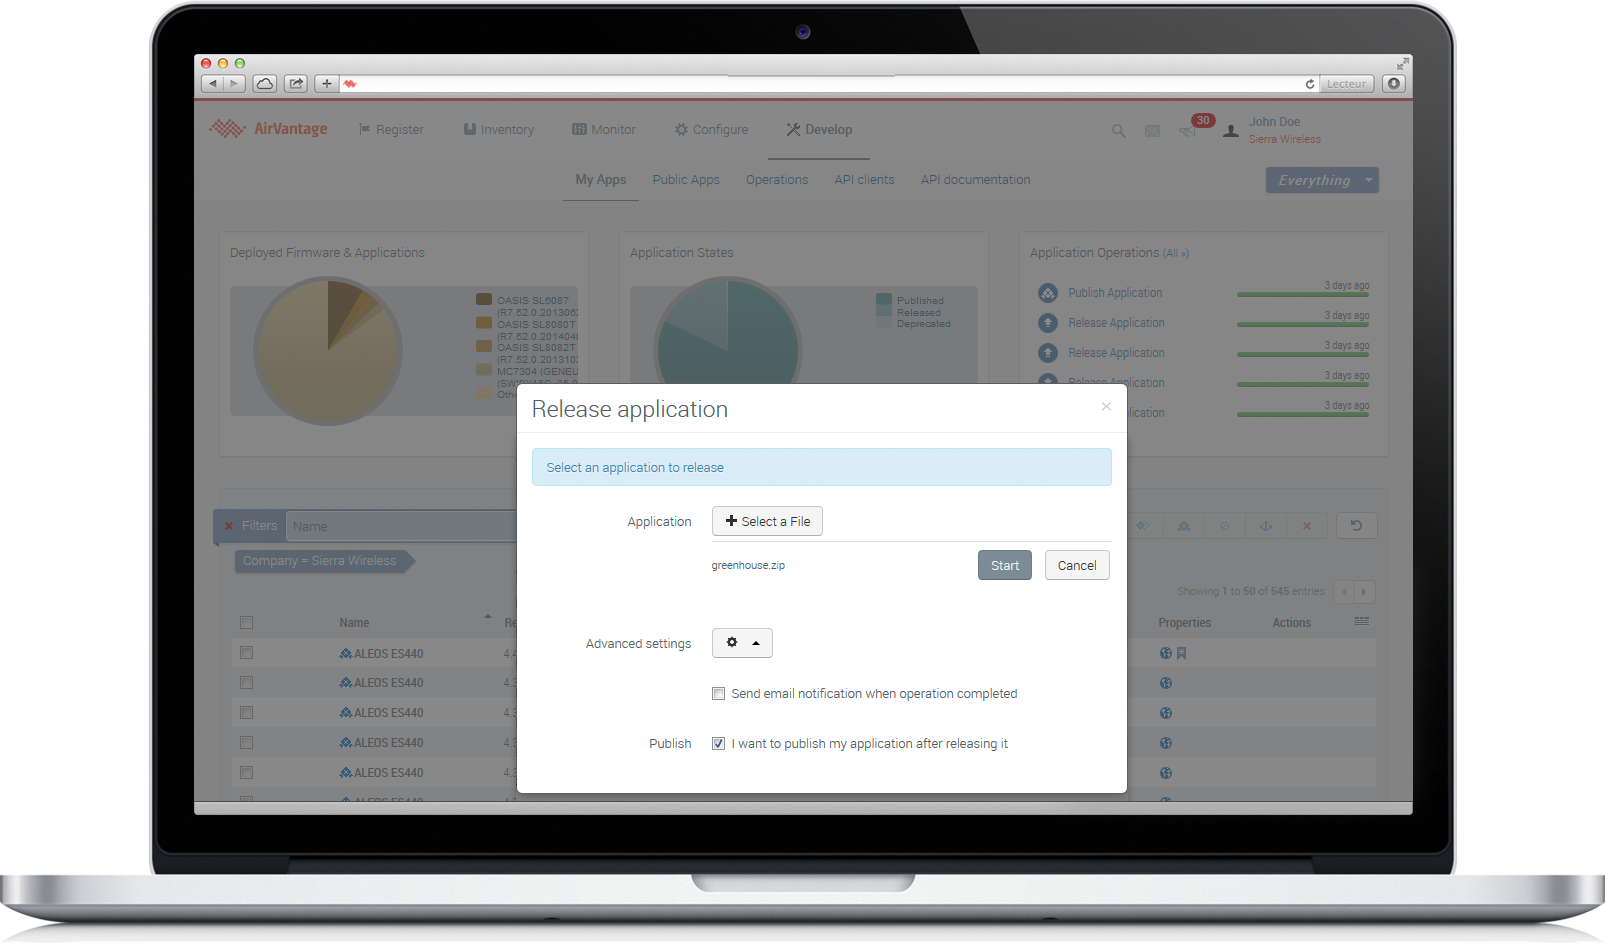
Release your application
- Select your file model.app.zip
- Open Advanced settings and select I want to publish my application after releasing it
- Finally, click on Start
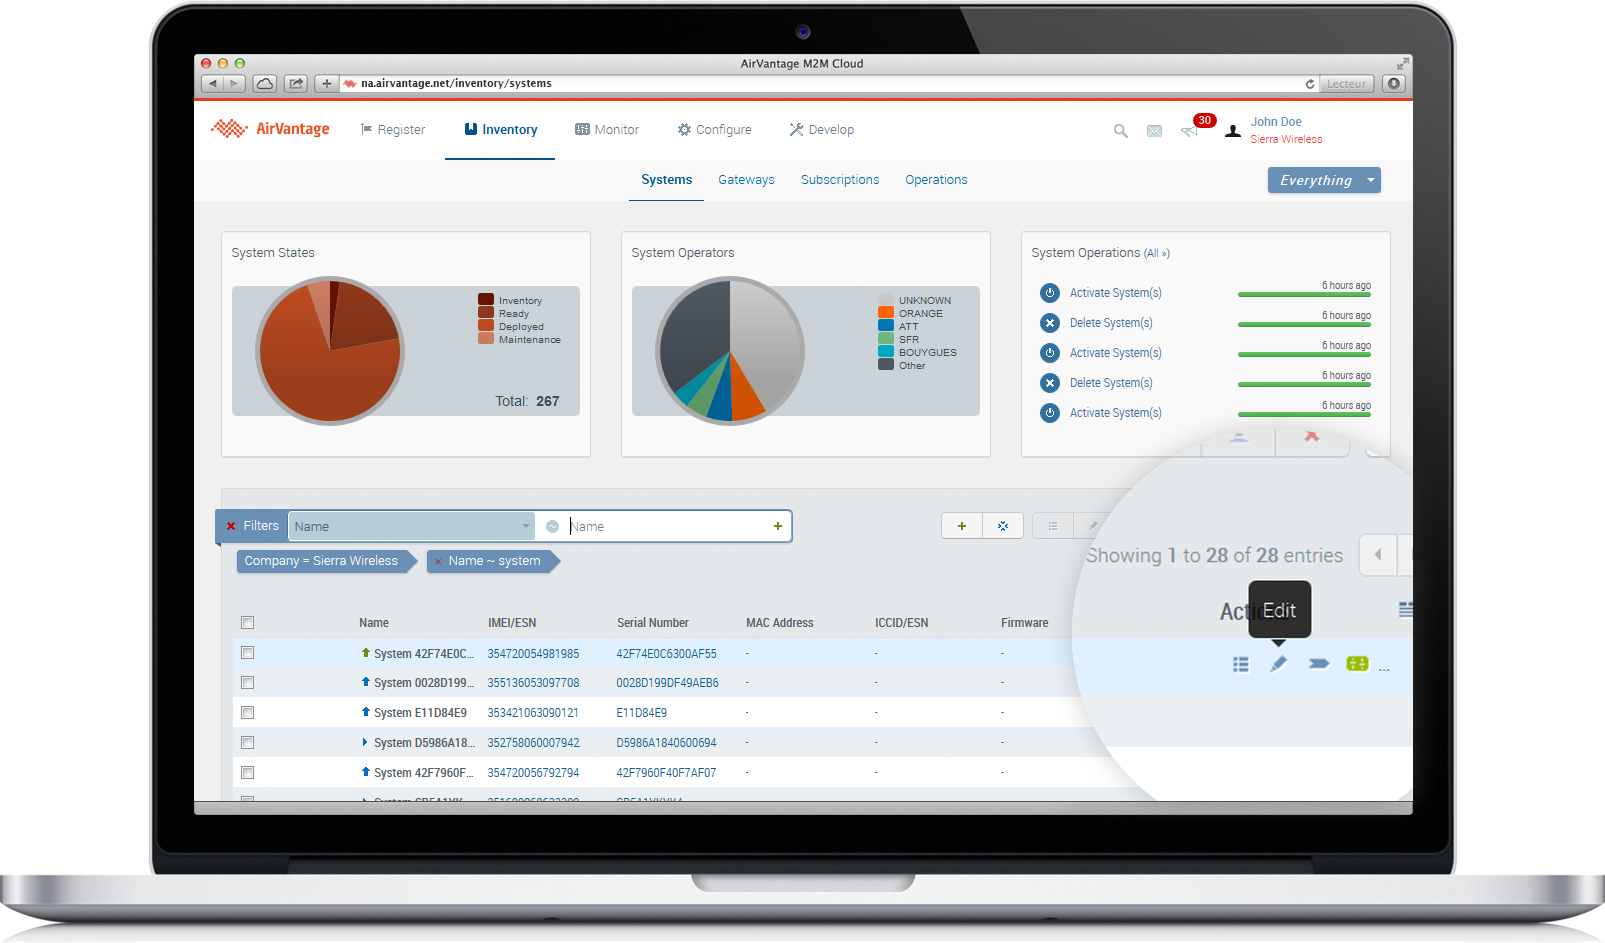
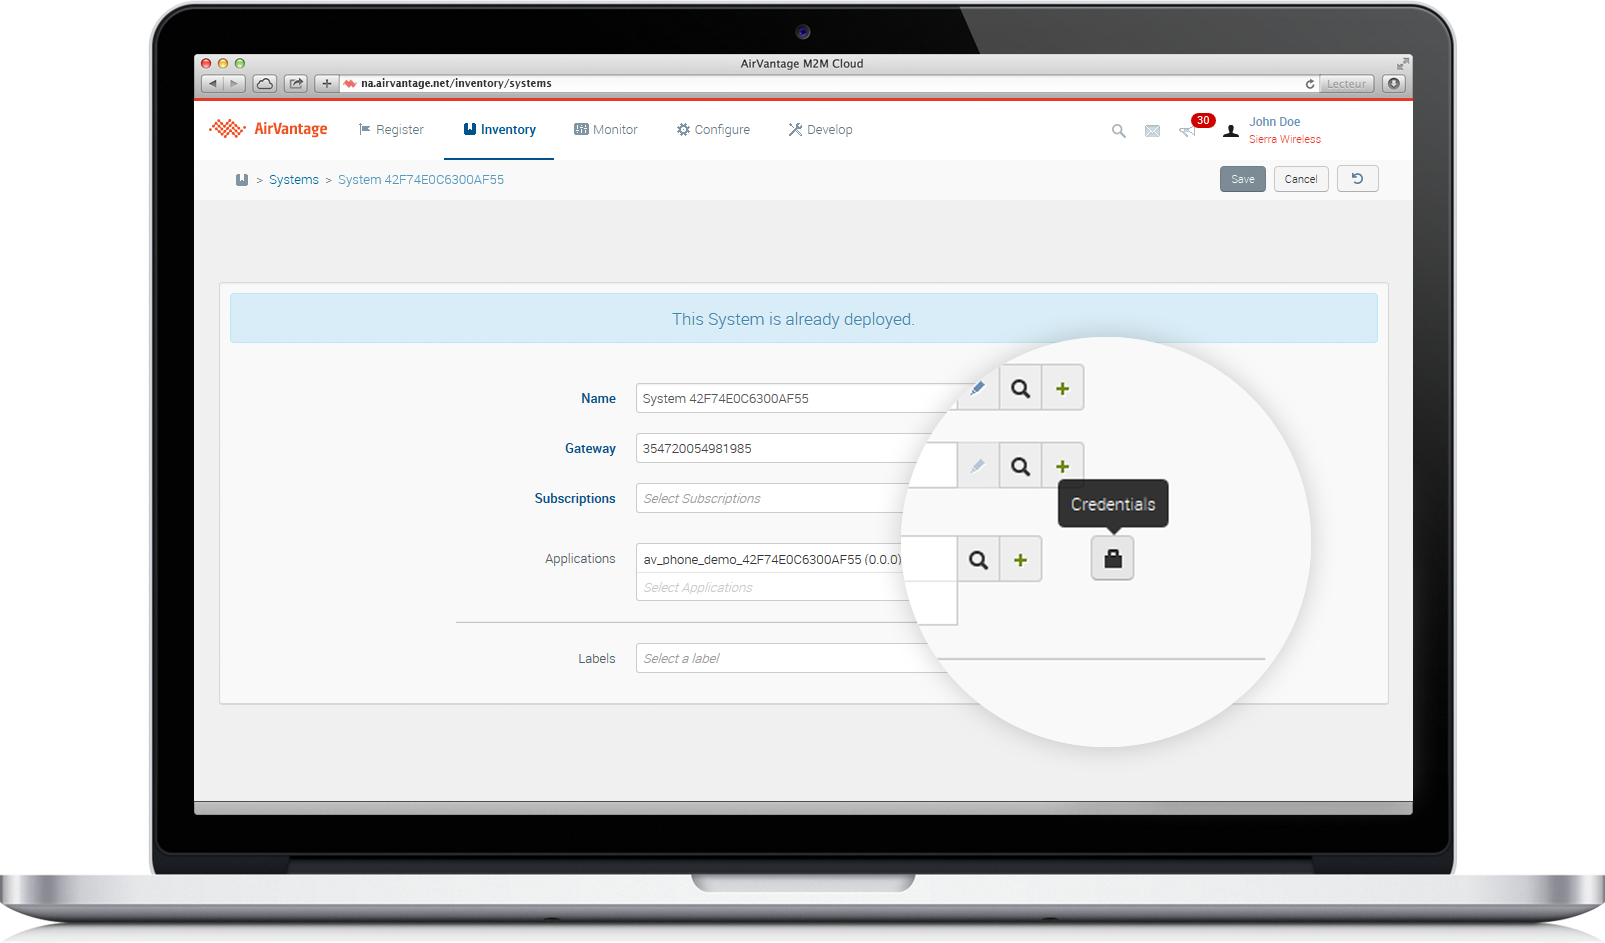
Edit your system
- Go on Inventory > Systems
- Select your system and click on the Edit icon
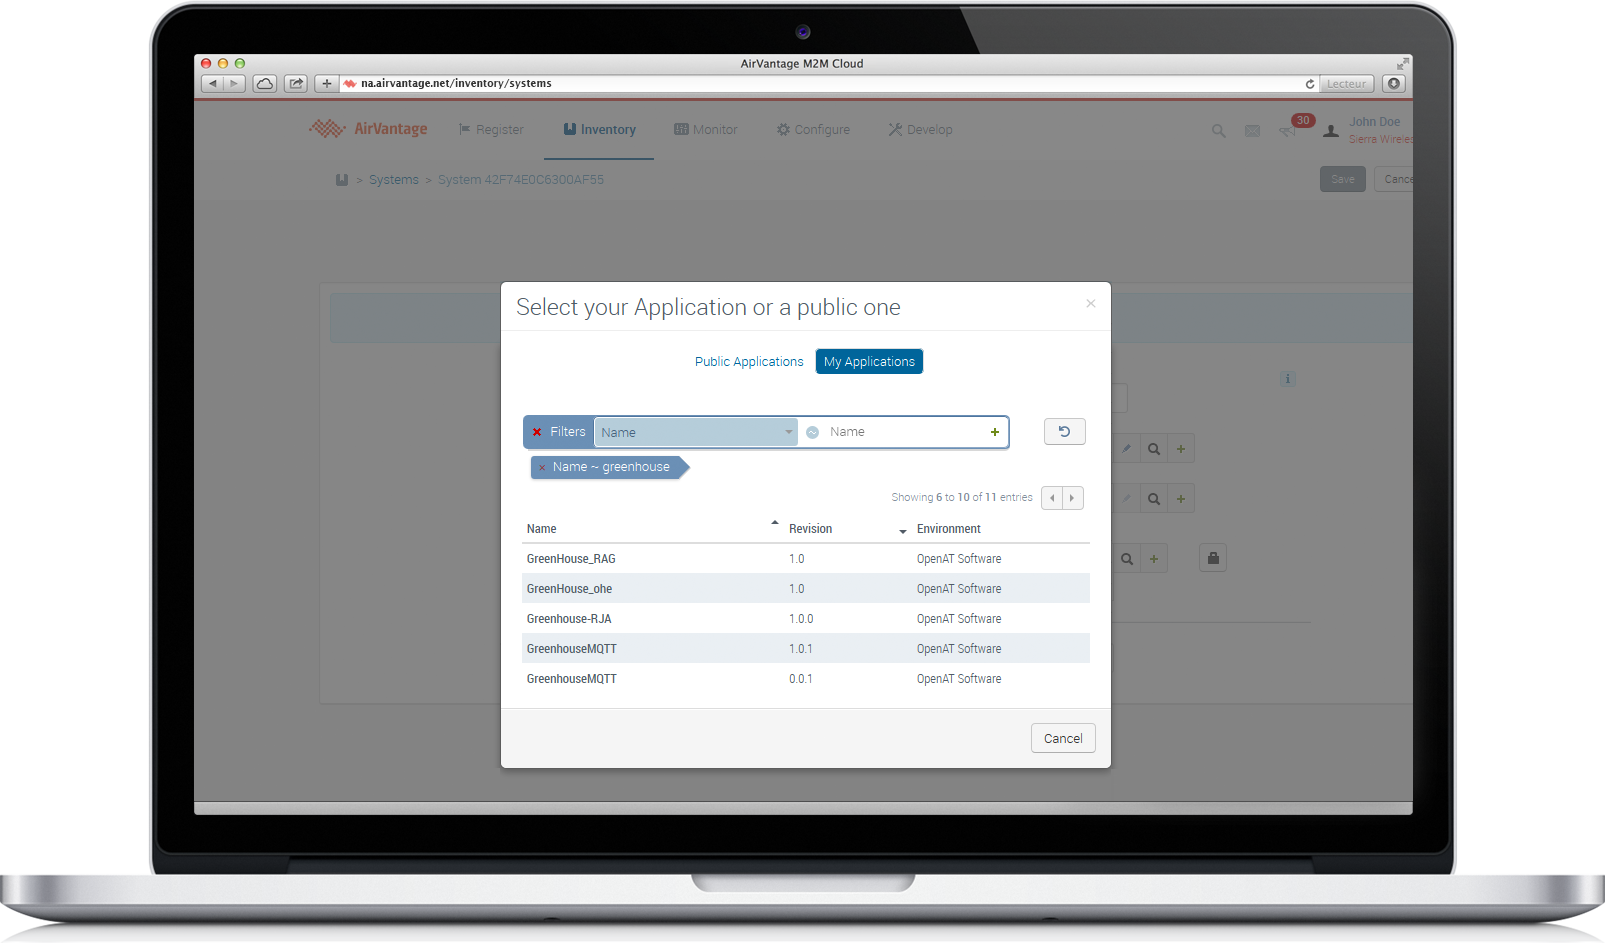
Search your application
- Click on Search application
- In the new dialog box, select the My Application tab
- Search your application using its name (AirVantage Greenhouse)
Associate your application to your system
- Click on the application to select it.
- Click on the padlock and configure the password (for example:
test12!). - Click on Save in the right top corner
- Click on the Monitor icon to monitor your system
Step 3: Implementing an application
It is now time to write an application for our GX440. You can have a look about using MQTT in AirVantage , if you want to have a description about the serialisation details.
The app
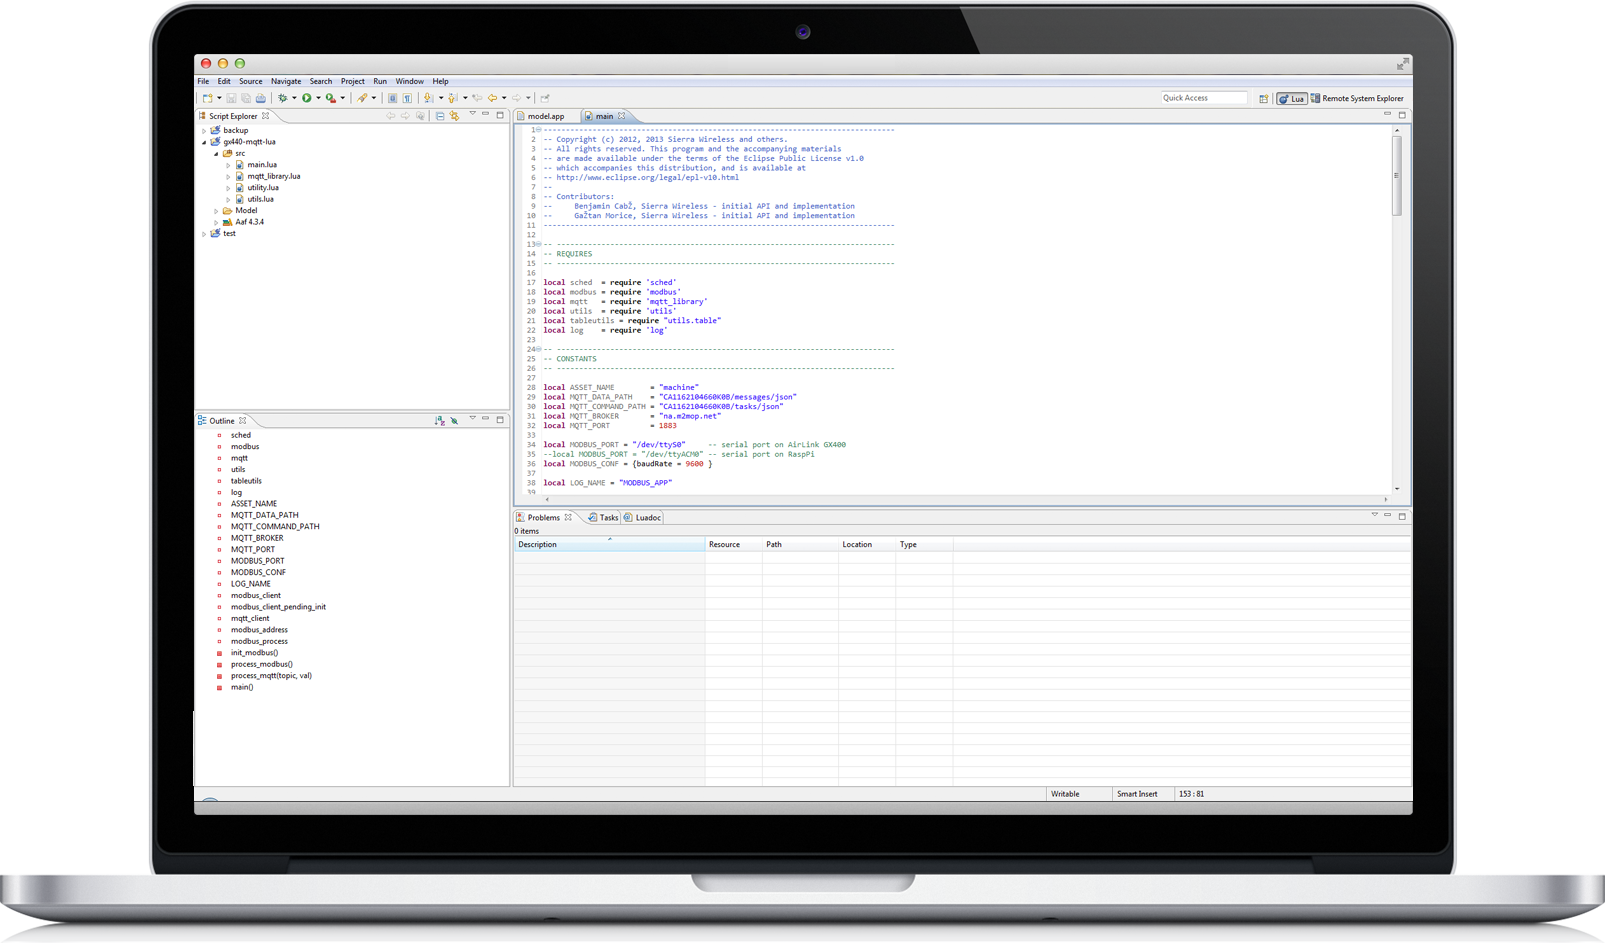
- In the Developer Studio for ALEOS, create a new Lua Project, give it a name.
- Copy the application files from github repository
- Edit the
main.luaand update the MQTT path, the broker at the beginning of the file.
-- ----------------------------------------------------------------------------
-- CONSTANTS
-- ----------------------------------------------------------------------------

local ASSET_NAME        = "machine"
local MQTT_DATA_PATH    = "CA1162104660K/messages/json"
local MQTT_COMMAND_PATH = "CA1162104660K/tasks/json"
local MQTT_BROKER       = "eu.m2mop.net"
local MQTT_PORT         = 1883

local MODBUS_PORT = "/dev/ttyS0"
local MODBUS_CONF = {baudRate = 9600 }

local LOG_NAME = "MODBUS_APP"
- Edit the username and the password in the connect function at the end of the file (use the same password that the one defined previously in AirVantage).
-- ----------------------------------------------------------------------------
-- MAIN
-- ----------------------------------------------------------------------------
local function main()
	log.setlevel("INFO")
	log(LOG_NAME, "INFO", "Application started")

	modbus_client = modbus.new(MODBUS_PORT, MODBUS_CONF)
	log(LOG_NAME, "INFO", "Modbus      - OK")

	mqtt_client = mqtt.client.create(MQTT_BROKER, MQTT_PORT, process_mqtt)
	log(LOG_NAME, "INFO", "MQTT Client - OK")
	mqtt_client:connect(LOG_NAME, nil, nil, nil, nil, "CA1162104660K", "test12!")
	mqtt_client:subscribe({MQTT_COMMAND_PATH.."#"})
Declare a connection with your gateway
- Go in the Remote System Explorer by using the Window menu > Open Perspective
- In the Remote System area, click with the right button of your mouse and select New > Connection
- Click on Next
- Supply the host name (Ip Address), the connection name and click on Finish button to close the dialog box

Upload the application in the gateway
- Right click on your project in the Project Explorer
- Select Export…
- Select Sierra Wireless > Local Application Package and click on Next
- Select your project in the list and fill the Package name entry.
- Select your gateway connection in the Host field
- Click on Finish button
- Fill the password field and click on Ok and Click on yes to accept the key.
By default these credentials are uasuser : sierra12345.

View your application running
- Go on AceManager, section Admin > Log
- Check Applications and AirVantage log level are INFO and displayed in Log
- Reboot the gateway if you did changes.
- Go back to the Remote System Explorer view
- Click on System Log with the right button of your mouse and select Show System Logs

Look, it is alive:
MODBUS_APP-INFO: Application started
MODBUS_APP-INFO: Modbus      - OK
MODBUS_APP-INFO: MQTT Client - OK
MODBUS_APP-INFO: Init done
MODBUS_APP-INFO: Read data humidity : 0
MODBUS_APP-INFO: Read data temperature : 33
MODBUS_APP-INFO: Read data luminosity : 16
MODBUS_APP-INFO: Read data light : 0
MODBUS_APP-INFO: Sending data {"machine.humidity":0, "machine.temperature":27.0276, "machine.luminosity":12.149870801034, "machine.light":0}
Your data is now sent. You can check your data communication. Just go to Monitor > Systems, then pick your own and click Timeline. That is it.
Find the full sample in github and clone it!
Next Step
Continue the tutorial by using tools supplied by AirVantage to test your communication with your device.