 Searching...
Getting Started with the AirVantage API
Integrate with AirVantage API
Here we give you an overview of what you can do with the AirVantage API via a simple use case: retrieve the system with a given ICCID and activate it.
We’ll explain all the technical aspects needed:
- basic API syntax,
- authentication,
- AirVantage integration,
- how to do simple GET calls.
Basics
What can you do with the API?
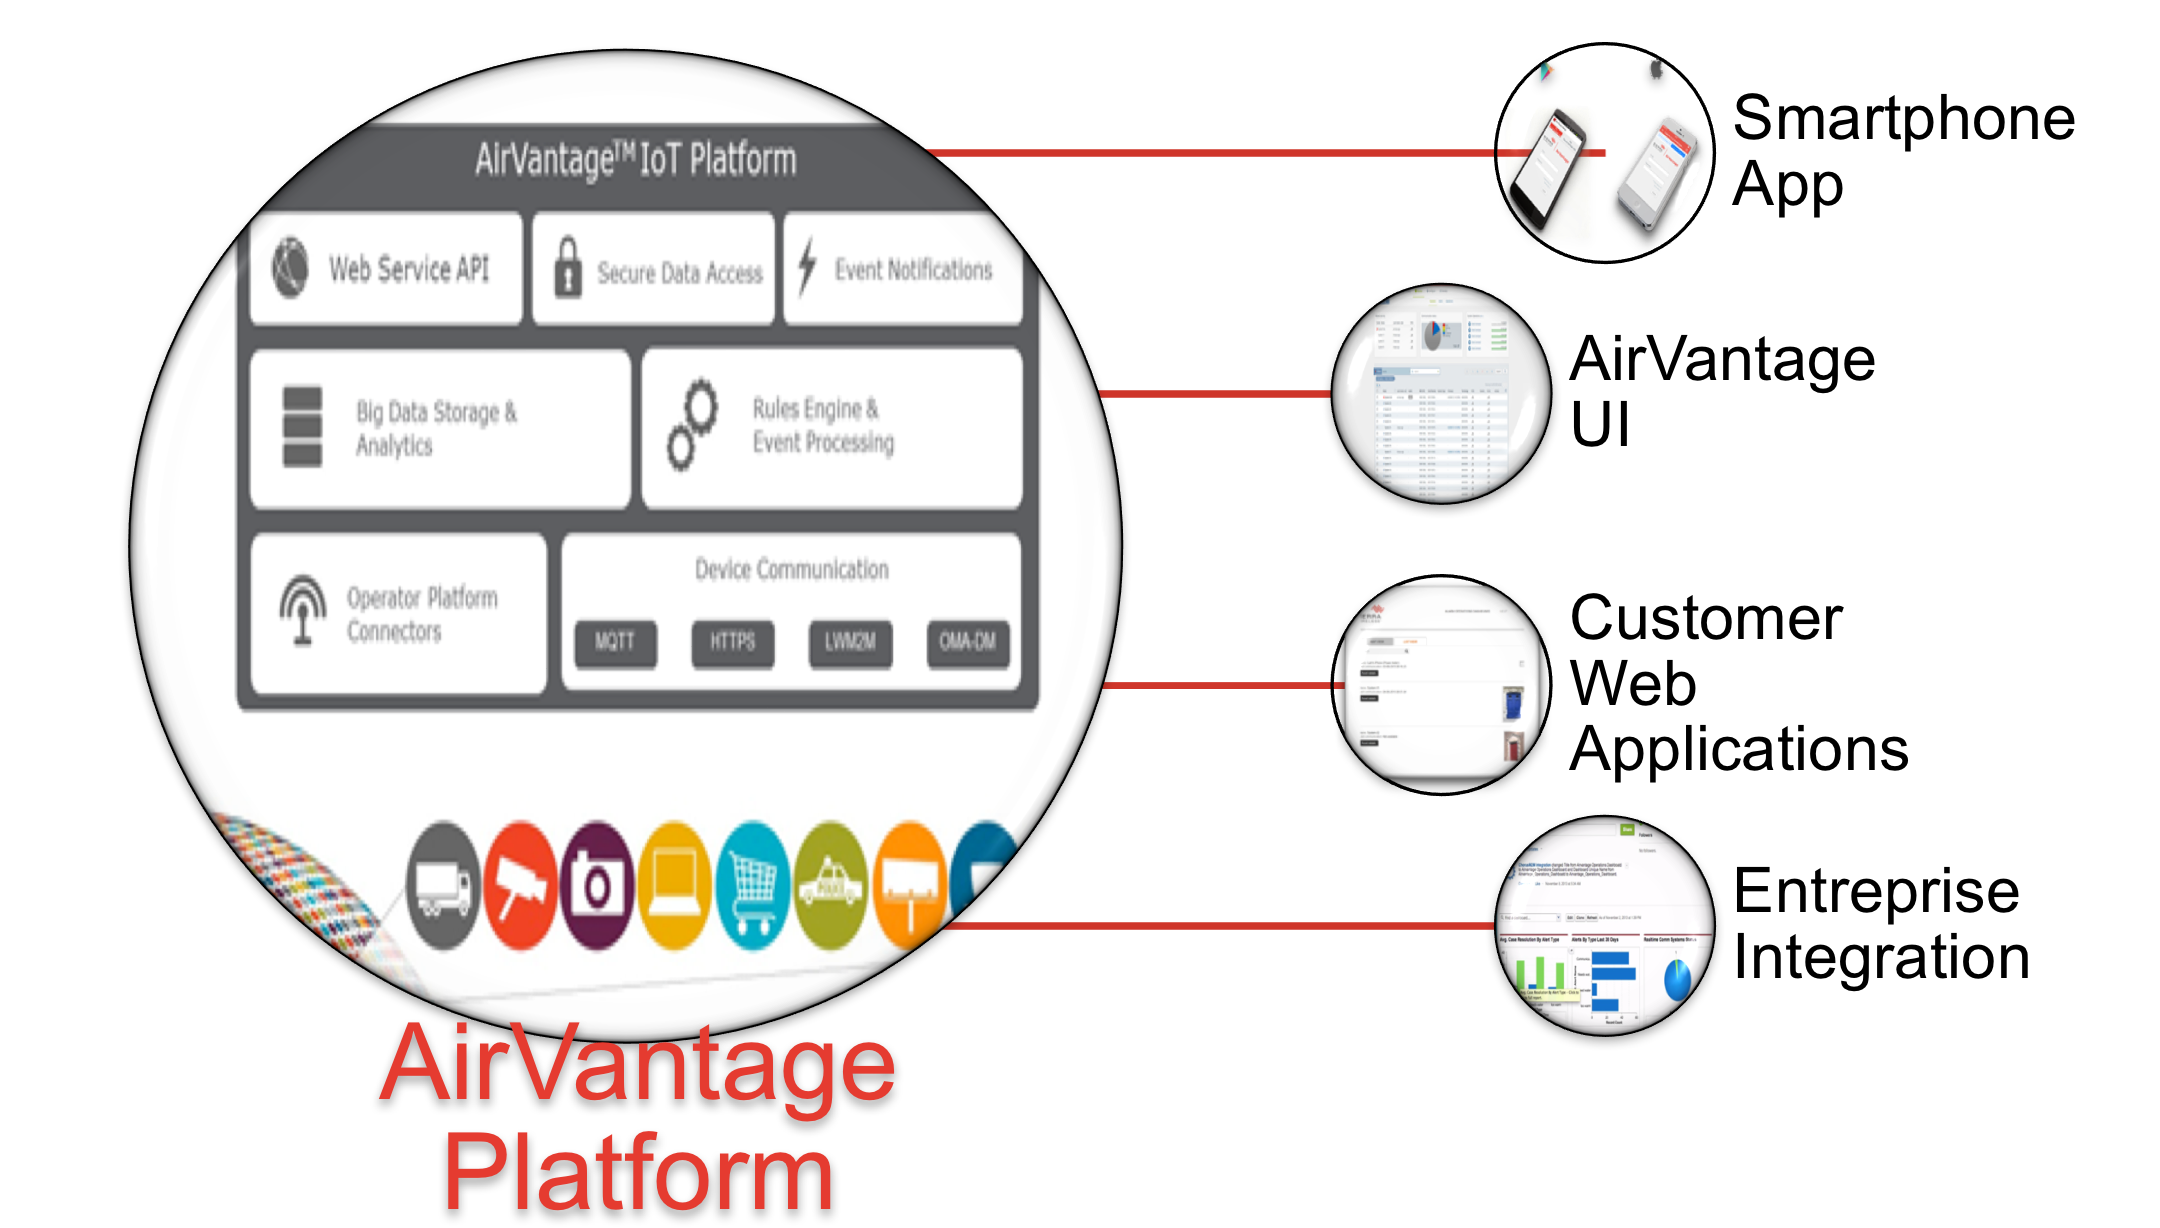
The AirVantage API provides a powerful and flexible interface between deployed devices and AirVantage. You can use it to develop custom applications for your business needs, whatever the domain: smart Phone, CRM, ERP…
For example, you can use the API to:
- Exploit raw applicative data and aggregated fleet data.
- Create script-based Firmware Upgrade campaigns
- Remotely monitor and manage devices to avoid field intervention.
Which tool can you use?
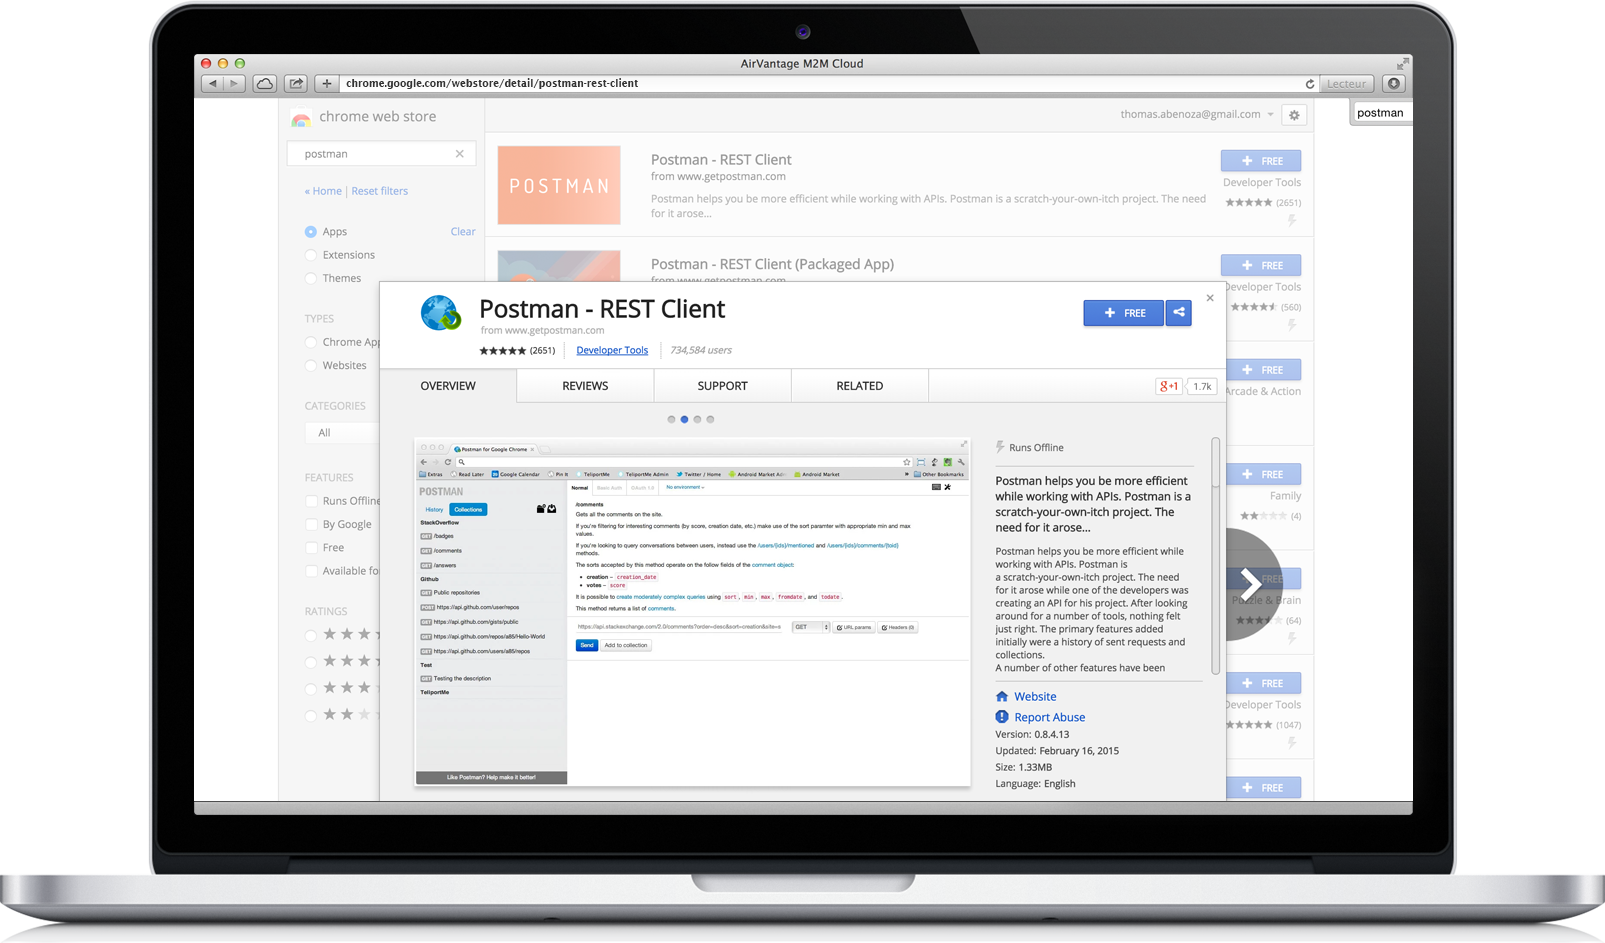
Start by installing a REST Client like:
- Postman can be used to test your API calls with AirVantage
- cURL can be used as well as command line tools to transfer data (not described in this tutorial).
Or use a browser-specific client:
Chrome: Postman
Firefox: RESTClient
For more details, see the API documentation: https://doc.airvantage.net/av/reference/cloud/API/
What are REST APIs?
This is the typical format of our REST API

Request:
GET https://{server}/api/v1/users/current
Authorization: Bearer {token}
| HTTP verb | Base URI | Resource Path | Parameters |
|---|---|---|---|
| GET | https://{server}/api/v1 | /users/current | ?param={value} |
Response:
{
  uid: "81210eca05484d34a29bc6c34dc31bf7",
  email: "dsciamma@sierrawireless.com",
  name: "David Sciamma",
  company: {
    uid: "97ba9e22078548a2847912a87152e3f4",
    name: "Sierra Wireless"
  },
  profile: {
    uid: "df1c0f7d5f8c4db2b45978f98e1093ad",
    name: "Manager"
  }
}
REST (Representational state transfer)
HTTP based RESTful APIs are defined with these aspects:
- Base URI, such as http://example.com/resources/
An Internet media type (JSON, XML, RSS, CSV …) must be defined. Most of the time, application/json is used.
Standard HTTP methods:
- GET - Used for retrieving resources,
- POST - Used for creating resources, performing custom actions,
- PUT - Used for updating resources or collections.
- DELETE - Used for deleting resources
Hypertext links
(src: Wikipedia )
JSON (JavaScript Object Notation)
JSON stands for JavaScript Object Notation, is an open standard format that uses human-readable text to transmit data objects consisting of attribute-value pairs. It is used primarily to transmit data between a server and web application, as an alternative to XML. (src: Wikipedia )
- Widely adopted
- Language independent
- Simple (set of attribute-value pairs)
- Types
- Number, String, Boolean, Array, Object, null
Use API with authentication
To integrate to AirVantage APIs, you will first need to authenticate. This requires:
- An API Client identifier
- Support for one of the OAuth Flow methods described below
Implement authentication
AirVantage uses the OAuth 2.0 protocol for authentication. AirVantage supports three ways of getting an access token. Select the flow that best suits your application:
- The Authorization Code Flow: This should be the preferred flow for server-side applications. This flow is great if your code can keep a secret. The application will get an access token and a refresh token. The refresh token can then be stored by the application and used later to get a new access token without asking the user again for credentials. For native applications such as mobile apps or applications who cannot keep secrets you MUST use the PCKE (RFC 7636) extension to the Authorization Code flow to prevent CSRF and authorization code injection attacks. PKCE is not a replacement for a client secret, and PKCE is recommended even if a client is using a client secret.
- The Client Credentials Flow: This flow can be used for server-to-server authentication where the application acts on its own behalf rather than on behalf of a user, e.g. you’re developing a backend service that needs to access APIs independently without user interaction.
- The Resource Owner Flow:Deprecated This flow can be used if the user trusts the application e.g. you’re a company and you’re developing an application only used by your employees then they don’t need to give their credentials to the application.
You can find more details about how authentication works as well as sample API calls in this AirVantage API documentation section .
Note: Postman supports the Authorization code!
Specs: rfc6749

Create an API Client
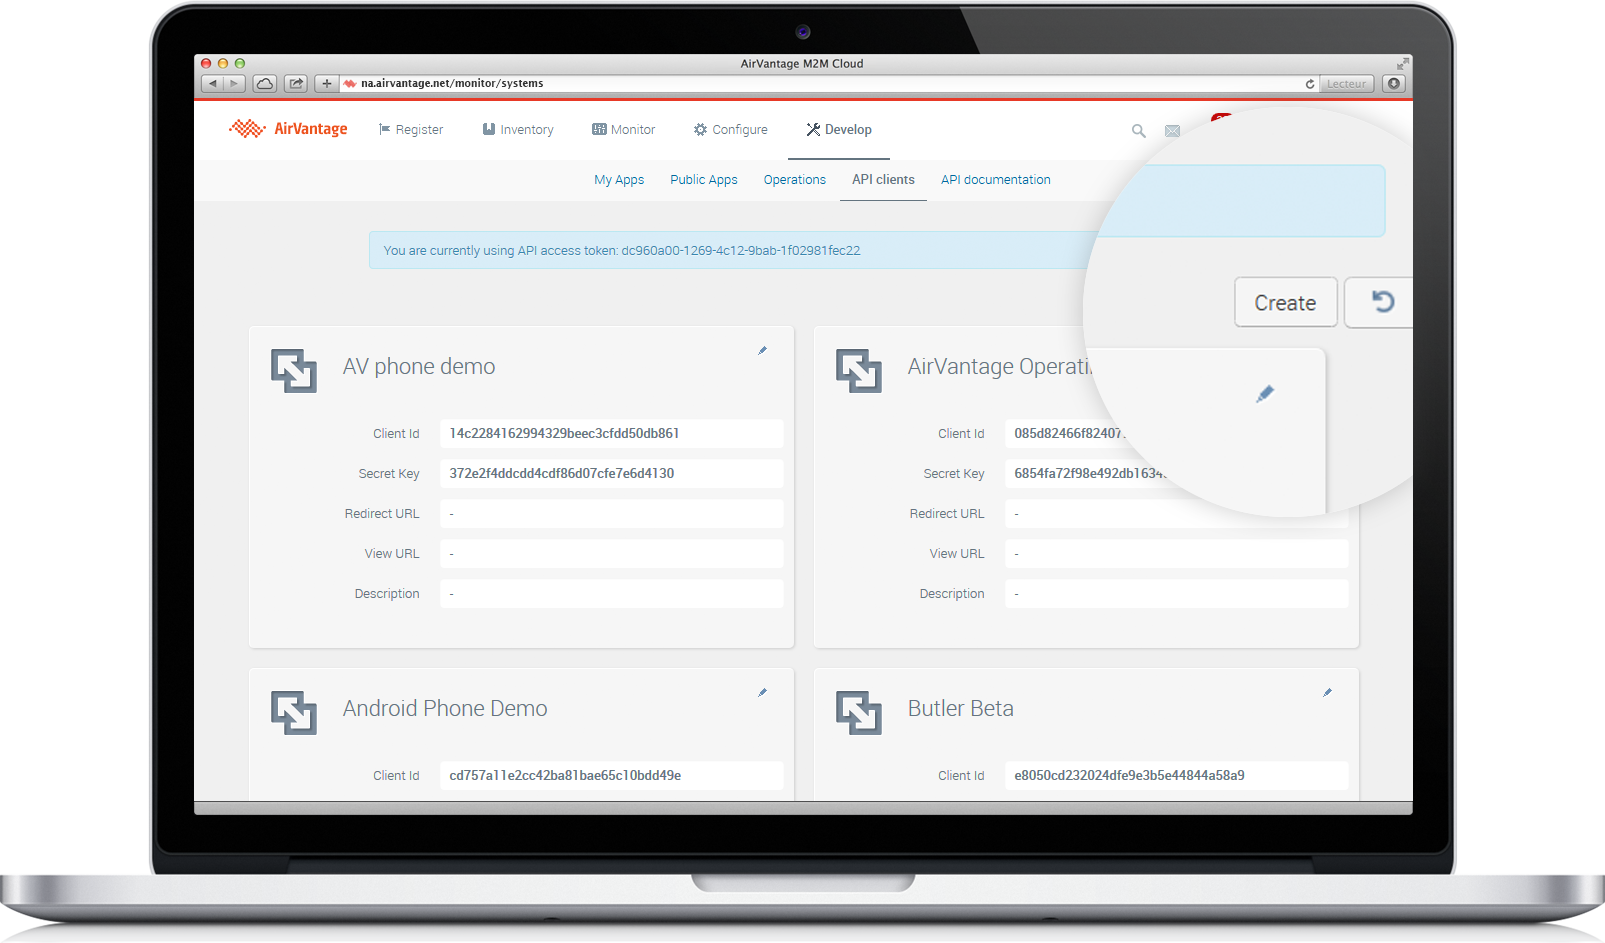
The first step in order to use AirVantage API is to create an API Client. The API Client represents the identity of the application that needs to connect to AirVantage API. All the API calls will be traced and related to an API Client. An API Client consists in:
- Go to Develop > API Clients
- Click on the Create action
- In the Create API Client modal:
- Provide a Name
- A Client ID and a Secret Key: Both are generated by AirVantage
- Redirect URIs in case of Authorization code flow and Profiles in case of Client credentials flow The following chapter of the User Guide explains the steps to create an API Client .
Get an Access Token
The method depends on which Oauth flow method your application uses. Here are three examples:
Get an access token using Authorization Code flow
- Authorize url: https//eu.airvantage.net/api/oauth/authorize
- Token url: https//eu.airvantage.net/api/oauth/token
- Client-id: 46147801a4af4432a5a45dfb68db927a
- Client secret: 6fff692d93494e39ba511d5a099ba352
- Save the token: demoToken
Tokens are your own property and responsibility: Never share a token with anyone or between two applications. For example, don’t share it in a public source repository.
OR Get an access token using Client credentials flow
Existing API clients in the AirVantage platform do not support this flow type by default.
To use the Client Credentials Flow, you will need an API client specifically configured with “Client Credentials” as the flow type.
- Token url: https://eu.airvantage.net/api/oauth/token
- Use provided API clients credentials (client_id and client_secret)
- HTTP Method: POST
- Header: content-type: application/x-www-form-urlencoded
Here’s the full URL to complete:
https://eu.airvantage.net/api/oauth/token

Content-Type: application/x-www-form-urlencoded
grant_type=client_credentials&client_id={client_id}&client_secret={client_secret}
This is how it looks in Postman:

OR Get an access token using Resource owner flow
The resource owner flow is being deprecated due to security risks, as it involves directly sharing passwords with applications. Support for this flow will end by the end of the year. If your API client was using the authorization code flow, that’s perfectly fine. However, if your setup relied on the resource owner flow, it’s recommended to switch to the client credentials flow instead.
- Token url: https://eu.airvantage.net/api/oauth/token
- Use provided API clients credentials (client_id and client_secret) and your user credentials (username and password)
- HTTP Method: POST
- Header: content-type: application/x-www-form-urlencoded
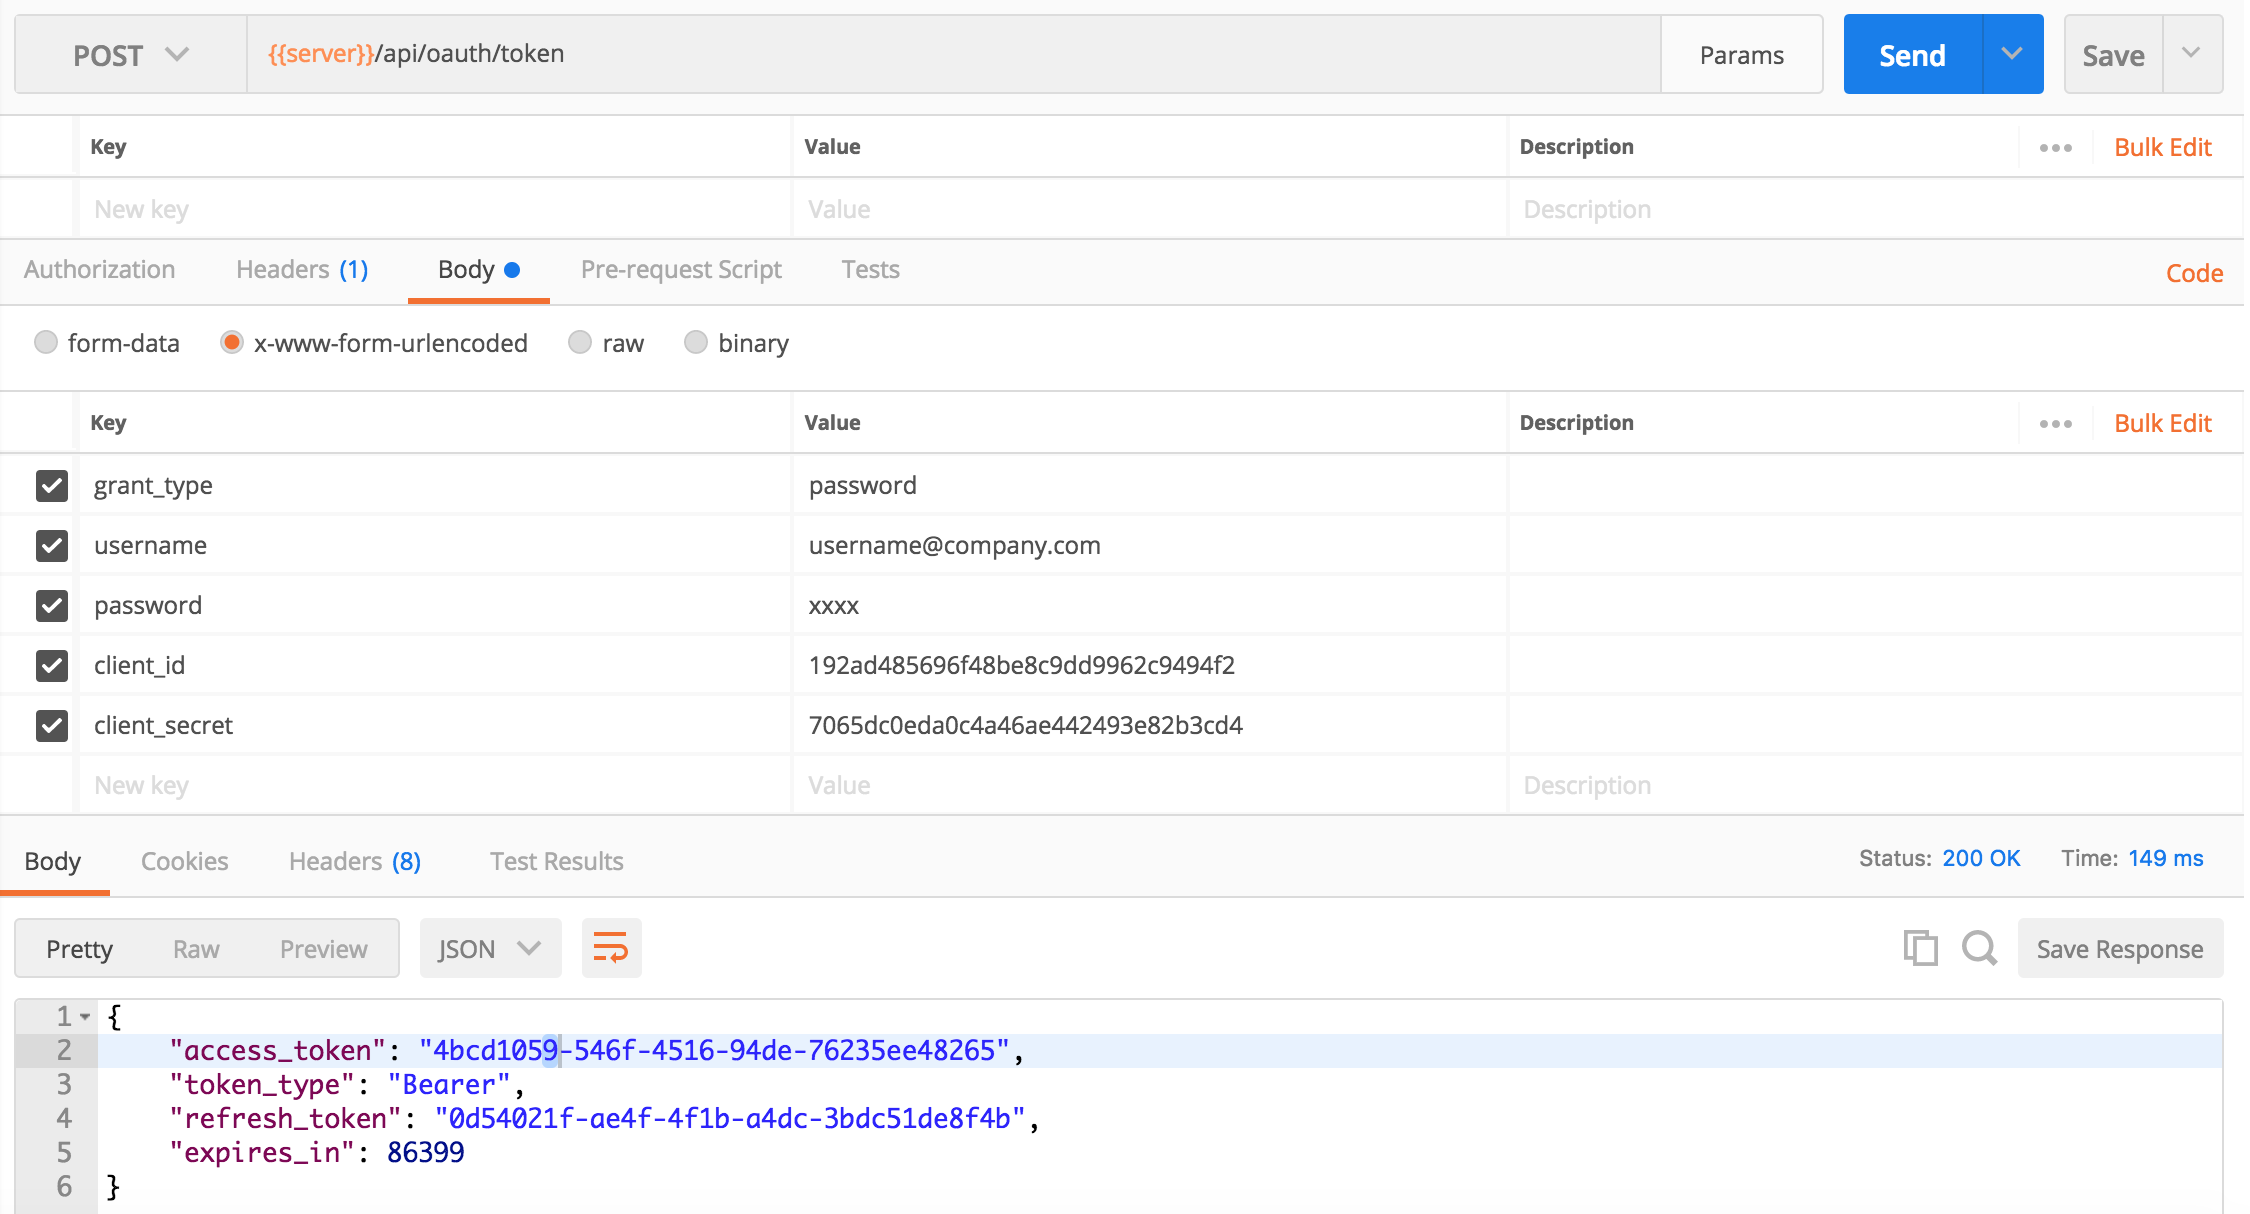
Here’s the full URL to complete:
https://eu.airvantage.net/api/oauth/token

Content-Type: application/x-www-form-urlencoded
grant_type=password&username={username}&password={password}&client_id={client_id}&client_secret={client_secret}
This is how it looks in Postman:
Access Token Usage
The client accesses protected resources in AirVantage by presenting the access token.
The method in which the client utilizes the access token to authenticate with the AirVantage involves using the HTTP “Authorization” request header field RFC2617.
For example, replace {accessToken} by your access token in the Authorization header:
GET https://eu.airvantage.net/api/v1/systems
Authorization: Bearer {accessToken}
Why you must not use a token as a parameter...
Another possibility is to send the access token in the HTTP request URI, the client adds the access token to the request URI query component. However, its use is not recommended, due to its security deficiencies.
For example:
https://eu.airvantage.net/api/v1/systems?access_token={accessToken}&name=xxx
Because of the security weaknesses associated with the URI method, including the high likelihood that the URL containing the access token will be logged, it SHOULD NOT be used unless it is impossible to transport the access token in the “Authorization” request header field.
Develop an application
Once you created the API Client and picked the best OAuth2 flow depending on your application, you can start calling the AirVantage API using the language of your choice (Java, Javascript, Ruby, Python…).
AirVantage provides all the features in its API. Then it’s really easy to integrate with your backend to automate your flows.
Have a look on the API & Examples page to find API Libraries in several languages to illustrate what will be described below.
We will now see in more details the use of AirVantage APIs via a simple use case: retrieve the system with a given ICCID and activate it.
Getting your system from its ICCID
In AirVantage, the main entity is the system. For connectivity, the system is simply composed of one subscription only, for which the ICCID is a unique identifier.
First, you will want to get the system that correspond to a specific ICCID and its information. One of the most important field is the system uid which is used by API to identify your system and that you will need to use later for activation.
- Search a system and get its information, using the API:
> GET https://eu.airvantage.net/api/v1/systems?subscription=identifier:89332401000003052210&fields=name,uid,subscription,lifeCycleState&access_token={token}
- Copy the system uid field from the response below:
{
  "items": [
    {
      "uid": "07620b74710042818257687443aea4e1",
      "lifeCycleState": "INVENTORY",
      "subscription": {
        "state": "INVENTORY",
        "identifier": "89332401000002977052",
        "uid": "a222db5b2c104fd6b7de09323b591839",
        "mobileNumber": null,
        "networkIdentifier": null,
        "ipAddress": null,
        "technology": "4G",
        "operator": "SIERRA_WIRELESS",
        "appletGeneration": "V4",
        "confType": "LITE",
        "formFactor": "2FF"
      },
      "name": "SIM 89332401000002977052"
    }
  ],
  "count": 1,
  "size": 1,
  "offset": 0
}
Activating the System
Now that you can identify your system, let’s see how you can activate it.
When you activate, you will need to pass the offer on which to activate as a parameter of the activation API call. Let’s first see how to retrieve this offer.
Offer uid
- To list all offers available to you along with their uid, use the following API call:
> GET https://eu.airvantage.net/api/v1/offers?access_token={token}
- Copy the uid corresponding to the offer on which you want to activate the system in the response:
[
  {
    "limit": 10485760,
    "uid": "a11eb95b4e734058919b0f212eefc5e9",
    "types": [],
    "name": "10MB EU Bundle"
  },
  {
    "limit": 1048576,
    "uid": "7edaf87c9c414325859f8e1923c0a2cd",
    "types": [],
    "name": "1MB EU Test Ready Bundle"
  },
  {
    "limit": 2097152,
    "uid": "6b9a3055c4cc468f9c72c0213dc4fe32",
    "types": [],
    "name": "2MB EU Bundle"
  }
]
Activation launch
Now you have all the information to effectively activate your system. Let’s assume you want to activate the system on the 10MB EU Bundle offer, the activation API call to be done is the following:
> POST https://eu.airvantage.net/api/v1/operations/systems/activate&access_token={token}
Content-Type: application/json
...
{
    "systems" : {
        "uids" : ["07620b74710042818257687443aea4e1"]
    },
    "offerId" :"a11eb95b4e734058919b0f212eefc5e9"
}
You have now triggered the activation on the targetted SIM!
Test your application
OK! So now you have a running application, don’t forget to deploy it on a web server that can be accessed by AirVantage. For a better integration with AirVantage, HTTPS access to your application is recommended.
All set!
Now that you can activate your SIMs using the APIs, you can also implement other processes to fully integrate AirVantage to your IT. Take a look at the AirVantage API Reference to go beyond this example.
Have a look to the API Libraries & Examples to find more sample applications!
You can also go further and for instance create:
- Web applications to display your business data
- Mobile applications to control your SIMs from your smartphone
- Your own business dashboards using existing tools
- Integrate in your IT
- Integrations with other online services like Salesforce, Zoho, Zapier, etc