How to launch a bulk activation?
If you have only a few new SIMs/systems to Activate, you can simply do so from the connectivity management portal by selecting the SIMs and then clicking the ‘Activate’ button. If you have a larger number of SIMs to activate you may need to use one of the following techniques:
 Initializing Table Of Contents...
Use filters to select SIMs to activate
If you have a large number of SIMs to activate - hundreds or even thousands - you will find it useful to apply single or multiple filters to the list before selecting the SIMs to activate.
The first useful filter to consider is the State one, as you can only activate SIMs that are in the Inventory state of the lifecycle. To filter the SIM list to show only these SIMS, simply click the Inventory segment on the State chart. This applies a State = Inventory filter, as shown below.
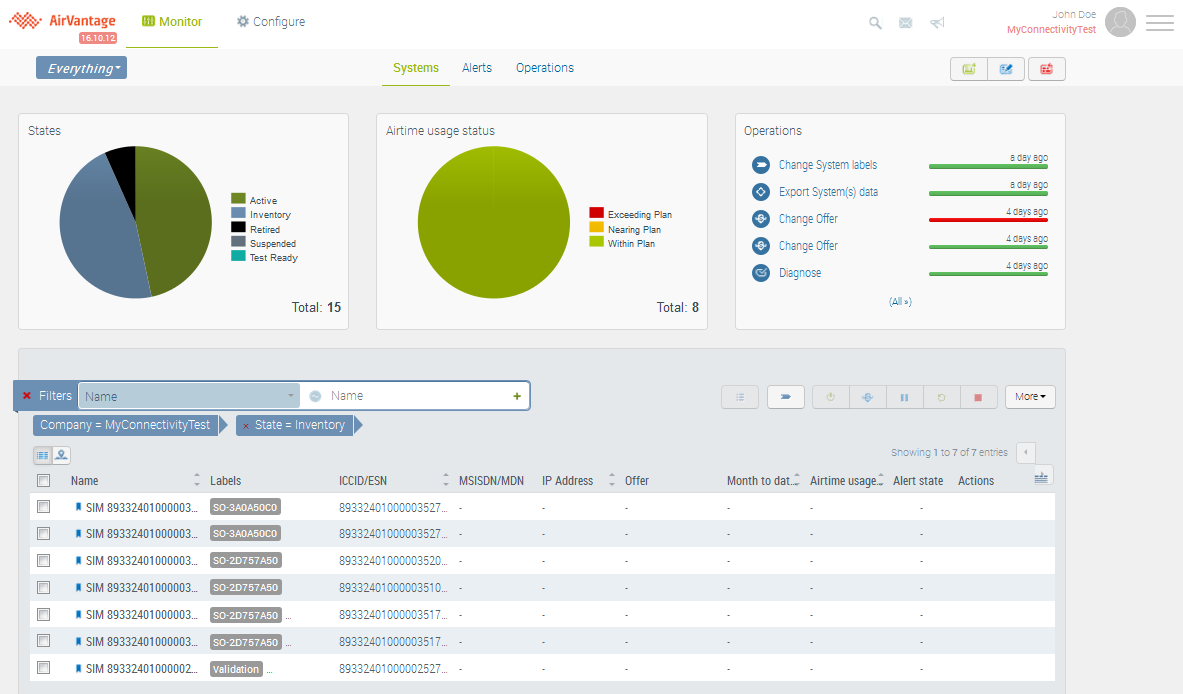
You can also add a filter based on Label in the grid. Multiple filters can be applied on the fleet: filter on state + with a specific label for example.
Another useful filter is the one on ICCID. You can select all ICCIDs that start with a specific pattern. In this example, the filter will match all SIMs whose ICCID series starts with these 13 digits:

Activate all SIMs from a specific order
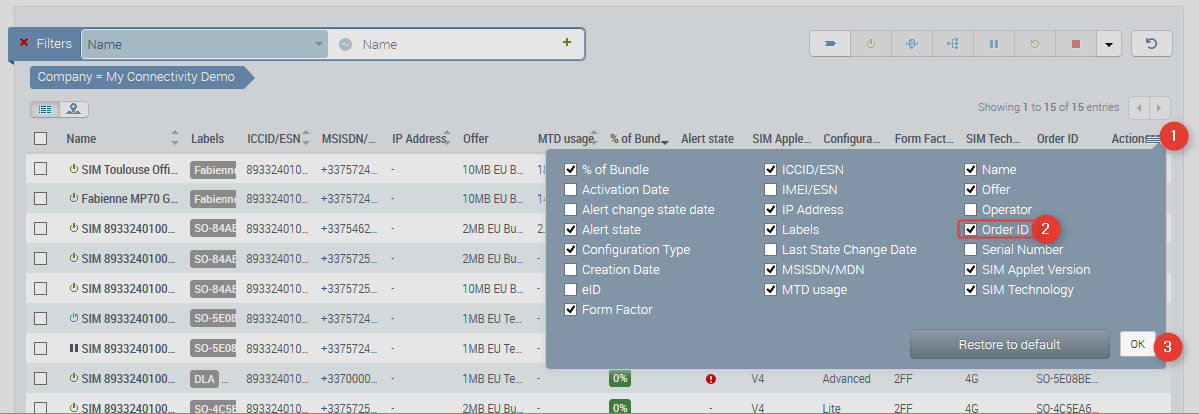
One common use case it when you need to activate all the SIMs from a given order. This can be done by filtering the list down to those SIMs matching a given Order ID.
First display the Monitor section of your Connectivity Portal. Use the filter bar, select filter on Order ID and then provide as input the orderID you are looking for. The orderID is starting in ‘SO-’ (SIM Order) and can be displayed by adding the column Order ID to your grid, as shown below:
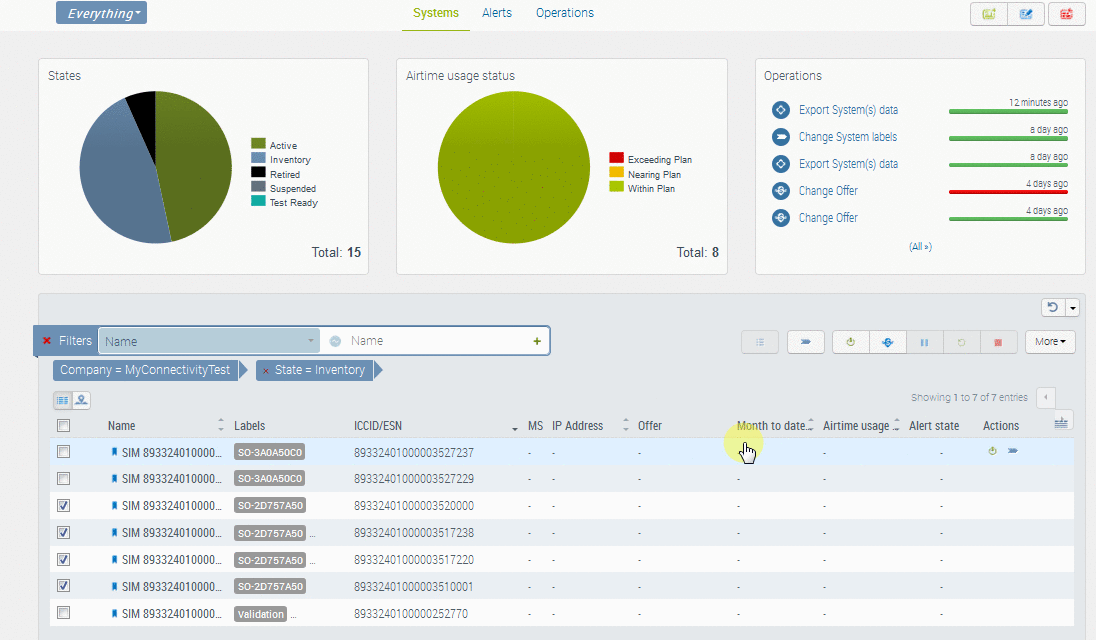
Once you have filtered the SIMs/Systems with a specific Order-ID, you just have to select all SIMs from this list by selecting the top checkbox, then click on Activate. As an alternative to selecting all SIMs you can also choose only one or more among the filtered selection.
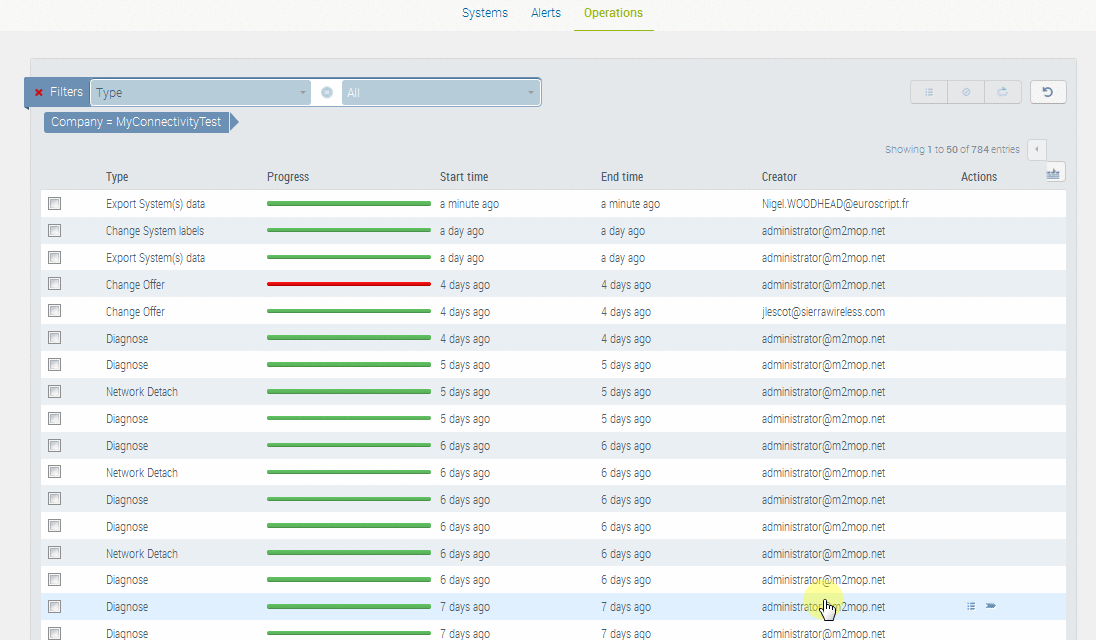
Once launched the status of the Activate operation can be checked as usual in the Operations list.

Export SIM data for advanced selection and activation
Sometimes you may wish to apply more sophisticated sorting and/or filtering to a list of SIMs, in order to correctly identify those you wish to activate. You can use the Export data option to create a CSV file that you can then edit in a tool such as Excel.
First select the range of SIMs whose data you want to export. For example all those corresponding to a give Order, or taggged with a custom Label. Then select More > Export Data, and specify the fields to include in the CSV file. Watch how:
You can retrieve and export the CSV file from the Operations screen. Select Actions > View for the completed Export System(s) data operation, click the link to retrieve the CSV file, then Open or Save it. Watch how:
Now you can import it into Excel or a similar tool. For example, open a new workbook in Excel and select the File > From Text icon, which launches the Text file Import Wizard.
- Select the CSV file you saved
- Specify that it is comma-delimited
- Data in some columns will be imported better if you specify that it should be in Text format rather than Number (for Subscription IDs, for example) Watch how:
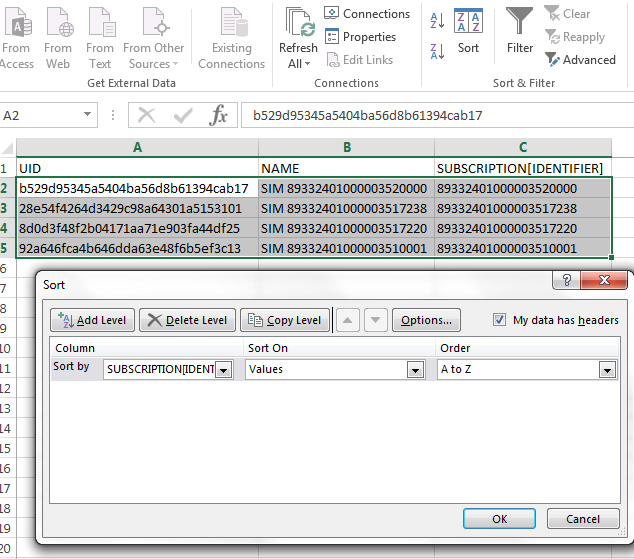
Suppose we now want to Sort this - for instance, on the Subscription ID column. Use the Excel Sort tool.
You can of course define more complex multi-column Sorts, and/or Filters in Excel, to apply to your data.
Once you have identified the list of SIMs you want to activate, in AirVantage, you can apply a label to those SIMs to further take action on this selection. Let’s take as an example, some SIMs that we have identified from a Sort operation in Excel.
In AirVantage, select the Change Labels action.

Select the field to be filtered by the new Label, most likely ICCID/ESN, then simply do a Copy/Paste from your selection in Excel into the list field.
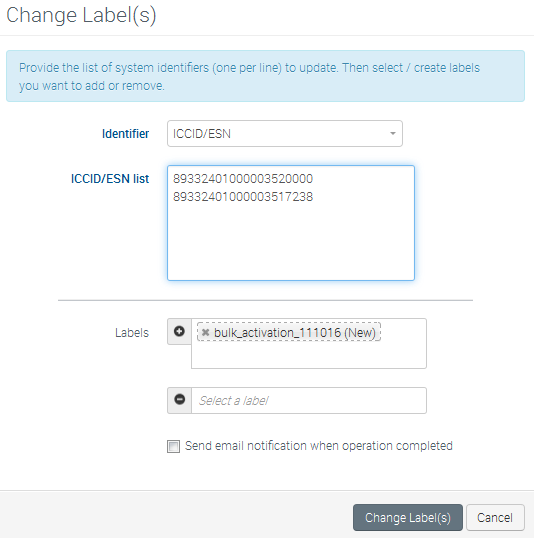
You can now apply the Label by Adding a Label filter and typing part or all its name…
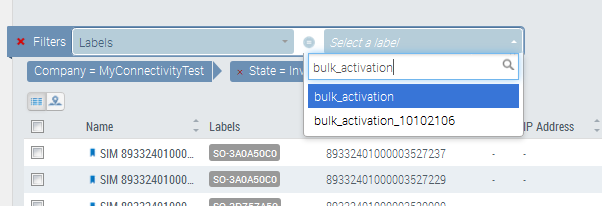
Here we have applied the new Label Filter, you can use the check box at the top left of the list to select all SIMs/systems with the created label. Once done, you are ready, now simply click on Activate!

Follow activation progress
Once you launched activation on the offer of choice, you can follow the progress of the activation as any other operation in the Operation widget. If a large number of systems has been selected, this may operation take some time to complete (typically a few minutes per SIM).
You can click on the operation details to view the status per SIM: