Configuring OpenVPN
You can configure the router as an OpenVPN client, which enables clients on one of the router’s LAN segments to access a VPN without those clients needing to install OpenVPN. OpenVPN uses SSL/TLS to facilitate key exchange and supports up to 256-bit encryption. OpenVPN is capable of crossing network address translators (NATs) and firewalls. Peers can authenticate each other using PKI certificates, along with pre-shared TLS keys, and username and password.
Notes:
- AirLink OS supports connecting to one or more OpenVPN servers running OpenVPN 2.5.x or 2.6.x
- Only one OpenVPN tunnel is currently supported
- Only UDP traffic is currently supported

 Initializing Table Of Contents...
Prerequisites
- One or more OpenVPN server(s) running OpenVPN 2.5.x or 2.6.x.
- OpenVPN server(s) must be properly configured with ports, firewall rules, NAT tables rules, IP forwarding, and so on. For information on configuring OpenVPN servers, see the OpenVPN community resources here.
- OpenVPN server configuration settings must be known prior to configuring OpenVPN on the client AirLink router, so that server and client OpenVPN settings match. Mismatched settings can result in unexpected behavior.
- The Root CA certificate for the OpenVPN server must be loaded on the AirLink router. See the CERTIFICATE setting below.
OpenVPN Site-to-Site Network Topology

By default, the server/client LAN segments must be configured in the server configuration for those LAN segments to be accessible over the VPN (See this page for more information). However, enabling the MASQUERADE ALL TUNNEL TRAFFIC setting (see below) can allow the client LAN segments to be accessed without server-side configuration.
Configuring OpenVPN
To configure an OpenVPN tunnel:
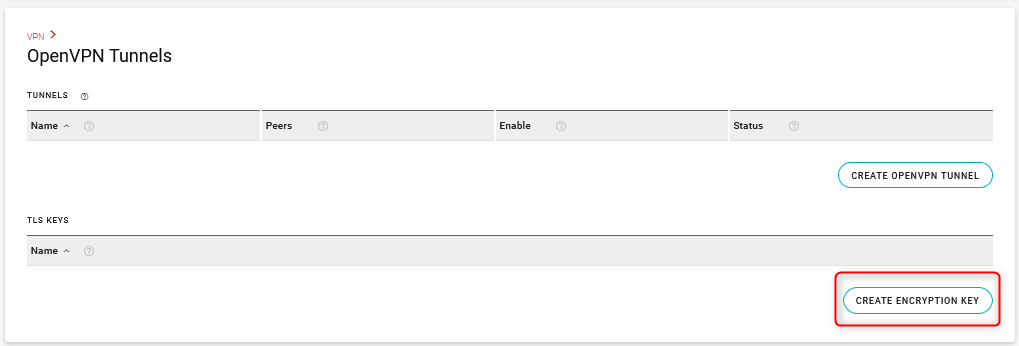
Go to Networking > VPN > OpenVPN Tunnels.
Click CREATE OPENVPN TUNNEL. The Create OpenVPN Tunnel screen appears, as shown on the right.
Note: The CREATE OPENVPN TUNNEL button becomes unavailable after you have created one OpenVPN tunnel.
Enter the settings from the OpenVPN Tunnel Configuration Settings table below, as required.
Click CREATE.

Create OpenVPN Tunnel settings
| SETTING | DESCRIPTION | RANGE | DEFAULT |
|---|---|---|---|
| NAME | Name for the tunnel (OpenVPN Tunnel 1, for example). | n/a | n/a |
| PEERS |
Enter the IP address (IPv4 or IPv6) or FQDN and port number of the remote OpenVPN server. The entry must include the IP address followed by the port number.
The OpenVPN client will only connect to one server at a time. You can enter multiple remote peer servers for redundancy. The router OpenVPN client will move on to the next host in the list if the connection fails (see PING INTERVAL and TUNNEL RESTART below). |
n/a | n/a |
| ENCRYPTION ALGORITHM | Select the algorithm for encrypting OpenVPN traffic. |
|
aes256gcm |
| AUTHENTICATION ALGORITHM | Displays the message digest algorithm used to authenticate OpenVPN traffic. The Authentication Algorithm is automatically selected to match the selected ENCRYPTION ALGORITHM. |
|
sha384 |
| CERTIFICATE |
Select the server root CA (Certificate Authority) certificate, client certificate, and client key. If the certificate is not present:

|
n/a | n/a |
| ADDITIONAL TLS AUTHENTICATION |
Enable or disable adding a layer of HMAC authentication on top of the TLS control channel to mitigate DoS attacks and attacks on the TLS stack. Click the field to add a previously uploaded tls-auth key (from the TLS KEYS table) or click CREATE to upload a new tls-auth key. See this article for information on generating this additional tls-auth key. 
|
n/a | n/a |
| USER NAME |
Enter the user name required for client authentication. Required if the OpenVPN server requires dual authentication (certificate and username/password). |
n/a | n/a |
| USER PASSWORD |
Enter the user password required for client authentication. Required if the OpenVPN server requires dual authentication (certificate and username/password). |
n/a | n/a |
| USER NAME/PASSWORD RETRY |
Enable or disable user name/password retries if there is an authentication error after sending the credentials. When disabled, the OpenVPN client exits with fatal error after a verification error. When enabled, the OpenVPN client will retry the connection after a verification error. |
Disabled, Enabled | Disabled |
| MINIMUM TLS VERSION |
Minimum TLS version accepted from peer. Only TLS version 1.2 or higher is supported. This option is not configurable but is displayed so that you can verify the minimum TLS version available. |
1.2 | 1.2 |
| TUNNEL MTU |
MTU sets the Maximum Transmission Unit (in bytes) for packets in the tunnel. You may have to decrease the tunnel MTU to adjust for the increased packet size for OpenVPN packets. OpenVPN adds headers to each packet, which may cause packets to be fragmented or dropped if they exceed the transport MTUs in other network interfaces. Certain types of UDP traffic (video or audio, for example) may be dropped if the packet size exceeds the Tunnel MTU. |
100 to 1500 | 1500 |
| MSS FIX |
You can set MSS FIX (in bytes) if TUNNEL MTU does not resolve issues with dropped packets. MSS FIX limits UDP packet sizes to the configured value. MSS FIX does not need to be set on the server side, and it may also have asymmetric values between the client and server. |
0 to 1500, set to 0 to disable | 1400 |
| FRAGMENT |
You can set FRAGMENT (in bytes) if TUNNEL MTU does not resolve issues with dropped packets. This setting enables fragmentation performed by OpenVPN’s internal algorithm. FRAGMENT must either be set on both the client side and the server side, or not set on the client side and server side. When it is configured, it may have asymmetric values. |
0 to 1500, set to 0 to disable | 1300 |
| ALLOW DYNAMIC PEER IP | Allow the remote peer to change its IP address/port number, due to DHCP, for example. | Off, On | Off |
| RE-NEGOTIATION (SECONDS) | Set the interval at which the OpenVPN client will renegotiate the data channel key. Note the smaller of both the client and server configurations is used. | 0 to 604800, set to 0 to disable |
86400 (24 hours) |
| PING INTERVAL (SECONDS) |
Set the keep-alive sent by the client. VPN Link Monitor applies only for IPsec tunnels, so OpenVPN has its own built-in ping monitor. If no traffic is detected for 10 seconds, the OpenVPN client will ping the remote server. |
0 to 300 | 10 |
| TUNNEL RESTART (SECONDS) | Enter the time (in seconds) for a tunnel restart. If no response is received from the remote peer after 60 seconds, the tunnel is restarted. | 0 to 1500 | 60 |
| WAN INTERFACES |
Select WAN interfaces for the tunnel to use. OpenVPN uses these interfaces in the order they’re selected, and are subject to the router’s Multi-WAN settings. If you leave WAN INTERFACES at the default settings, the router will use the “Default IPv4 Traffic” and “Default IPv6 Traffic” Multi-WAN policies for OpenVPN traffic. If you select non-default settings for WAN INTERFACES, the OpenVPN tunnel name will appear in the VPN POLICIES FOR CLIENT TUNNELS table in Networking > Multi-WAN Policies, and you can apply any Multi-WAN rules to that policy. You can also view the current WAN status of the OpenVPN tunnel in the VPN POLICIES FOR CLIENT TUNNELS table. See the Multi-WAN page for more information. |
Any enabled WAN interface | default |
| FOLLOW SYSTEM LOG LEVEL |
Enable or disable following the log level verbosity set in System > Log Levels > VPN. If instructed by Semtech support, you can disable the setting to fine tune the log level for OpenVPN. Once disabled, a LOG LEVEL option appears. The log level can be selected from range 0 to 11, where level 0 is no logging and level 11 is maximum debug logging. |
Enabled, Disabled | Enabled |
| MASQUERADE ALL TUNNEL TRAFFIC |
Turn this setting on to automatically masquerade outgoing tunnel traffic with the local tunnel IP address. As noted in the introduction to this page, clients on one of the router’s LAN segments can access a VPN without those clients needing to install OpenVPN. To enable this to happen without any server-side configuration of remote LAN segments, you must enable MASQUERADE ALL TUNNEL TRAFFIC. For example, in the network diagram above, with MASQUERADE ALL TUNNEL TRAFFIC enabled, outgoing traffic would be masqueraded to 10.0.0.2. |
On, Off | Off |
You can monitor the OpenVPN Tunnel’s operation in the Status column in the TUNNELS table. Possible status messages include:
- Not ready
- Enabled (not connected)
- Connected (showing the Remote peer, and the local and remote endpoints)
- Disconnected (invalid configuration)
- Disabled (not Enabled in the UI)
Additional status messages may appear that originate from the OpenVPN server.

TLS Keys
OpenVPN supports additional authentication using TLS Keys, which are like certificates in that you can create a key and share it with a client tunnel. See this article for more information.
You can add TLS keys in the TLS KEYS table and then add them to your OpenVPN configuration.
Click CREATE ENCRYPTION KEY.
The Create Encryption Key screen appears.
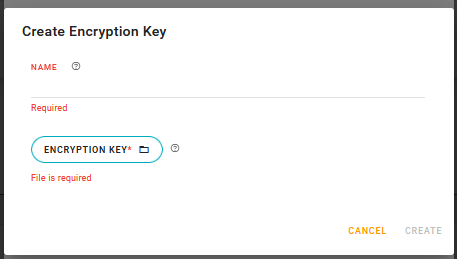
In the Create Encryption Key screen:
a. Enter a NAME for the key.
b. Click ENCRYPTION KEY to upload the key.
Click CREATE.

