Enable a connection to AirVantage using REST
 Searching...
This article explains the different steps to enable AirVantage connection for any device using REST.


Step 1: Setup Hardware
- Plug the device to USB.
- Set up Internet on your device with an ethernet cable.
- Install the device developer tools
Step 2: Design your application
An application model aims to explain to AirVantage how to deal with the device about communication and authentication and managing the data: variable, settings or commands. If you don’t supply such information, the server will ignore all the communication from your device.
Define your data
The first step is to create the application model. You can create a file named model.app with the following content, you just need to change the type value with a unique identifier for your application and the name and revision with the apprioriate value for your use case.
- First of all, to be able to send and receive data, you have to describe your data to AirVantage. Here is the description, you just need to change the type value with a unique identifier for your application and the name and revision with the appropriate values for your use case.
- You can modify the
<data>area. Once it matches your needs, save everything as model.app.
Don’t modify the asset id as it is used in the code source application or modify it accordingly

<?xml version="1.0" encoding="ISO-8859-1"?>
<app:application
        xmlns:app="http://www.sierrawireless.com/airvantage/application/1.0"
        type="com.test.airvantage.app"
        name="AirVantage Greenhouse"
        revision="0.0.1">
 <capabilities>

  <communication>
   <protocol comm-id="SERIAL" type="REST" />
  </communication>

  <data>
   <encoding type="REST">
    <asset default-label="Greenhouse" id="machine">
      <variable default-label="Temperature" path="temperature"
                                      type="double"/>
      <variable default-label="Luminosity" path="luminosity"
                                      type="double"/>
      <setting default-label="Threshold" path="threshold"
                                      type="int"/>
     </asset>
   </encoding>
  </data>
  </capabilities>
</app:application>
- Zip this file, mine is named model.app.zip
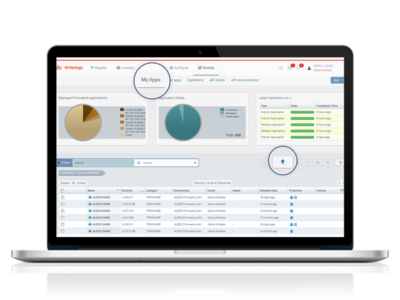
- Go on Develop Activity > My Apps
- Click on the Release button
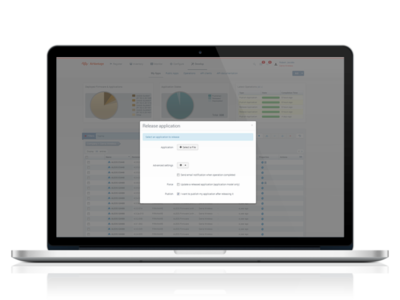
Release your application
- Select your file model.app.zip
- Open Advanced settings and select I want to publish my application after releasing it
- Finally, click on Start
Edit your system
- Go to Inventory > Systems
- Select your system and click on the Edit icon

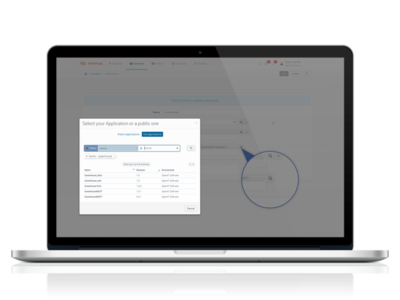
Search your application
- Click on Search application
- In the new dialog box, select the My Application tab
- Search your application using its name (AirVantage Greenhouse)
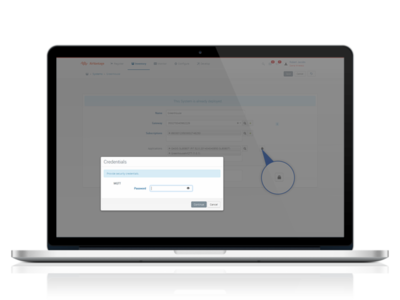
Associate your application to your system
- Click on the application to select it.
- Click on the padlock and configure the password.
- Click on Save in the right top corner
- Click on the Monitor icon to monitor your system
Step 3: Implementing an application
Once your device is registered in AirVantage, you can start developing the embedded application that will use the REST protocol to communicate with AirVantage. Here are the different calls to integrate in the embedded application to send and receive data with AirVantage:
Send and Receive data
Once your device is registered in AirVantage, you can start developing the embedded application that will use REST API for devices to communicate with AirVantage. Here are the different calls to integrate in the embedded application to send and receive data with AirVantage:
Install tools
You can install Postman for Chrome or REST Client for Firefox. These tools allow you to use REST API with your browser to test the communication.
Authentication
The REST API for devices uses HTTP Basic Authentication to authenticate devices. So you need to specify the Authentication header for each API call. The username is the serial number of the gateway in AirVantage and the password is the one set during the creation of the system. Then you need to combine the two into a string “username:password” and encode the resulted string using Base64. Finally, you specify the Authentication header in the API calls.
Authorization: Basic dG90bzp0b3Rv
Send data to AirVantage
You can use the Messages API to send data from the device to AirVantage. A message can contain several data and several datapoints per data. Then you can easily send a complete status or historical values in one message.
Request:
POST https://na.airvantage.net/device/messages
Authorization: Basic dG90bzp0b3Rv
Content-Type: application/json
[
  {
    "machine.temperature": [{
      "timestamp" : 1349907137000,
      "value" : "23.2"
    },
    {
      "timestamp" : 1349908137000,
      "value" : "24.5"
    },
    {
      "timestamp" : 1349909137000,
      "value" : "22.9"
    }]
  },
  {
    "machine.threshold": [{
      "timestamp" : 1349907137000,
      "value" : "30"
    }]
  }
]
This message sends 3 values for the temperature with different timestamp and one value for the threshold parameter.
Once AirVantage receives this message, data are stored and can be accessed by the Data API on System (Last datapoints, Historical aggregated datapoints, Historical raw datapoints, Export datapoints)
Receive tasks from AirVantage
A device can not only push data to AirVantage but you can also use AirVantage to request the device to execute some tasks. Currently the REST API for devices supports 2 kind of tasks: read and write.
A read task requests the device to send back to the server the current values for a set of data. It’s a way for a user to request the device to “refresh” the value of a data on the server. This operation is only for variables and settings. To create this operation from AirVantage API, you need to call the “Retrieve data” API (see documentation of System API).
A write task requests the device to change the value of a data locally on the device. It’s a way to interact with the device and change the behaviour of the embedded application. This operation is only available for settings. To create this operation from AirVantage API, you need to call the “Apply settings” API (see documentation of System API).
The device needs to call periodically the following API:
Request:
GET https://na.airvantage.net/device/tasks
Authorization: Basic dG90bzp0b3Rv
Response:
HTTP/1.1 200 OK
Content-Type: application/json
[
  {
    "uid" : "3c12547b613740adb686271bdc8f097c",
    "timestamp" : 1348836320188,
    "read" : ["machine.temperature"]
  },
  {
    "uid": "8006cc58ba2141f69161a78f1bfdea1d",
    "timestamp": 1348836320566,
    "write" : [{"machine.threshold" : 25}}]
  }
]
In this example, AirVantage is asking to the device to send the current temperature and requests to change the value of the threshold to 25. Once the API is called, AirVantage assumed the tasks have been retrieved by the device and then acknowledge automatically the tasks. In the current example, the device will probably directly call the message API to send back to AirVantage the last value of the temperature.
Next Step
Continue the tutorial by using tools supplied by AirVantage to test your communication with your device.