Enable connection using an HL6 to AirVantage using MQTT
This article explains the different steps to enable AirVantage connection using an HL6 using MQTT.
Prerequisite
- Have a basic knownlege of MQTT. See the other tutorial about MQTT for airvantage: MQTT API.
- Have a basic knownlege of Ruby.
Step 1: Setup Hardware
- Plug the HL6 to USB
- Set up Internet on your device by configuring the APN
Step 2: Design your application
An application model aims to explain to AirVantage how to deal with the device about communication and authentication and managing the data: variable, settings or commands. If you don’t supply such information, the server will ignore all the communication from your device.
Define your data
- First of all, to be able to send and receive data, you have to describe your data to AirVantage. Here is the description, you just need to change the type value with a unique identifier for your application and the name and revision with the appropriate values for your use case.
- You can modify the
<data>area. Once it matches your needs, save everything as model.app.
Don’t modify the asset id as it is used in the code source application or modify it accordingly
<?xml version="1.0" encoding="ISO-8859-1"?>
<app:application
        xmlns:app="http://www.sierrawireless.com/airvantage/application/1.0"
        type="com.test.airvantage.app"
        name="AirVantage Greenhouse"
        revision="0.0.1">
 <capabilities>

  <communication>
   <protocol comm-id="SERIAL" type="MQTT" />
  </communication>

  <data>
   <encoding type="MQTT">
    <asset default-label="Greenhouse" id="machine">
      <variable default-label="Temperature" path="temperature"
                                      type="double"/>
      <variable default-label="Luminosity" path="luminosity"
                                      type="double"/>
      <setting default-label="Threshold" path="threshold"
                                      type="int"/>
     </asset>
   </encoding>
  </data>
  </capabilities>
</app:application>
- Zip this file, mine is named model.app.zip
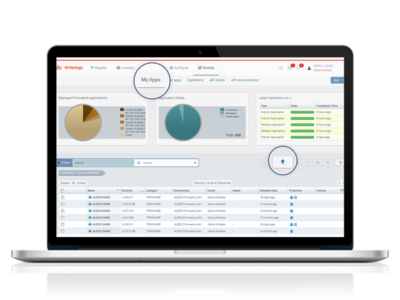
- Go on Develop Activity > My Apps
- Click on the Release button
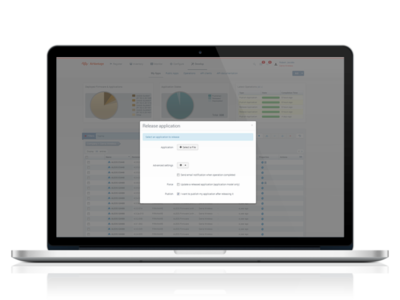
Release your application
- Select your file model.app.zip
- Open Advanced settings and select I want to publish my application after releasing it
- Finally, click on Start
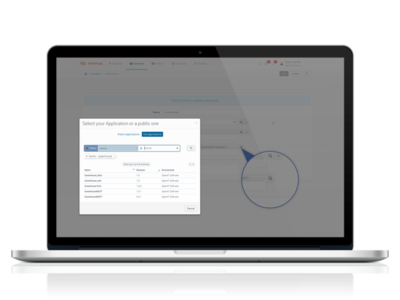
Search your application
- Click on Search application
- In the new dialog box, select the My Application tab
- Search your application using its name (AirVantage Greenhouse)
Associate your application to your system
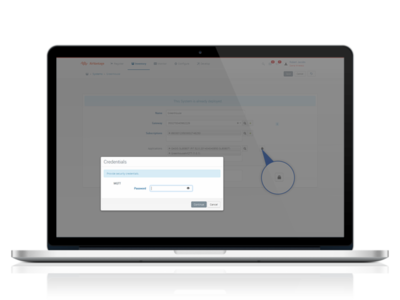
- Click on the application to select it.
- Click on the padlock and configure the password.
- Click on Save in the right top corner
- Click on the Monitor icon to monitor your system
Step 3: Implementing an application
It is now time to write an application for our BeagleBone. You can have a look about using MQTT in AirVantage, if you want to have a description about the serialisation details.
Initialize the MQTT channel:
At first, we need to create a MQTT client instance with the right congfiguration.
# Prepare MQTT credentials for device
deviceId = 'DEVICE_SERIAL'
app_password = 'APP_PASSWORD'
With same serialnumber and password used for system creation on AirVantage.
Send data to Airvantage
We will send three temperature values and one threshold value. The variables string identifier machine.temperature and machine.threshold are the same as definied in your system application model.
require 'mqtt'
require 'json'

# Prepare MQTT credentials for device
deviceId = 'DEVICE_SERIAL'
app_password = 'APP_PASSWORD'

# Build JSON payload for MQTT message
payload = JSON.generate [{'machine.temperature' => [ {'timestamp' => nil, 'value' => 28.97} ] }]
puts "MQTT payload: #{payload}"

# Connect MQTT client and publish JSON payload
MQTT::Client.connect(
    :remote_host => 'na.airvantage.net',
    :remote_port => 1883,
    :username => deviceId,
    :password => app_password
) do |c|
  bytes = c.publish(deviceId + '/messages/json', payload)
  puts "Published #{bytes.to_s} bytes."
end
Receive messages
This snippet handles two different messages sent by AirVantage. The first message contains an updated value of the threshold setting. The second message contains a request from AirVantage to get current temperature.
require 'mqtt'
require 'json'

# Prepare MQTT credentials for device
deviceId = 'DEVICE_SERIAL'
app_password = 'APP_PASSWORD'

# Build JSON payload for MQTT message
payload = JSON.generate [{'machine.temperature' => [ {'timestamp' => nil, 'value' => 28.97} ] }]
puts "MQTT payload: #{payload}"

# Connect MQTT client and publish JSON payload
MQTT::Client.connect(
    :remote_host => 'na.airvantage.net',
    :remote_port => 1883,
    :username => deviceId,
    :password => app_password
) do |c|
  bytes = c.publish(deviceId + '/messages/json', payload)
  puts "Published #{bytes.to_s} bytes."
end
Find the full sample in github and clone it!
Next step
Continue the tutorial by using tools supplied by AirVantage to test your communication with your device.
 Searching...


