Using REST API on Raspberry Pi
 Searching...
This article is about using AirVantage API for devices. It will focus on a device: the famous Raspberry Pi.


Step 1: Setup Hardware
Operating System & network access
Starting this tutorial, I assume you have flashed a Rapsbian
on your Raspberry Pi SD. To find it on the network, I used the Internet sharing capabilities of my Mac
and nmap.
$ sudo nmap -sn 192.168.2.0/24
Starting Nmap 6.40 ( http://nmap.org ) at 2013-11-25 16:49 CET
Nmap scan report for 192.168.2.6
Host is up (0.00070s latency).
MAC Address: B8:27:EB:76:EA:56 (Raspberry Pi Foundation)
Nmap scan report for 192.168.2.1
Host is up.
Nmap done: 256 IP addresses (2 hosts up) scanned in 2.02 seconds
This command shows us an unique Raspberry Pi available at 192.168.2.6.
Connect to Raspberry Pi
- Connect to the Raspberry Pi we just found is simple.
$ ssh 192.168.2.6
- Now, we are ready to perform some work.
Register your system
What is a system? A system represents: * Gateway/module which supplies the connectivity * SIM card which give the network access (if any) * Some applications running in the hardware (gateway/module/ any host like micro controler or processor)
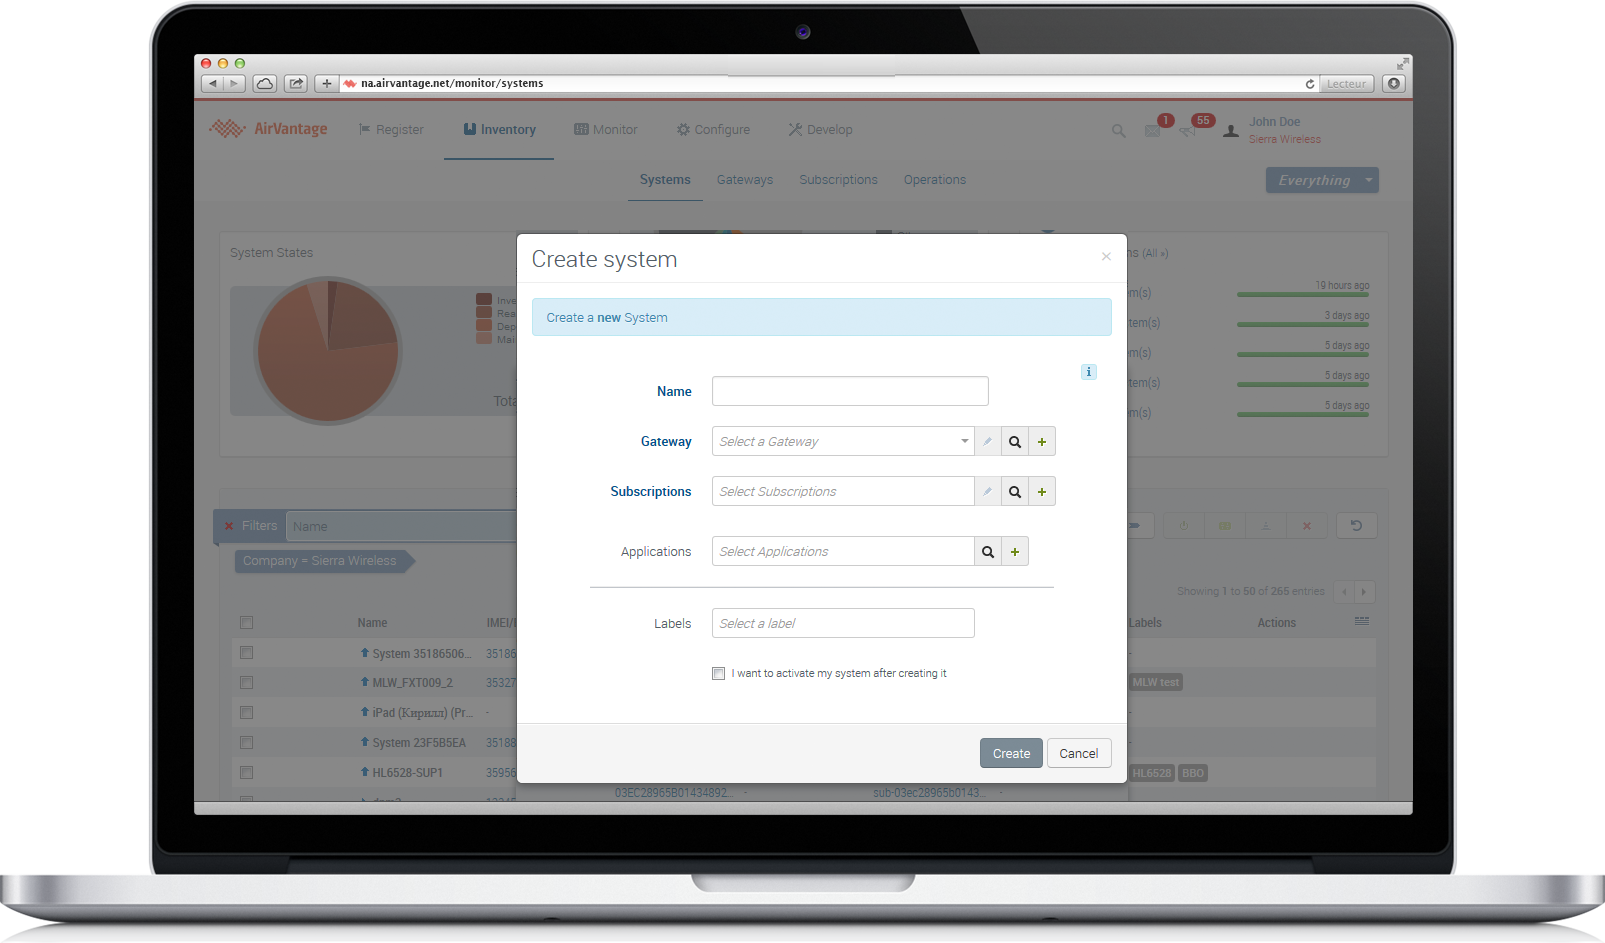
- Go to Inventory > Systems
- Click on the “Create” button above the table, a dialog is displayed:
- “System” field: Specify an optional name for your system.
- In the “Details” screen, create a new gateway and enter the identifier of the device in the “Serial Number” field: here, let’s use the IP Address without dot. For example:
19216826. Keep this number in mind, you will need it later! - You don’t need to create or use a subscription
- Check
I want to activate my system after creating it - Click on the create button
Step 2: Design your application
An application model aims to explain to AirVantage how to deal with the device about communication and authentication and managing the data: variable, settings or commands. If you don’t supply such information, the server will ignore all the communication from your device.
Define your data
- First of all, to be able to send and receive data, you have to describe your data to AirVantage. Here is the description, you just need to change the type value with a unique identifier for your application and the name and revision with the appropriate values for your use case.
- You can modify the
<data>area. Once it matches your needs, save everything as model.app.
Don’t modify the asset id as it is used in the code source application or modify it accordingly
<?xml version="1.0" encoding="ISO-8859-1"?>
<app:application
        xmlns:app="http://www.sierrawireless.com/airvantage/application/1.0"
        type="com.test.airvantage.app"
        name="AirVantage Greenhouse"
        revision="0.0.1">
 <capabilities>

    <communication>
      <protocol comm-id="SERIAL" type="REST" />
    </communication>

    <data>
      <encoding type="REST">
        <asset default-label="Greenhouse" id="machine">
          <variable default-label="Temperature" path="temperature"
                                                type="double"/>
          <variable default-label="Luminosity" path="luminosity"
                                               type="double"/>
          <setting default-label="Threshold" path="threshold"
                                             type="int"/>
        </asset>
      </encoding>
    </data>
  </capabilities>
</app:application>
Create your application package
- Zip this file, mine is named model.app.zip
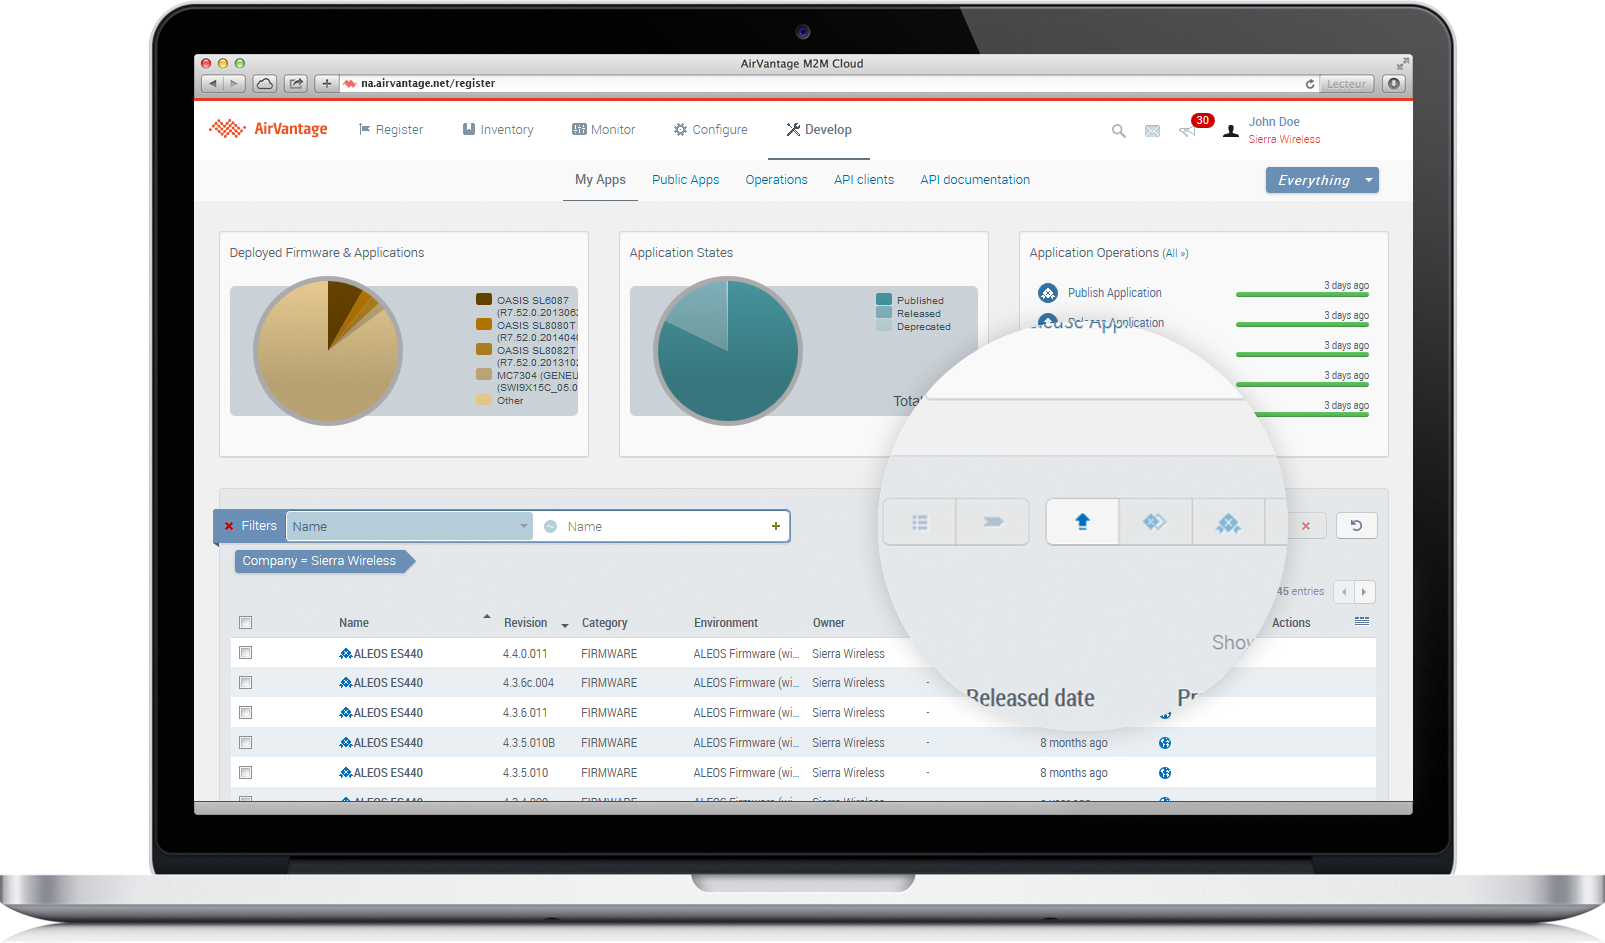
- Go on Develop Activity > My Apps
- Click on the Release button
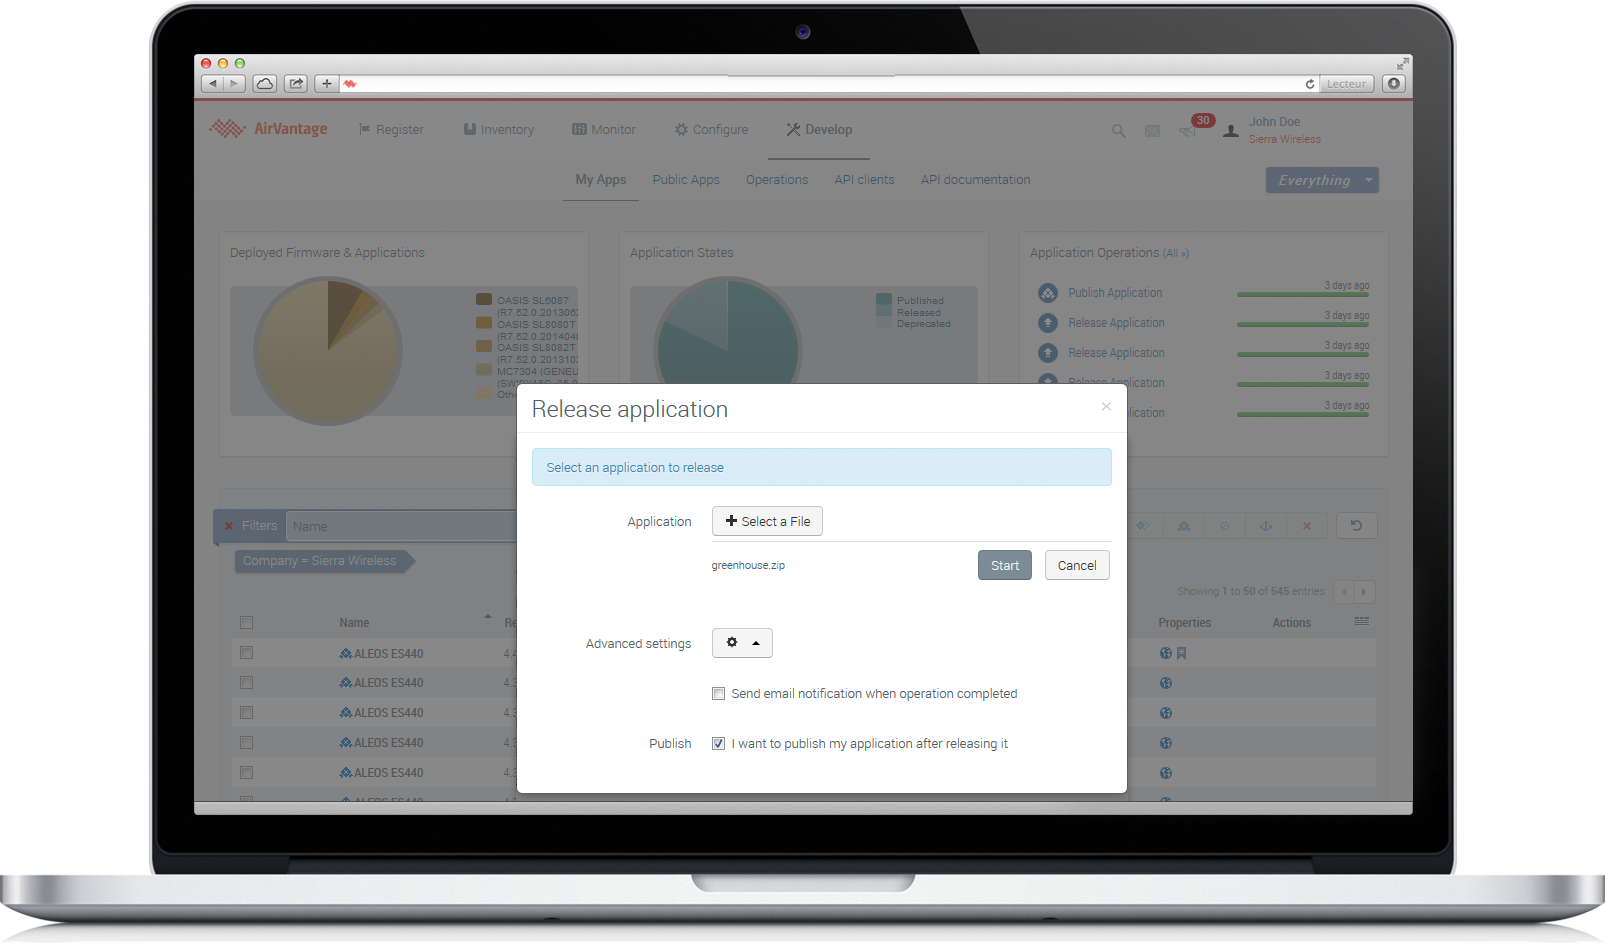
Release your application
- Select your file model.app.zip
- Open Advanced settings and select I want to publish my application after releasing it
- Finally, click on Start
Edit your system
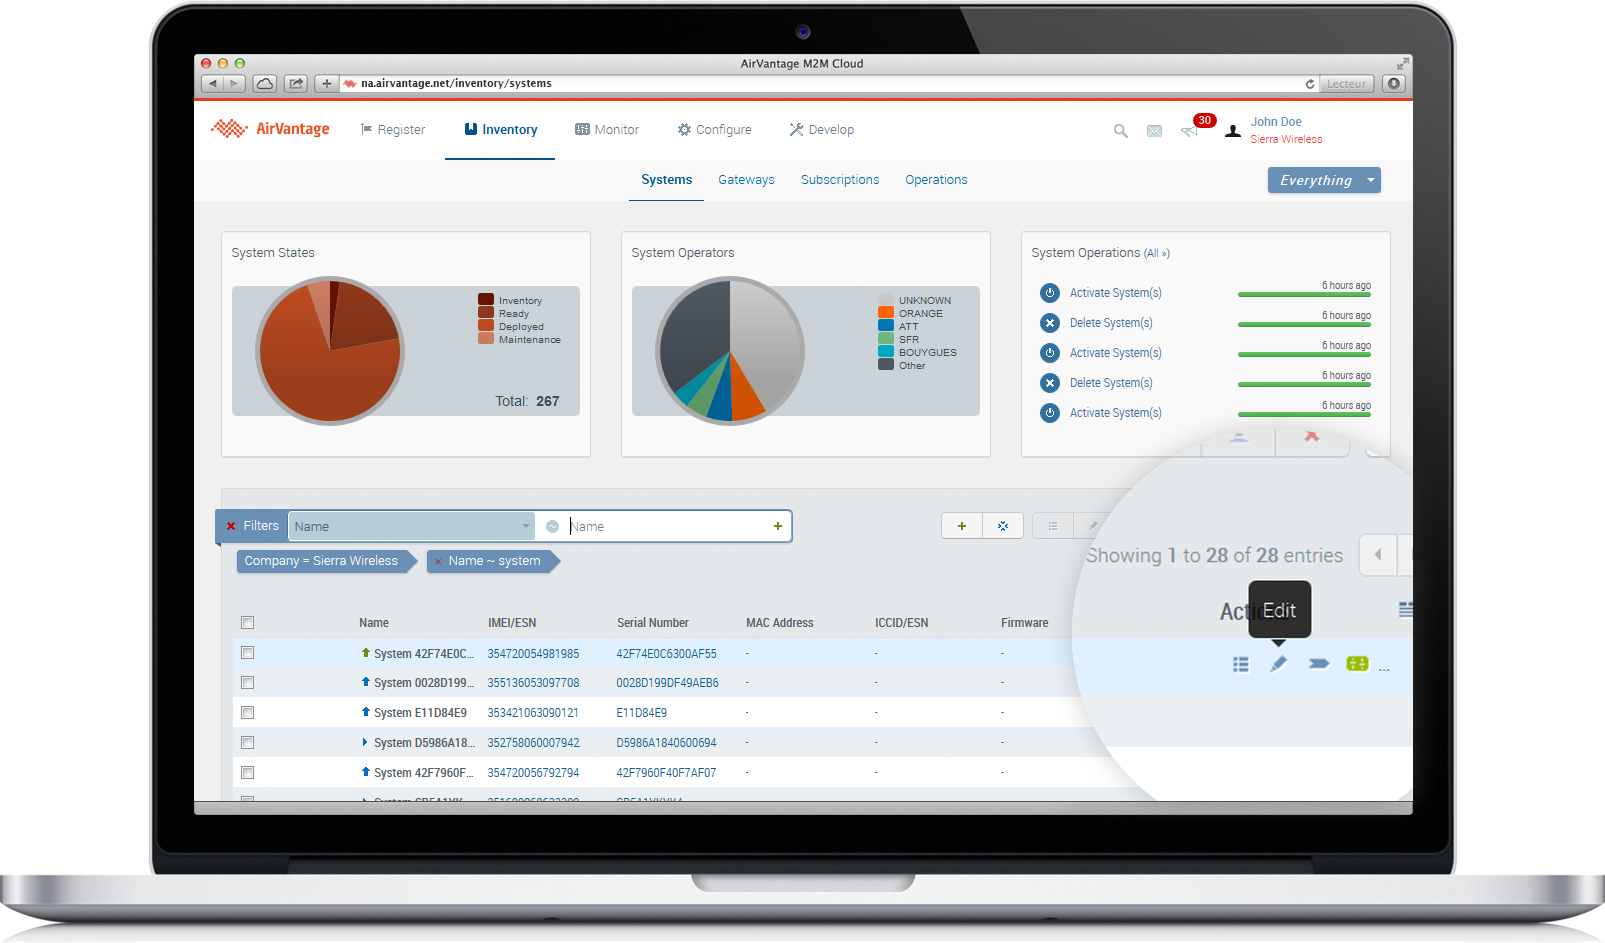
- Go on Inventory > Systems
- Select your system and click on the Edit icon
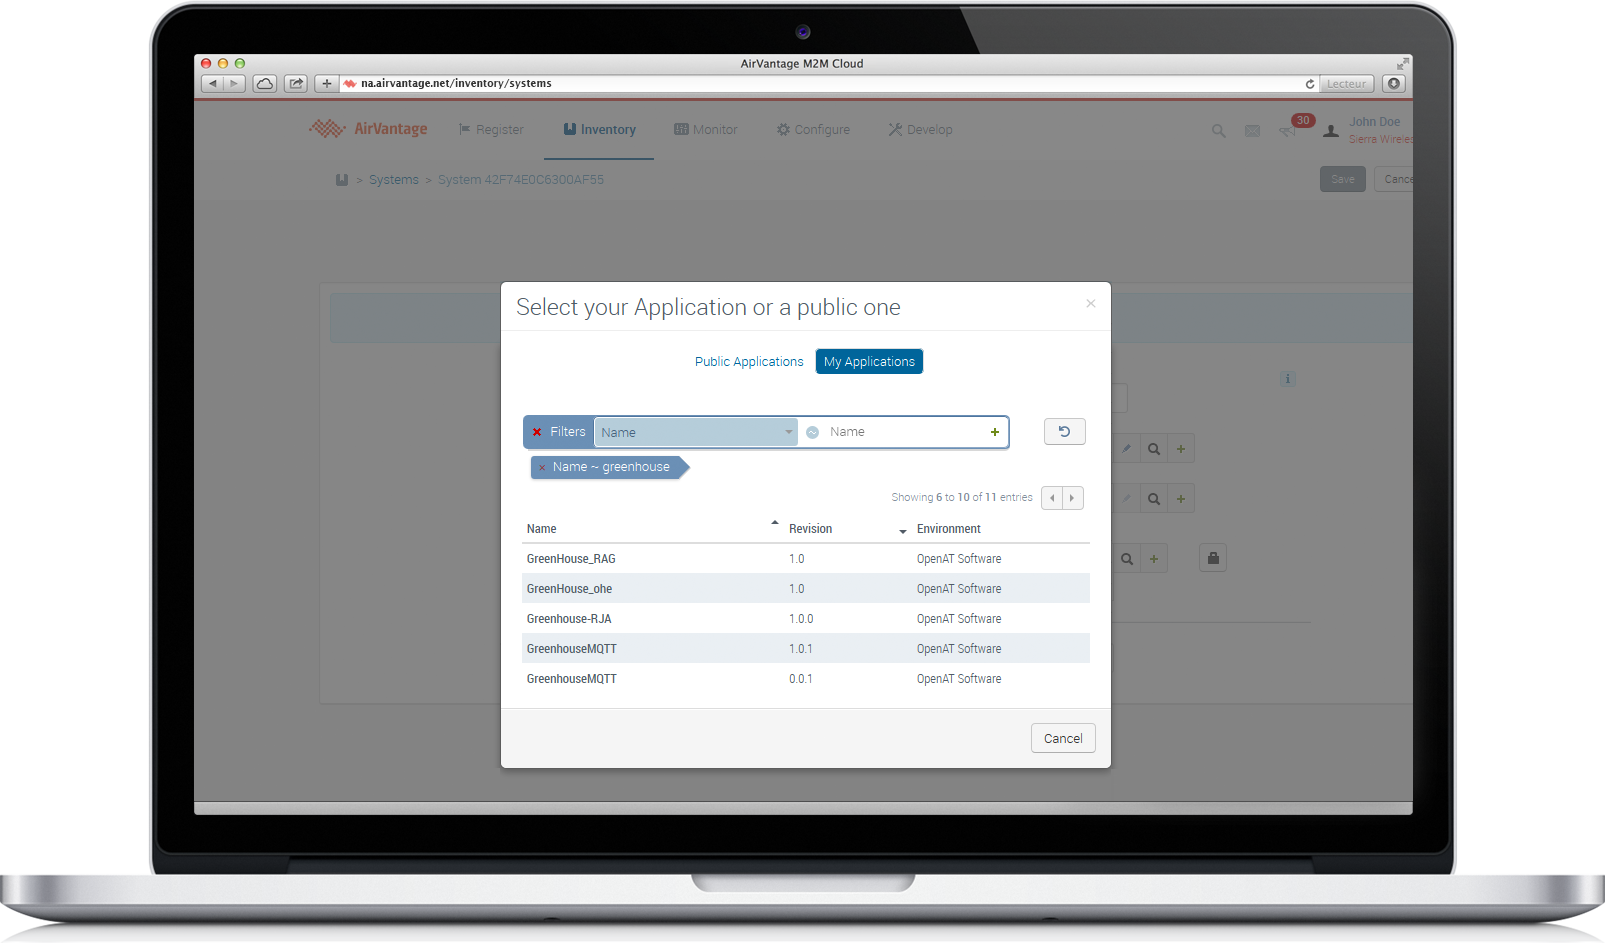
Search your application
- Click on Search application
- In the new dialog box, select the My Application tab
- Search your application using its name (AirVantage Greenhouse)
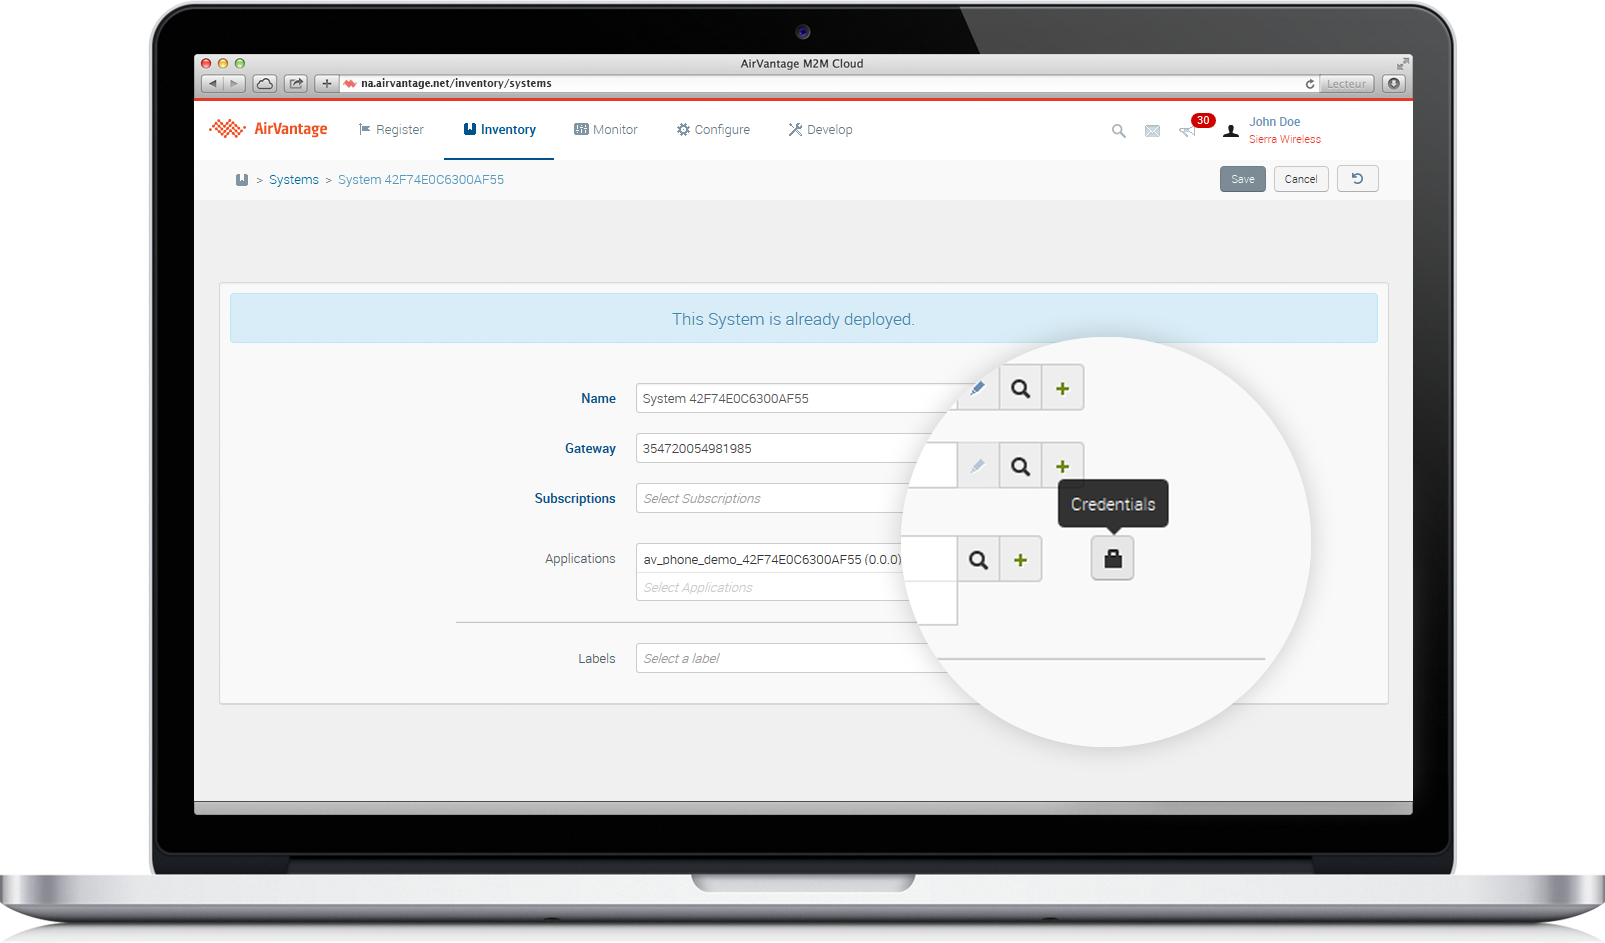
Associate your application to your system
- Click on the application to select it.
- Click on the padlock and configure the password. Keep the password in mind, you will need it later!
- Click on Save in the right top corner
- Click on the Monitor icon to monitor your system
Step 3: Implementing an application
It is now time to write an app for our Pi. I tend to like simple and Python’s Requests got my attention. So I choose to code with Python.
Install Requests
Before enjoying easy Requests, let’s install it.
# Installing Setuptools
wget https://bitbucket.org/pypa/setuptools/raw/bootstrap/ez_setup.py
sudo python3.2 ez_setup.py
# Installing pip
wget https://raw.github.com/pypa/pip/master/contrib/get-pip.py
sudo python3.2 get-pip.py
# Installing Requests
$ sudo pip install requests
Note: If you are wondering about
Setuptoolsandpip, they are just prerequisites for installing Requests .
The app
Here is the app wich communicate with AirVantage’s RESTful APIs:
#!/usr/bin/env python3.2
from argparse import ArgumentParser
import json
import requests
from time import time

# Parse arguments
parser = ArgumentParser(description="Using RESTful AirVantage.")
parser.add_argument("identifier",
  help="Your identifier, defined on AirVantage, here a trimmed a MAC address.")
parser.add_argument("password", help="REST password.")
args = parser.parse_args()

#
# Sending data to AirVantage
#
timestamp = int( time() * 1000)
# +1000 and +2000 are here to avoid aving several data points at the same time
data = [
  {
    "machine.temperature": [
      { "value" : "23.2", "timestamp" : timestamp },
      { "value" : "24.5", "timestamp" : timestamp + 1000 },
      { "value" : "22.9", "timestamp" : timestamp + 2000 }
    ]
  },
  {
    "machine.threshold": [
      { "value" : "30", "timestamp" : timestamp }
    ]
  }
]

# Using Basic Authentication
url = "https://eu.airvantage.net/device/messages"
print("Sending to {}.".format(url))
response = requests.post( url,
  auth=(args.identifier, args.password),
  data=json.dumps(data),
  headers={'Content-type': 'application/json'}
)
print("Response: {}. Content: {}".format(response.status_code, response.text))

# Check if there are messages
message_url = "https://eu.airvantage.net/device/tasks"
print("Checking for messages at {}.".format(message_url))
response = requests.get( message_url,
  auth=(args.identifier, args.password),
  headers={'Content-type': 'application/json'}
)
print("Response: {}. Content: {}".format(response.status_code, response.text))
print("Done")
View your application running
The 2 first parameters are identifier and password: it’s the two fields you supplied when creating your system and when you have associated the application you had to keep in mind.
Look, it is alive:
$ ./rest.py "B827EB76EA56" your_rest_password
Sending to https://eu.airvantage.net/device/messages.
Response: 200. Content: []
Checking for messages at https://eu.airvantage.net/device/tasks.
Response: 200. Content: []
Done
Your data is now sent. You can check your data communication. Just go to Inventory > Systems, then pick your own and click Timeline. That is it.
If you want to try it but feeling a bit lazy, it is all available at GitHub.
Next Step
Continue the tutorial by using tools supplied by AirVantage to test your communication with your device.