How to upgrade Firmware on my AirPrime module or AirLink programmable modem?
 Searching...
An upgrade campaign defines the different steps required to go from a configuration A of a system to a configuration B. There are simple campaigns where only one component needs to be upgrade (custom application or firmware) and complex campaigns appears when both components need to be upgrade.
Before starting your campaign, you have to identify all steps and write down a procedure. Upgrade campaign are usually a repetition of simple steps, it is important to write down a procedure to avoid forgetting steps.
To perform an upgrade campaign, you must:
- select devices you want to upgrade,
- create upgrade batches,
- perform upgrade and retries,
- write a report
- clean AirVantage All these steps are defined below.
You can upgrade the firmware on a single device or in bulk. The operation will handle the upgrade of the firmware.
Identify the systems to upgrade
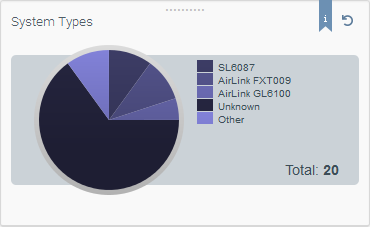
Click on Monitor > Systems to view the list of your deployed AirPrime modules. The you will need to select one or several Systems from the list to be upgraded. As the firmware packages are specific per type of device, we advise that the selection contains devices of the same type. To this purpose, you can use the System type widget or the grid filter:
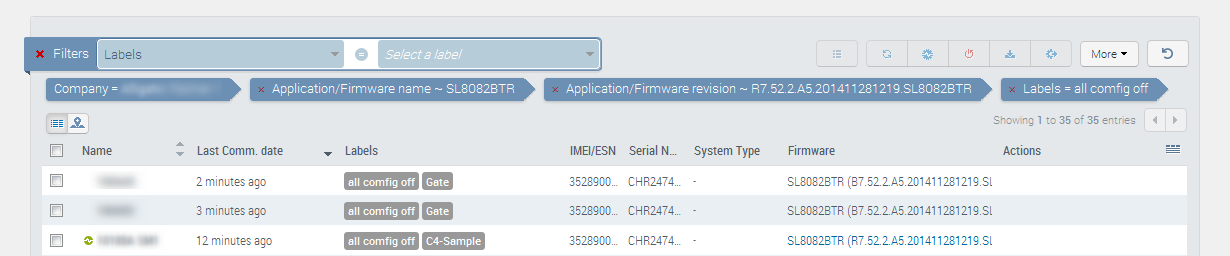
Then finetune your selection by optionally applying additional filters (labels, firmware version, etc…) to the displayed systems:
Batch Creation
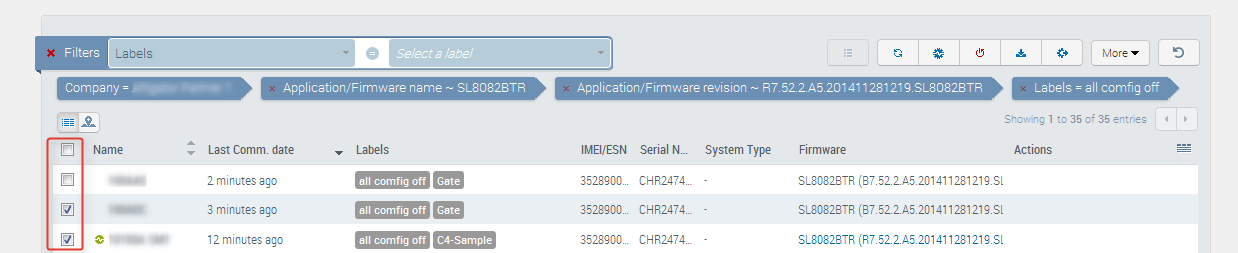
To easily find systems later put a label by selecting all devices and choose the “change label” feature.
We advise to perform upgrade campaign by batch.
A good practice is to create a first batch of 10 devices to test the complete procedure then a batch 50 devices and finally batches of 100 devices. To test your campaign, it’s easier to start with device communicating regularly, so choose devices with a recent “Last Communication Date”. To create a batch, select the X systems you want to upgrade and put a label on them. Use a label tmp_XXXX_YYYY_batchZZZZ where:
- XXXX is the campaign name and date
- YYYY is the name of the person in charge of the campaign.
- ZZZZ is the batch creation date and number
Select the firmware you want to upgrade to
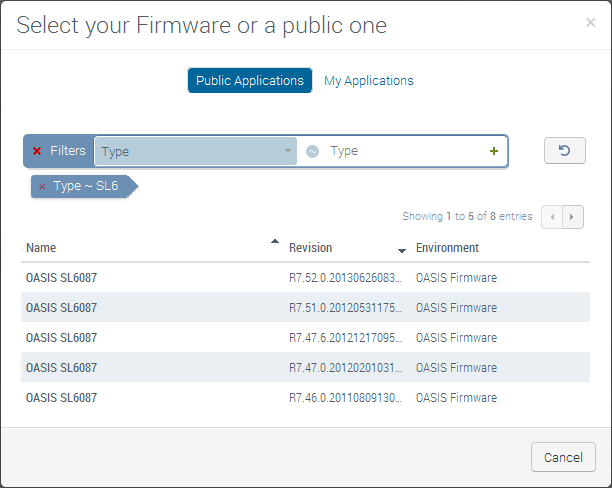
After having selected the candidate systems for upgrade, click on the Upgrade Firmware button in grid menu. The Upgrade Firmware dialog box opens. It displays the list of firmware already available in MyApp. These are the firmwares that have already been used at least once within your company. Choose firmware package in the Firmware drop-down menu.
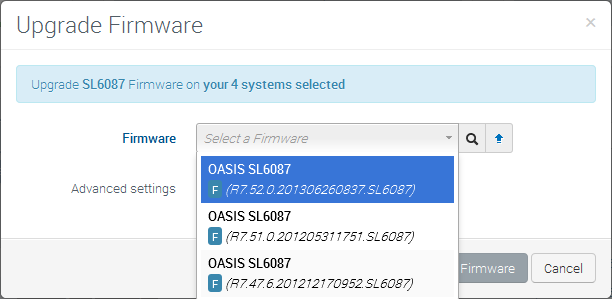
If upgrading to a new version the very first time it may be necessary to click the magnifying glass icon to search for new firmware among the Public Apps. Note that once the firmware is selected, it will be copied to your company’s My Apps list and will be available from the pull-down list for the next use. To search for a firmware for a specific type of device, you can search by firmware Name and/or firmware Revision as shown below:
You must be aware that when selecting a version to which you want to upgrade, the binary package may contain different binaries to upgrade to the same version: the delta, the delta+reverse and/or the full binary. AirVantage will select the package to apply following those criteria:
- by default the delta+reverse option to optimize bandwidth and provide the capability to revert the operation.
- if delta+reverse is not present, then the delta only will be provided to optimize bandwidth.
- if none of the above was feasible, then the full binary will be used.
If there is no binary valid in the package to upgrade from version A to version B, and no full binary for version B, you will get an error ‘No binary available’. In that case, please contact your usual AirPrime support contact.
Optionally schedule the update
By default the firmware will be updated on the next connection from the device. As for any operation, you can schedule the upgrade for a specified future date and time. Refer to paragraph How to schedule an operation from How to use Operations?
Monitor upgrade success
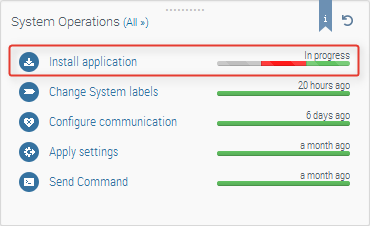
System Operations widget in system grid gives a summary status of the upgrade operation just launched. If the operation is still in progress, the overall status will be In progress. Once terminated, you will get the date of termination.
For more information, click on the specific operation. It opens the operation details popup.
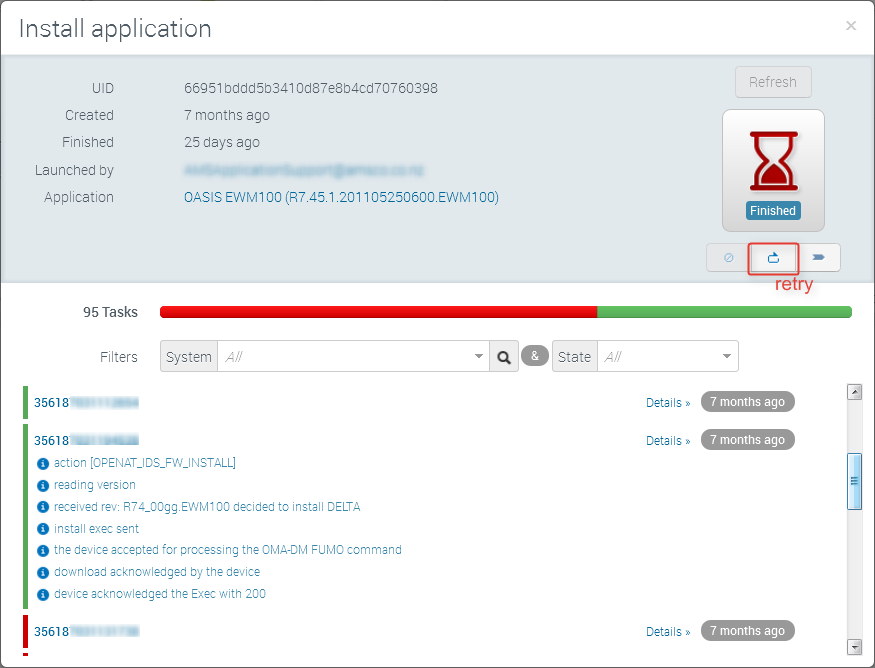
The Red/Green bar gives you an overview of the campaign results, and so you can:
- filter the result to spot the systems for which upgrade failed or the result for a specific system
- Use the “Retry” action to re-launch the same operation on the failed devices
- Put labels, if you want to save the state of devices after this attempt.
From there, you can click on a specific system to view the different stepping stones of the firmware upgrade and/or the reason for error.
Once the operation is terminated, if some upgrades did not go through, you can use the Retry button that will relaunch the operation on all the systems for which it failed or was cancelled.
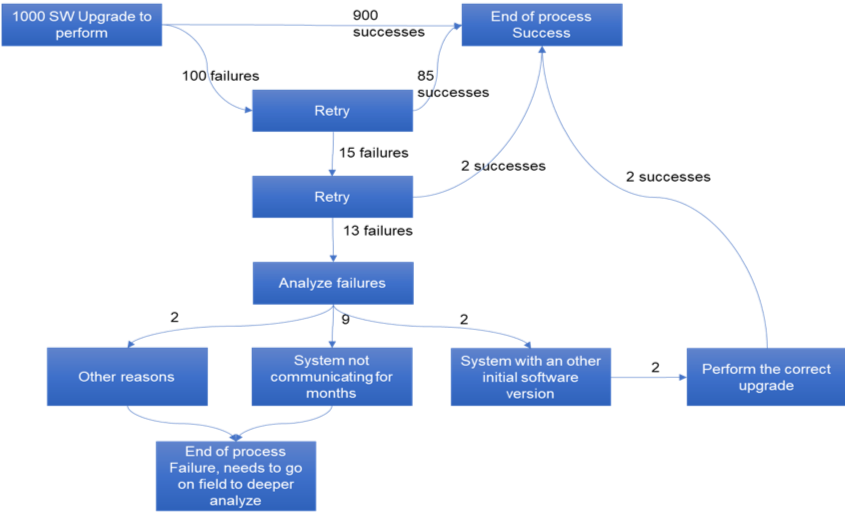
Create a report
A report could ease your upgrade campaign. This report will contain:
- the different steps of your campaign,
- for each steps the different states of your systems,
- for each states an action to perform.
Example of an illustrated report, each states and steps can be more described in a document:
Clean
At the end of the campaign you have to:
- Remove temporary labels linked to the campaign,
- Delete application not used anymore.