Configuring the Hardware Key
Configuring the Hardware Key
To ensure the security of the Hybrid Cloud environment, all operations that are sent from ALMS to the AirLink router must be signed. The router will have a private key (Root certificate) that will be used to authorize the operation, and it must be signed by a user who has their own key. In the Hybrid Cloud environment, we use a hardware key in conjunction with the Fortify software to sign the operation before it is sent to the router.
Hybrid Cloud has been tested and validated with hardware keys from YubiKey. While other hardware keys that support the X.509 standard can be used with the system, the YubiKey 5 NFC has been validated and are the supported option.
Setting up YubiKey to sign Hybrid Cloud Operations
The YubiKey with the Client certificate will allow you to authorize operations on your Hybrid Cloud account. These instructions show you how to configure the YubiKey with the Client certificate, enabling a security handshake between ALMS and your authorizing workstation/computer.
Before setting up your YubiKeys, ensure that you perform the following steps:
- Generate Root certificates (Base-64 encoded X.509 .pem files). These certificates will be loaded on the routers. For more information, see Generating Certificates.
- Install YubiKey Manager so that you can generate a certificate signing request (CSR).
After your YubiKeys are set up, you can proceed with enabling Hybrid Cloud on all the routers in your fleet (see Configuring the AirLink Router for Hybrid Cloud) and begin authorizing operations.
Generating a certificate request (CSR)
You will generate client certificates in your PKI environment. To do so, you first need to generate a certificate signing request (CSR) through YubiKey Manager. You will send the CSR to your IT Department to create the client certificate, which you will then load back onto your YubiKeys.
To generate a certificate request (CSR) through YubiKey Manager:
- Insert the YubiKey in your computer (requires a USB connector).
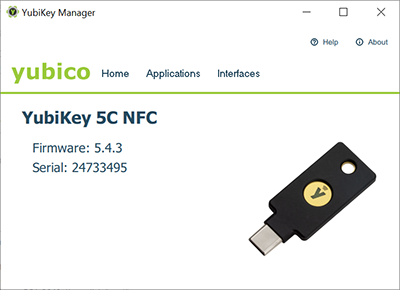
Open YubiKey Manager.

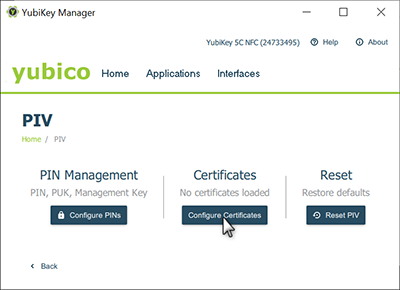
Go to Applications > PIV and click Configure Certificates.

Select Authentication (Slot 9a) or Digital Signature (Slot 9c), and click Generate. (YubiKey supports different behavior from the key, depending on which “slot” the certificate is loaded into. Using Authentication (Slot 9a) lets you enter your PIN just once when you start authorizing Hybrid Cloud operations until you remove the smartcard or restart your computer. If you select Digital Signature (Slot 9c), you will be asked for the PIN for every operation. Please see the YubiKey documentation for more information.)
Select Certificate Signing Request (CSR), and then click Next.
Select Algorithm = RSA 2048, then click Next.
Enter the subject, for example, “YubiKey-CSR”, and then click Next.
Click Generate.
This generates the CSR file. Send the file to your company’s IT department or similar entity responsible for generating security certificates. The Client certificate .crt file should be generated on the machine where the root certificate was generated.
Once you receive the .crt file from your certificate team, you need to upload the file to the YubiKey.
Uploading the Client Certificate
To load certificates to the YubiKey:
- Insert the YubiKey in your computer.
- Open YubiKey Manager.
- Go to Applications > PIV and click Configure Certificates.
Import the Client certificate (my-end-client.crt ) into the desired slot.
a. Enter the management key when prompted. (If you did not change it on the YubiKey, click “use default”.)
b. Enter the PIN when prompted.
Go to Applications > PIV > PIN Management > Configure PINs and change the PIN from default.
Eject the YubiKey.
Loading a Certificate Chain
You may require multiple certificates, or a certificate chain, to be loaded on the YubiKey. For example, you may need a client certificate, an intermediate certificate, and a root certificate as part of your certificate chain. Each certificate in the chain must go into its own slot on the YubiKey.
If you have 1 or 2 intermediate certificates, use YubiKey Manager to import each certificate into slots 9D and 9E, using the procedure described in Uploading the Client Certificate.
If you have 3 or more intermediate certificates, use the yubico-piv-tool CLI to store them in slots 82 to 95. For example:
- Client certificate in slot 9a or 9c
- Intermediate_cert_1 in slot 82
- Intermediate_cert_2 in slot 83
- intermediate_cert_3 in slot 84
- If there are more intermediate certs, continue with slot 85, 86, and so on.
The procedure is described in this article, and is summarized below.
To access the yubico-piv-tool CLI and import certificates:
- Insert your YubiKey and open YubiKey Manager.
- Open Terminal and use the cd command to go to the directory that contains ykman.
Import your remaining certificates into slots 82 to 95.
For example:
$ ./ykman piv import-certificate 82 chain_cert_intermediate_1.pem

$ ./ykman piv import-certificate 83 chain_cert_intermediate_2.pem

$ ./ykman piv import-certificate 84 chain_cert_intermediate_3.pem
Best Practices
Semtech recommends setting up two YubiKeys. Keep one as a backup in a secure place if one key is lost. If you only set up one YubiKey and happen to lose it, you will be unable to work with the Hybrid Cloud system until new certificates are generated and new keys provisioned.
 Searching...

