Loading and storing additional radio module firmware (RMFW) allows for RMFW image switching. Image switching enables your router to work with different carriers.
Initializing Table Of Contents...
Automatic radio module firmware image switching (based on Carrier SIM)
This process is used when NETWORK OPERATOR SWITCHING is set to Automatic. You can check this setting in the Hardware Interfaces > Cellular Interfaces > Cellular section.
For automatic Network Operator Switching to work, the router must have the radio module firmware corresponding to the network operator loaded and displayed in the RADIO MODULE FIRMWARE table. It can also work if the generic RMFW loaded and displayed is compatible with the network operator. The following steps describe how to ensure that the required radio module firmware is loaded onto the router.
Ensure the router is powered off.
Insert the carrier SIM that you want to image switch to into the desired SIM Card (slot).
By default on the XR90, SIM Card (slot) 1 maps to XP1 and slot 2 maps to XP2.
Power the router on.
Log in to AirLink OS.
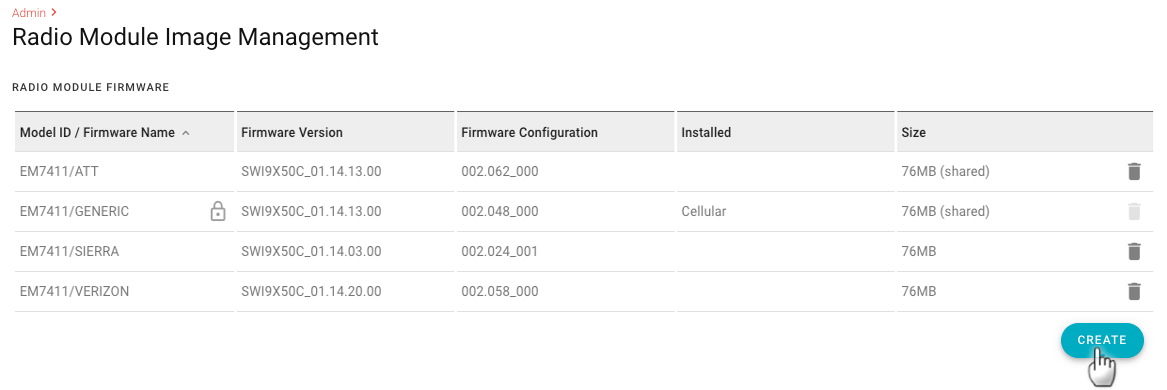
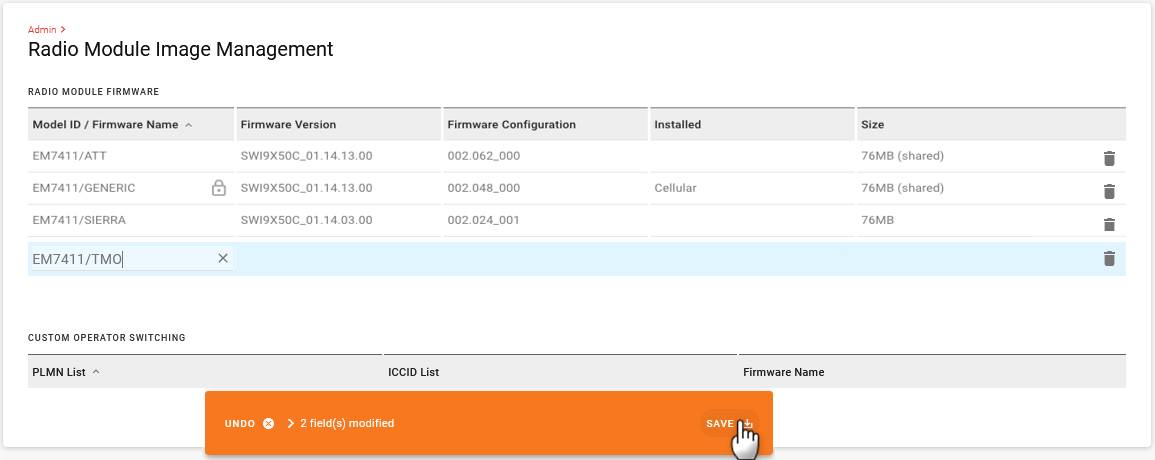
Go to System > Admin > Radio Module Image Management.
Check if the required RMFW is showing in the Radio Module Firmware list.
If the firmware is showing and the FIRMWARE VERSION is filled in, then it will automatically switch to the correct RMFW when SIM switching.
If the firmware is showing, but the FIRMWARE VERSION is blank, then continue with step 7.
Update AirLink OS or re-execute the Airlink OS update even if it is already updated, as described in Updating Airlink OS Software. The software update will take 1-2 minutes, as indicated by the yellow LED chase pattern. During the update, any specified RMFW images not on the router are loaded onto the router, but are not applied to the radio module yet. The router reboots when the software update is complete.
After reboot, the router executes several checks and the RMFW image switch occurs based on the SIM that was inserted in Step 2 above, as indicated by the green LED chase pattern. The update should take about 2-5 minutes, depending on the RMFW version it is updating to.
When the update is complete, you can confirm the RMFW configuration under Status/Monitoring > System > Cellular. Check that the FIRMWARE NAME, FIRMWARE VERSION, and FIRMWARE CONFIGURATION have been updated.
The CUSTOM OPERATOR SWITCHING (COS) is only used when RMFW image switching is automatic. When the router sees a SIM, and is set to automatic, then the COS table is checked first. If there is no relevant COS definition, then the internal database defines which RMFW to use.
Example: If Bell issues a new SIM that has a different Public Land Mobile Network(PLMN) or Integrated Circuit Card Identifier(ICCID) than what is defined in the internal database, then a definition using COS to associate the new PLMN or ICCID to an existing carrier firmware is created.
In the above example,
If a SIM with PLMN 20801 or 20820 is detected, the system will use BELL RMFW.
If a SIM with an ICCID starting with “89330121313814” is detected, TELSTRA RMFW will be used.
Manually loading radio module firmware image on to the router
If the RMFW does not already exist on the router, then use the following process to manually download the RMFW from ALMS onto the router.
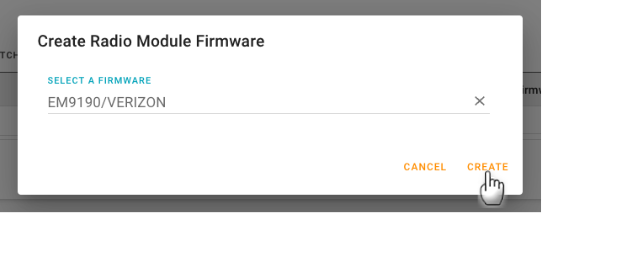
Click CREATE.
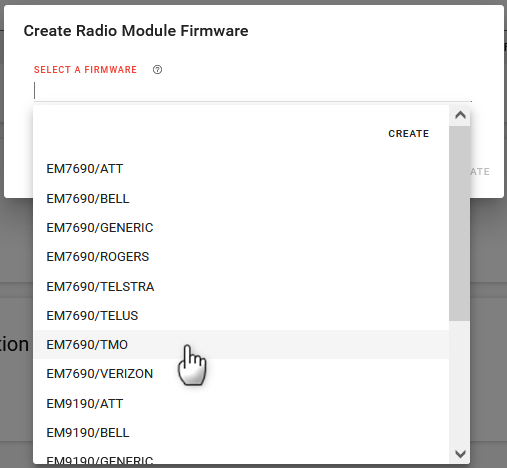
Click on the entry line to select the desired module/carrier combination from the list.
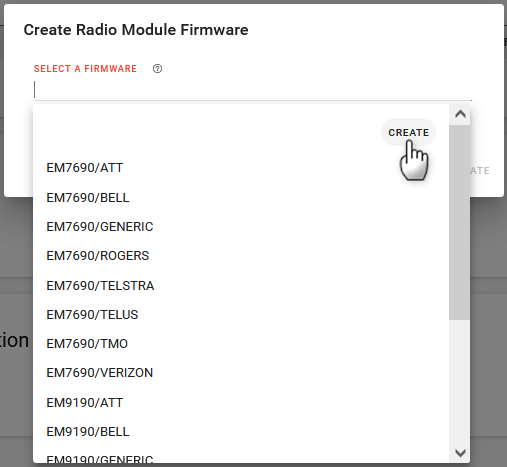
If you don’t find your desired radio module/carrier combination in the list:
a. Click on the entry line and click CREATE.
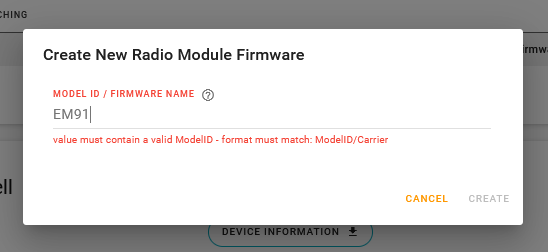
b. Enter the new firmware name (Model ID / Firmware Name)
c. Click CREATE to create an instance with this value.
Click CREATE to add a radio module firmware entry in the table.
Click SAVE and a new row for the selected carrier appears. The FIRMWARE CONFIGURATION and FIRMWARE VERSION fields are blank.
Reboot the router which will perform an Airlink OS update that will retrieve the RMFW and add it to the router. After reboot, the router executes several checks and the RMFW image switch occurs based on the SIM that was inserted, as indicated by the green LED chase pattern. The update should take about 2-5 minutes, depending on the RMFW version it is updating to.
When the update is complete, you can confirm the RMFW configuration under Status / Monitoring > Cellular. Check that the FIRMWARE NAME, FIRMWARE VERSION, and FIRMWARE CONFIGURATION have been updated.
Optional: Manual radio module firmware image switching
When NETWORK OPERATOR SWITCHING setting is set to Manual, you can manually switch the radio module firmware to a specific network operator using this process. You can check the NETWORK OPERATOR SWITCHING setting in the Hardware Interfaces > Cellular Interfaces > Cellular section.
Follow the process below to manually switch the radio module firemware.
Ensure the router is powered off.
Insert the carrier SIM that you want to image switch to into the desired SIM Card (slot).
By default on the XR90, SIM Card (slot) 1 maps to XP1 and slot 2 maps to XP2.
Power the router on.
Go to Hardware Interfaces > Cellular Interfaces.
Under Cellular > NETWORK OPERATOR SWITCHING, click Automatic to switch it to Manual.
Under SELECT NETWORK OPERATOR, select your desired carrier.
Click SAVE.
The Cellular ADAPTER STATUS indicates Initializing and then Updating Firmware within a few seconds, as indicated by the green LED chase pattern. The update should take about 2-5 minutes depending on the RMFW version it is updating to.
When the update is complete, you can confirm the RMFW configuration under Status/Monitoring > System > Cellular. Check that the FIRMWARE NAME, FIRMWARE VERSION, and FIRMWARE CONFIGURATION have been updated.
 Initializing Table Of Contents...