 Searching...
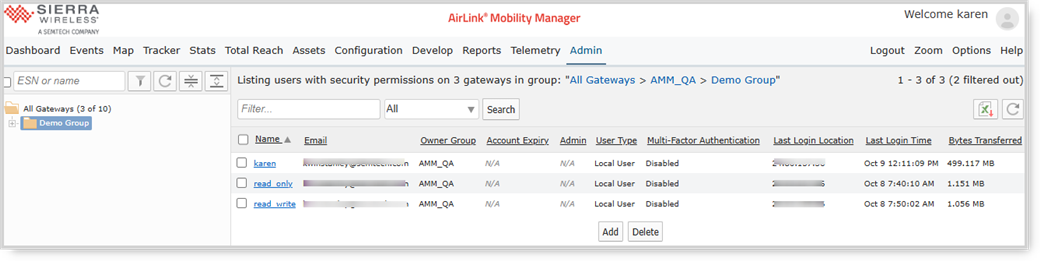
Users
The Users panel is used to add, modify, and delete user IDs, privileges, and preferences. The Users panel also allows the creation of remote user groups if using LDAP. To locate the Users panel, select Admin > User Management > Users.
Users Panel
Note: Users who have been assigned read/write permissions to the AMM and have access to Admin > User Management > Users tab can only create new users in the Customer group(s) that they have access to in the Gateway tree. Similarly, they can only assign the new users to tabs, reports, and stats that they have access to.
New User Screen

Overview of the User Interface
- Type*: select Local User to create a local user on the AMM. Select Remote User Group if using LDAP. Refer to Implementing LDAP for more information. The default is set to Local User.
Identification
- Name*: enter the user ID that is used for login.
Note: An error message will popup if invalid characters or any XSS scripts are used in the name. Invalid characters include the forward slash /, the double quote “ and the white space.
- Email*: enter the email address of the user.
- Customer group: select the group that the user will have access to.
- Password: enter the password. The minimum requirements for the password are that it must contain at least 8 non-space characters.
Note: In AMM 2.18, if the admin password is changed, then the AMM processes need to be restarted. Alternatively, the AMM server can be rebooted. Refer to AMM Shut Down Procedure.
- Expiry: optional expiry date for the user account.
Note: The Expiry field can only be viewed and set by the admin user. Other user accounts that have the write privilege on the AMM, are also allowed to add new users, but cannot set Expiry. The new user will be automatically assigned the same expiry date as the user account itself.
Authentication
- Use group authentication settings for this user.: default is set to enabled. This field will always show if the user has the correct privileges set, regardless of if the Customer Group has group authentication settings defined or not. The only exception is for user accounts that have visibility to All Gateways; then the checkbox is visible but disabled (because there is no group at the All Gateway level).
- Password Composition Rules: When enabled, the system will check the following:
- commonly used passwords are not allowed.
- must contain at least one digit (e.g. 0-9).
- must contain at least one non-alphanumeric character (e.g. ~!@#$%^&*()-+=)
- must contain at least 1 lower case and 1 uppercase alphabetical characters (e.g. A-Z, a-z)
- password cannot include numerical sequence of 5 or more digits (e.g. 12345)
- password cannot include alphabetical sequence of 5 or more letters (e.g. abcde)
- password cannot include QWERTY sequences (e.g. qwerty, asdfg)
- password cannot repeat 4 or more characters (e.g. 1111, aaaa)
- Password Rotation: When enabled, the administrator can set the length of time at which the password will expire and on next login the user will be required to change their password.
- Password History Check: The AMM will check the past set number of passwords to ensure they are not reused.
- Multi-Factor Authentication: Enables multi-factor authentication. Refer to Multi-Factor Authentication for more information.
Privileges
AMM: default is set to Read/Write. This allows the user to read and make changes using the AMM.
When set to Read, the user will only be able to view, not apply any changes.
When set to Admin, the user will have administrative privileges over other users. They will also have access to all Tabs, Reports and Stats. Only the ‘admin’ or a user with the Admin privilege assigned, can set another user to Admin. They cannot edit their own privileges. The Admin privilege can also be assigned to a Remote User Group.
Authentication Settings: default is set to None. The user is not able to view the Authentication section. This setting is dependent on the above AMM setting.
- When the AMM setting is set to Read, the Authentication Setting can be only be set to None, not able to view their authentication settings or Read, which will allow the user to view them.
- When the AMM setting is set to Read/Write, the user can have their Authentication Settings set to either Read or Read/Write. Both will allow the user to view their authentication settings. If the user has Read/Write, they will also be able to modify their authentication settings as well as other users, if they have access to the User tab.
- When the AMM setting is set to Read, the Authentication Setting can be only be set to None, not able to view their authentication settings or Read, which will allow the user to view them.
Tabs: the default is set to All. However it is highly recommended that only the appropriate ones are selected for the user to be created. Not all tabs may be applicable to your network of devices.
Note: If a user had selected tabs assigned, then new tabs are not automatically assigned to the user when an AMM is upgraded. If a user has All tabs assigned, then the user will get any new tabs when the AMM is upgraded.
Note: ‘admin’ or users with Admin privileges are the only users that will have access to the System Upgrade, System Configuration, HA Configuration, Upload Certificate tabs. It is not possible to remove these options from users with Admin privileges.
Reports: the default is set to All. However it is highly recommended that only the appropriate reports are selected for the user to be created. Not all reports may be applicable to your network of devices.
Stats: the default is set to All. However it is highly recommended that only the appropriate stats are selected for the user to be created. Not all stats may be applicable to your network of devices.
Preferences
- Measurement units*: default is Metric. Imperial is an option.
- Position Format*: default is Decimal Degrees. Degrees:Minutes.DeimalMinutes is an option.
- Format CSV output values same as HTML: default is enabled.
- Gateway Tree*: default is Display Name when available. Always display Name and ID and Display ID only are also options.
- Dashboard timespan: default is 24hrs. The time filter on the dashboard is set to this value.
- Tracker refresh*: default is set to 30 seconds. The lower this value, the faster the refresh. However the information shown is dependent on how often the device sends GPS data to the AMM. The lowest value allowed is 2 seconds.
- Dashboard refresh*: default is set to 30 seconds. The lower this value, the faster the refresh. However the information shown is dependent on how often the device sends data to the AMM. The lowest value allowed is 2 seconds.
- Session Timeout*: default is set to 30 minutes. Lowest value allowed is 5 minutes. Users are not able to edit their own Session Timeout, except for user admin. The Session Timeout only takes effect on user login.
Note: When viewing pages that are set to Auto-Refresh, if the Auto-Refresh is less than the Session Timeout, then the session will not timeout and the user will not be logged out. If the Auto-Refresh is greater than the Session Timeout, then the session will timeout and the user will be logged out.
- Oldest report*: default is 90 days. This value is dependent on how much storage space is available.
- Max concurrent logins: the number of sessions the user can login to.
- Restricted IP: the only ip address for which this user can login from.
- Max threshold emails/day: maximum number of emails/day that will be sent to the user for threshold alerts.
- Time Zone: select the timezone that the user will be using.
- Dashboard Gateway Columns: allows additional gateway columns to be added to the dashboard.
- Dashboard Threshold Columns: allows additional threshold columns to be added to the dashboard.
- Telemetry Dashboard: allows the telemetry dashboard to be configured.
* denotes a required field.
Note: Once a user is created, only an admin user can modify certain preferences. The preferences that can only be modified by admin are : Dashboard timespan, Tracker refresh, Dashboard refresh, Session Timeout, Oldest report, Max concurrent logins, Restricted IP, and Max threshold emails/day.
Adding a New User
Click on Add to open the Adding new user panel.
Select the Type first.
Then select the Customer Group. This is so that any group settings will automatically be imported.
Then fill in the Name, Email, and Password as a minimum requirement.
Click Save to save the new user.
Copying to a New User
Click on the name of the user that will be the source, to open its profile.
Change the Name, Email, and Password.
Then press the Save As button.
This will create a copy of the source user.
Note: It is possible to create a user with no password. However the user will be created with a default password of “12345”. When the user attempts to login, they will be redirected to change their password.
Note: It is not allowed for the admin user to be copied.
Modifying User Profile
Note:
- It is not allowed for the user to change their own name.
- User ‘admin’ privileges are not editable.
The Privileges section  of the Users screen, allows you to enable access to some or all of the Tabs, Reports, and/or Stats on the AMM:

Enabling All Items
To enable all items (e.g., all reports), ensure that the All check box  is enabled and then click Save.
Enabling Specific Items
To enable only certain items (e.g., specific tabs):
- De-select the All check box
 . This displays the available items on the left
  , a set of controls in the middle
  , and a list of selected items on the right
  .
. - Select the desired items in the Available Items list
and click the > button
 to move them to the Select Items list
.
to move them to the Select Items list
. - To remove selected items, select them from the Selected Items list
and click the <- button
 to move them back to the Available Items list.
 - (Optional) Use the up and down arrow buttons
 to change the order of the items in the Selected Items list.
 , and a list of selected items on the right
  .
. to move them to the Select Items list
  to move them back to the Available Items list.
 to change the order of the items in the Selected Items list.
Setting Multiple User Authentication
Setting Multiple User Authentication
To set multiple users with the same authentication,
- In the user list, select each user
 that will have the same authentication.

2. Select User Authentication button
at the bottom of the screen.
3. A popup will appear, allowing you to set the authentication settings for the users selected.

4. Press Save  when completed.
For User Authentication at a group level, see Group Administration