Getting Started
This guide provides instructions for quickly setting up your wireless modules and how to start using the service.
Step 1: Introduction
Supported devices
The Unlimited FOTA Edition supports the following AirPrime / AirLink system types:
- WP Series
- AR Series
- HL Series
- EM/MC Series: MC73xx when used with Linux QMI SDK 3.3.7 or more
- Open AT based products from legacy SL/Q/FX/GL Series (SL6087, SL808xT, WMPxxx, Q2686, Q2687, Q2698, FXT009, FX100, GL61xx)
Step 2: Register & Configure
- Log in your AirVantage FOTA Edition account using the credentials sent to you during the account creation process.
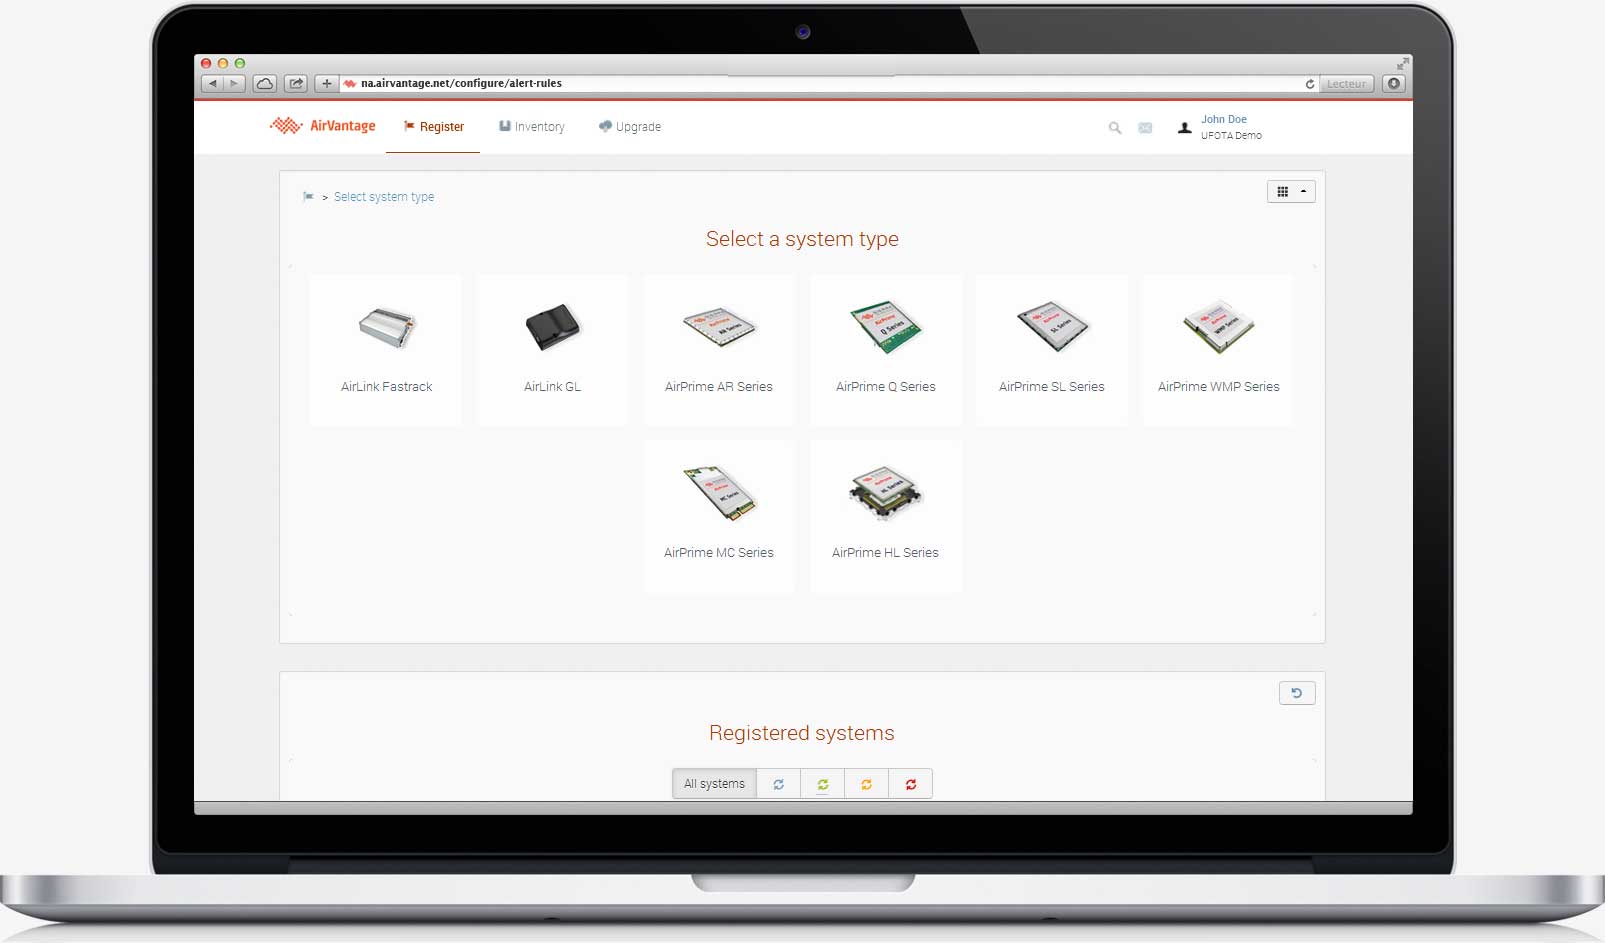
- From the Start page dashboard, click on the Register widget
Select & Identify the product
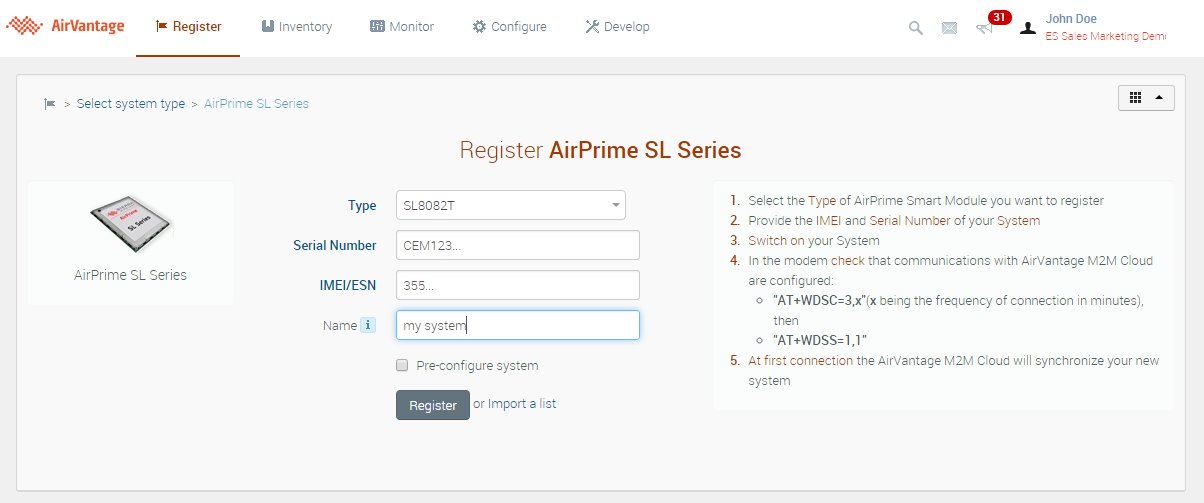
- Select the Type of AirPrime Smart Module you want to register
- Provide the IMEI and Serial Number of your System (these numbers are written on the wireless module label and could be also recover through AT+WMSN for serial number and AT+CGSM for IMEI)
Configure your module
- Switch on your wireless module and make sure it is properly configured to communicate to the cellular network.
- In the wireless module, check that communications with AirVantage M2M Cloud are configured:
- “AT+WDSS=0,“your.apn.com” “, to specify an APN for device management. Some modules have a default fallback on the customer APN and do not require this step.
- “AT+WDSC=3,x”(x being the frequency of connection in minutes)
- “AT+WDSS=1,1” to initiate manually your first connection to the server therefore avoiding to wait for the next polling period
- On the bottom of the web page, your wireless module should now be listed in the registered systems with the synchronized icon

In case your module does not appear as synchronized, you may want to visit the troubleshoot section
Step 3: Upgrade
There are two ways to launch a firmware upgrade.
- The simplest way to launch a firmware upgrade campaign for all devices with outdated firmware is from the Upgrade Status widget on the Start Page.
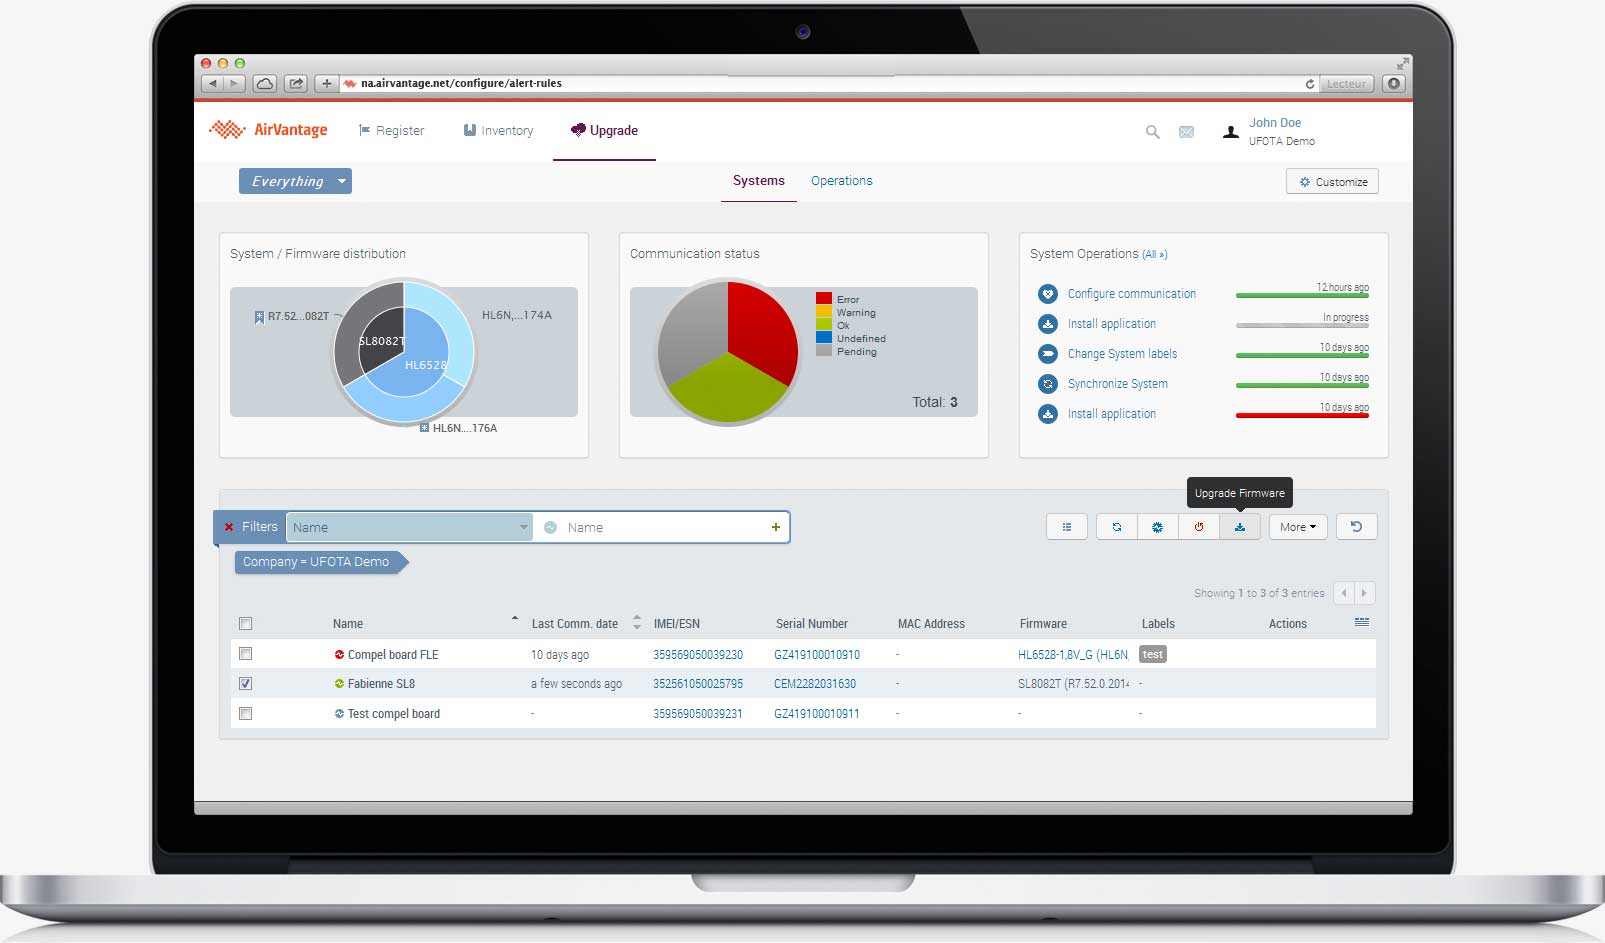
- To select one or more systems whose firmware needs upgrading, click on the Upgrade menu and select Systems.
Before upgrading, please ensure that the latest firmware is certified by your carrier. (You can find certification information for each firmware revision at Sierra Wireless Source
Fleet-based upgrade
The Upgrade Status widget identifies systems in need of firmware upgrades, and lets you apply the latest reference build with a single click.
Upgrade selected systems
- Listed in the lower part of the Upgrade > Systems page, you can see your registered wireless modules and associated current firmware
- Select the list of modules to be upgraded
- Click on the Upgrade Firmware button

- Select the firmware build to apply, then configure any options you require
See Upgrade activity page for further details.
 Searching...


