Device Templates are the easiest and fastest method for configuring multiple AirLink routers. AirLink OS gives you several options for creating, modifying and applying templates.
When working with templates, please consider that a template must be applied to routers of the same model type and OS version as the router from which the template was created. The source routers and the target routers should also have the same hardware features (Wi-Fi, for example), otherwise unexpected configurations may result after template application.
SOURCE ROUTER MODEL/AIRLINK OS VERSION
TARGET ROUTER MODEL/AIRLINK OS VERSION
APPLY TEMPLATE?
XR90/5.3.66
XR90/5.3.66
XR90/5.2.46
XR90/5.3.66
Different OS versions
XR90/5.3.66
XR60/5.3.66
Different router models
RX400/6.0.0.nn
EX400/6.0.0.nn
Different router models
RX55 Base Model/5.3.66
RX55 Wi-Fi Plus/5.3.66
Different hardware features
XR60 Dual Ethernet/5.3.66
XR60 Serial-Ethernet/5.3.66
Different hardware features
Before working with templates in ALMS, ensure that you synchronize the router. The synchronization updates all the information from the router, and ensures that router configuration data is up to date in ALMS.
To start working with templates, click the Templates icon and select an option.
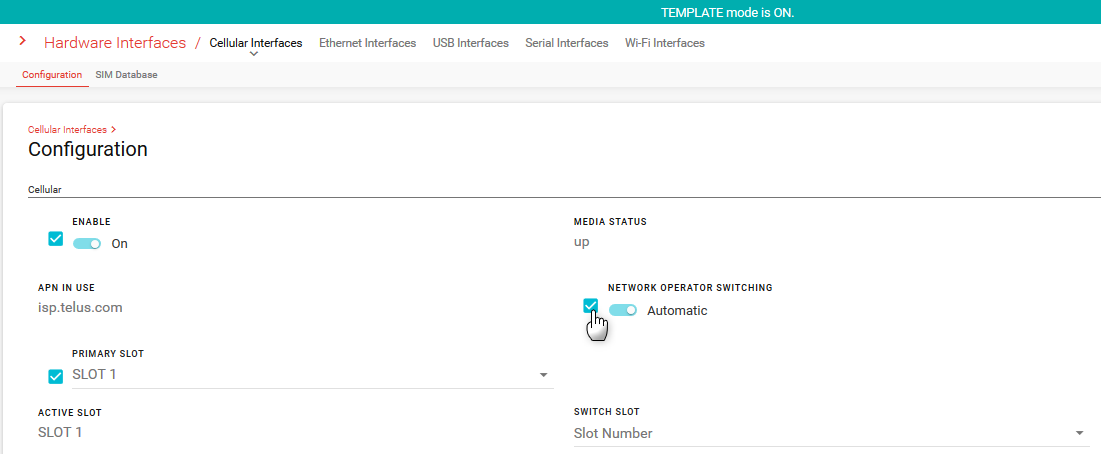
After selecting an option, the AirLink OS screen banner changes color and states You are in template mode. In Template mode, check boxes appear next to text boxes, table rows, and tables so you can select items to add to the template.
To cancel template mode, click the Cancel icon or CANCEL on the Template status bar (see below).
Create Template From Scratch
You may want to use this option when deploying minor configuration changes across multiple routers.
To create a template:
Click Create template from scratch.
You can now begin adding settings to your template.
To add a setting, select the checkbox next to the setting. The setting and its current value will be added to the template.
You can also select a checkbox in a table to add the contents of a table row to the template, or click to delete/reset a table row (or an entire table) in the template.
To save the template, click EXPORT (in ALMS) or EXPORT TO FILE (when using a locally connected computer).
If you are using ALMS, you can click EXPORT TO FILE to save the template to your computer, or click EXPORT TO MY ALMS ACCOUNT to save the template to ALMS.
When using a locally connected computer logged in to the AirLink OS UI, the option shown is EXPORT TO FILE, which saves the JSON file to the local computer. There is no option to export to ALMS.
Tips
For security reasons, sensitive information such as passwords and passphrases cannot be extracted from a router. Therefore, passwords and passphrases are not automatically included in a new template. If you select any configurations that include a password, you must re-enter the password before you can add it to the template. See Adding Passwords to a Template.
The Template status bar shows you how many settings have been added to the current template.
Click the arrow > to display the settings you have added. Click UNSELECT to remove settings from the template.
When you add a setting, it will automatically also add any dependent settings.
If you change your mind and remove the setting from the template, it will not automatically remove all the dependencies. For example, adding a Wi-Fi Access Point to a template will automatically add the LAN Segment settings associated with that access point. If you delete the Wi-Fi Access Point from the template, the LAN Segment settings will remain in the template and potentially overwrite the LAN configuration on the target device when the template is applied.
Create Template From Current Configuration
You may want to use this method when you have a configured device and want to deploy additional devices “out of the box” based on the configured device. Semtech recommends using Apply a replace template to apply a template created from the current configuration.
This option creates a template using all settings that were modified by a user (different from their factory default) except for sensitive information such as passwords and passphrases (see Adding Passwords to a Template).
To create a template using your current device settings:
Click Create template from current configuration.
Template mode is ON. The status bar shows the number of fields added to the template. Click > to view all the fields to be added.
Add or de-select settings as you require.
To save the template, click EXPORT (in ALMS) or EXPORT TO FILE (when using a locally connected computer), as described in Create template from scratch.
Tips
For security reasons, sensitive information such as passwords and security passphrases are not automatically saved to a new template. If you select any configurations that include a password, you must re-enter the password before you can add it to the template. See Adding Passwords to a Template.
Click UNSELECT to remove settings from the template. The system will not automatically remove any dependent settings. For example, adding a Wi-Fi Access Point to a template will automatically add the LAN Segment settings associated with that access point. If you delete the Wi-Fi Access Point from the template, the LAN Segment settings will remain in the template and potentially overwrite the LAN configuration on the target device when the template is applied.
Click settings with an arrow > to view the list of all template settings under that heading. Grayed-out items are settings that are currently hidden from the user.
Adding Passwords to a Template
For security reasons, sensitive information such as passwords and passphrases cannot be extracted from the router and copied into a new template. If you select any configurations that include a password, you must enter the password before you can add it to the template. Note that this procedure only adds a password to the template. Any passwords on the router from which you are creating the template cannot be changed in template mode.
The “admin” password used to log in to AirLink OS through a local connection to the router cannot be added to a template.
Please be aware of this requirement whenever your template includes configurations for:
Wi-Fi
Cellular Virtual APN
Captive Portal
IPsec VPN or OpenVPN
Generated Certificates and EST Credentials
SMS
User Accounts with LDAP, RADIUS or TACACS+ servers
Some password fields are readily visible in template mode, such as the SMS password shown below.
To add the password to the template, click the password field and enter the password.
Tip: As you enter the password, click Show/Hide to reveal the entry in plain text.
After entering the password, select the checkbox, and the password is included in the template.
Other passwords can be found within a configuration menu that will appear after clicking (edit) in a table, for example.
In this case, you can enter the password or passphrase and then click DONE.
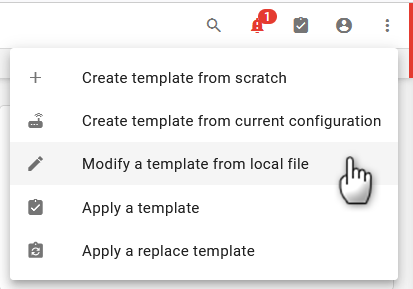
Modify a Template
Open an existing template in order to modify it by adding, removing, or updating settings and then save the template for future use.
To modify a template:
Click Modify a template from local file.
Browse to your file and then click Open.
The template loads into your browser, and Template mode is ON.
A template created from a different firmware version or device type other than the one currently in use cannot be uploaded for modification. A notification alert will indicate incompatibility and you will not be able to proceed further.
Edit and select settings and tables as described above.
To save the modified template, click EXPORT TO JSON, and then save the file.
Applying Templates
Two options are available for applying a template to a device.
Selecting Apply a template adds the settings contained in the template to the target device’s current configuration when the template is applied. No settings on the target device will be modified unless modified by the settings in the template. In effect, the Apply a template process merges the settings in the template with the device’s other settings.
Selecting Apply a replace template modifies and replaces all settings on the target device when the template is applied. The non-default settings in the template will modify those settings on the target device, and all other settings on the target device will return to their default configuration.
Semtech strongly recommends that you verify template application on a few locally accessible routers before deploying a template to a fleet.
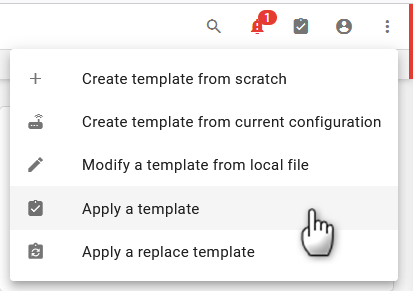
Apply a Template
Semtech recommends using Apply a template to configure only a few settings (created using Create template from scratch, for example) on target routers that are already configured and operational.
Templates created from different software versions or different hardware cannot be applied to the router. “Version mismatch” and “Product mismatch” alerts will indicate incompatibility.
To apply a template:
Click Apply a template.
Browse to your template file, and then click Open.
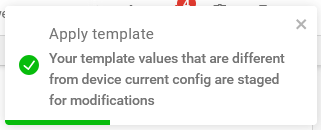
A confirmation message appears.
(Optional) On the status bar, click > to view which settings the template will update.
To apply the new settings from the template, click SAVE.
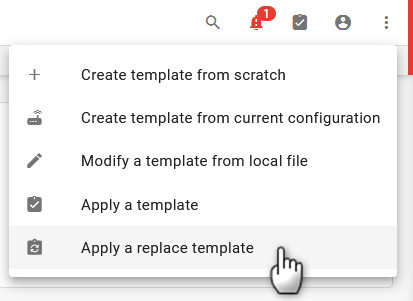
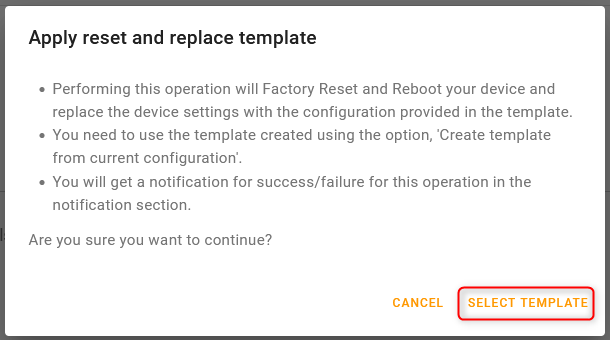
Apply a Replace Template
Semtech recommends using Apply a replace template to configure a complete working configuration from one router to another, particularly when deploying a fleet of new routers that need to have matching configurations, including passwords.
Using Apply a replace template will cause all settings that are not in the template to return to their default configuration on the target router. Because of this, ensure that the template contains all settings to configure and maintain device connectivity, including passwords and SIM Templates. See Adding Passwords to a Template and Using the SIM Database and SIM Templates.
Note: Using Apply a replace template when connected to the router through a local connection resets the “admin” AirLink OS login password to the default password found on the device label. This is because templates do not contain the “admin” password. Ensure that you have access to the default password before applying a replace template so that you can log in to AirLink OS through a local connection to the router afterward.
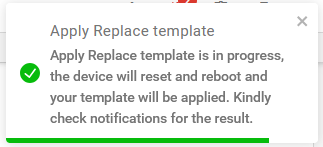
To apply a replace template:
Click Apply a replace template.
When the confirmation appears, click SELECT TEMPLATE.
Browse to your template file, and then click Open.
A confirmation message appears.
The router applies the template and reboots. After the reboot, you must use the default password to log in to AirLink OS through a local connection.

 Different OS versions

 and select an option.
 Initializing Table Of Contents...
 or CANCEL on the Template status bar (see below).
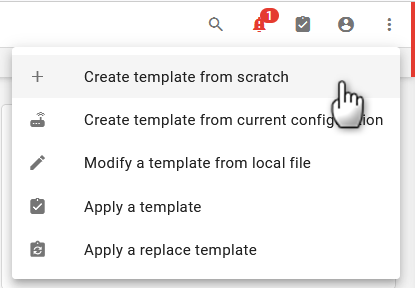
 to delete/reset a table row (or an entire table) in the template.


 to delete/reset a table row (or an entire table) in the template.


 (edit) in a table, for example.