How to configure systems using Apply Workflow(s)?
 Initializing Table Of Contents...
Using Workflows
The Apply Workflow(s) operation simplifies system configuration. Instead of applying actions to your system(s) separately, you can arrange separate actions into a workflow, and let AirVantage execute those actions in the order you want.
The Apply Workflow(s) window offers several pre-defined workflows in the left-hand column.
Using one or more of the pre-defined workflows is recommended because they enforce an order of operations that is required for a successful configuration. If you create a custom workflow using individual actions (described below), you must ensure that the order of operations is correct. For example, you must ensure that the AAF password is set before installing an AAF application.
The available pre-defined workflows vary according to the type of system(s) you have selected. If the system is a radio module, the pre-defined workflows will be different from the pre-defined workflows available for an AirLink gateway or router.
Gateway or router Basic workflow
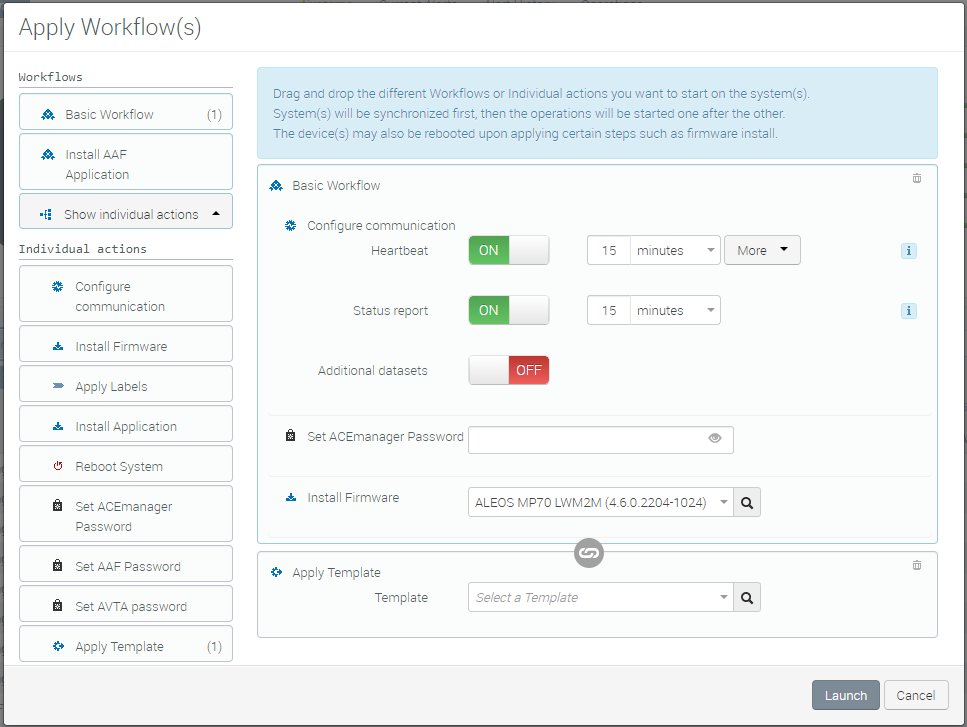
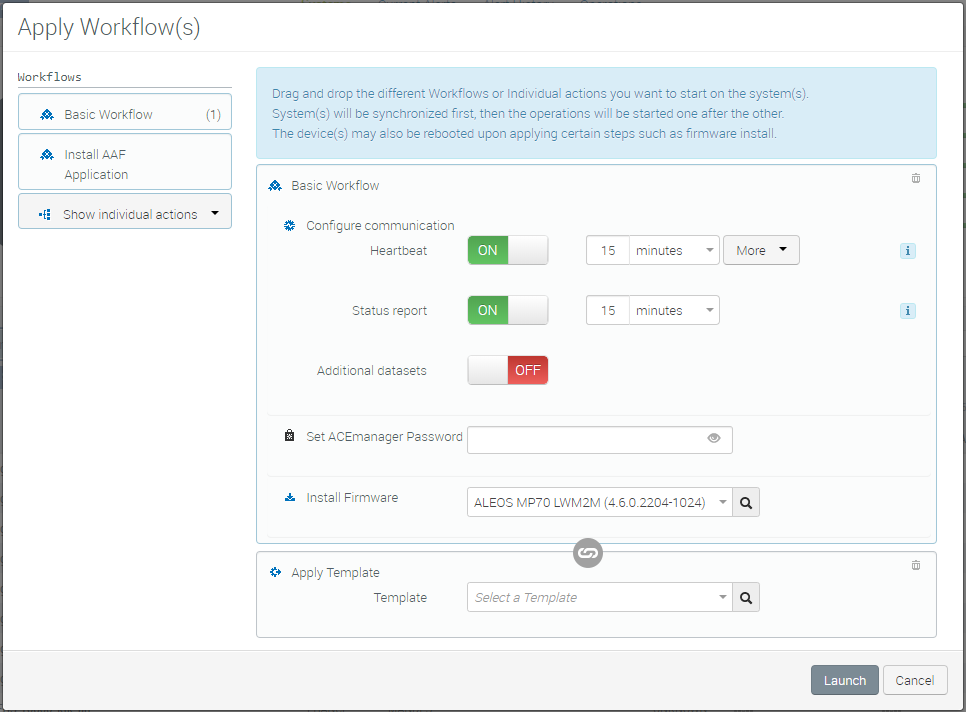
The main column of the Apply Workflow(s) window, by default, shows you the Basic Workflow, which includes:
- Configure Communication: Communication intervals with AirVantage and scheduled reports
- Install Firmware
The default Apply Workflow(s) window also includes an Apply Template operation.
The other pre-defined workflows are Install AAF Application and Configure ALMS ARA (available only in the ALMS ARA offer class on an MP70 device).
Radio module Basic workflow
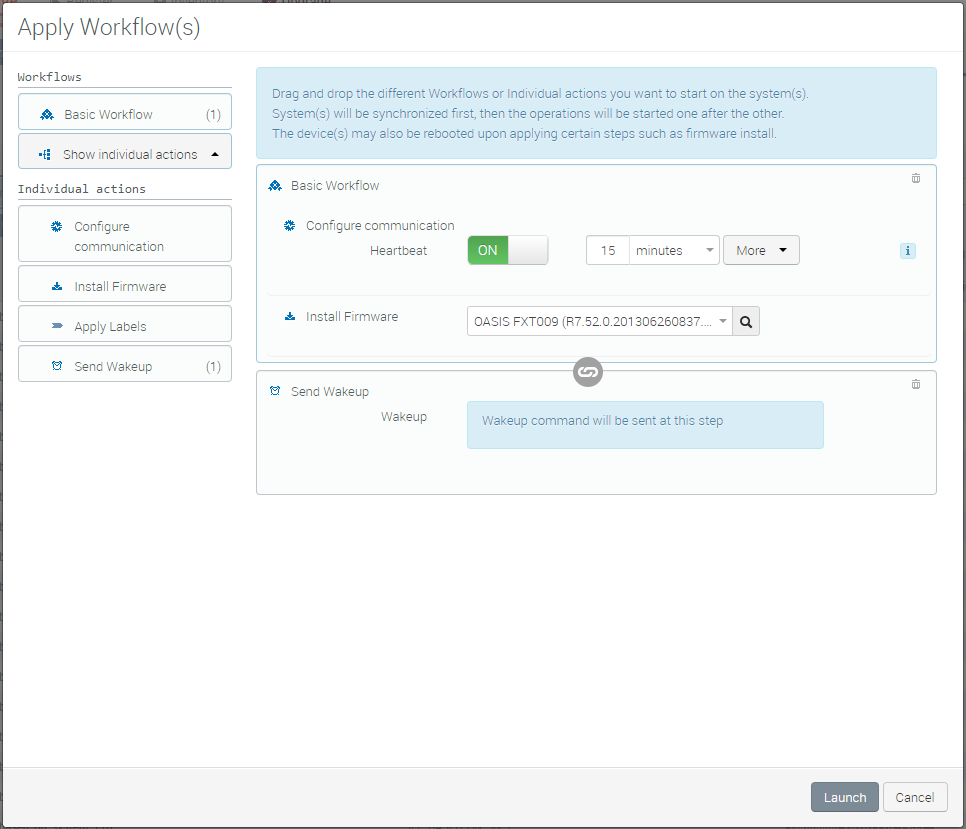
The Basic Workflow for a radio module includes:
- Configure Communication: Communication intervals with AirVantage
- Install Firmware
The default Apply Workflow(s) window also includes a Send Wakeup operation.
Launching Workflows
Once you click Launch and the Apply Workflow(s) process begins, the operations are executed one after another, resulting in the desired configuration. Please note that this process undertakes one operation step only at each device communication interval. The overall configuration may take few device heartbeat periods. The device will reboot one or more times during this process.
Selecting Systems
Before applying workflows, you must select one or more systems from the list on the Monitor > Systems screen.
After selecting one or more systems, click Apply Workflow(s).

Apply Workflow(s) is not available when you select all systems in your company. Also, if you select systems running different firmware versions, AirVantage prompts you to select systems running the same firmware. Hint: Select systems of the same device type and firmware.
Configuring Basic Workflow for a Gateway or Router
Configure device communication
Heartbeat is the time interval that the device will communicate to AirVantage.
All relevant jobs that are in queue are triggered based on the heartbeat. This timer cannot be set to less than 15 minutes. Note that the heartbeat will consume around 1.4 Kb of data.
Clicking More expands the window to show two additional timers that relate to the status icon that appears on the Monitor > Systems page. You can enter a timeout value to change the green icon to amber and from amber to red.
Status report is the time interval for collecting the group of status data from the device for display in AirVantage.
For information on status report data and airtime usage, see Default Status Report Parameters and associated data consumption .
Additional datasets is the time interval for collecting a user-defined set of data from the device for display in AirVantage. You need to create a Dataset data set in AirVantage in advance to configure this option.
To create a dataset, go to the Configure > Datasets page. Click on the + to begin the process.
Set ACEmanager Password
This operation appears for systems using LWM2M, and allows you to set a unique password for the device. Sierra Wireless recommends changing the unique default passwords on all devices.
Install Firmware
This option lets you apply a firmware update to the systems.
Prior to selecting this option ensure that you are selecting a valid upgrade version. Some older versions of AirLink ALEOS firmware have dependencies that may require an incremental update. In that case apply the valid version. You will be able to apply the latest version once the systems are registered and communicating with AirVantage.
Install AAF Application workflow for Gateways or Routers
You can add the Install AAF Application workflow to the Basic workflow if you wish to install an AAF application such as AVTA.
To add an AAF application:
Set an AAF password. The AAF password can be 4 to 100 characters long and can contain a mixture of letters, numbers, and/or special characters. The password is case sensitive.
Select the desired AAF application from the list or by searching (click the search icon).
To install additional AAF applications, add “Install Application” as an individual action (see Creating a Custom Workflow below).
Configure ALMS AMR workflow
This workflow is available only to the Advanced Mobility Reporting (AMR) offer class, and for telemetry-capable systems. For more information about prerequisites for AMR, see Reporting.
To configure AMR:
- Install the latest firmware for your device. For an AirLink MP70, ensure that ALEOS 4.9.0 or later is installed.
- Configure Telemetry for your system by ensuring that Driver Behavior Detection, Location Service, Direct Vehicle Bus Data Collection and Dead Reckoning are enabled. Note that the settings for Configuring Telemetry differ slightly depending on the ALEOS version. However, the final functionality is the same.
- Set an AAF password.
- Install the latest version of the AirLink Vehicle Telemetry Application (AVTA).
- Select the Start Application. This is the application that starts running after the Install Application process is complete. When configuring ALMS ARA, select the same version of AVTA for both Install Application and Start Application.
- Set the AVTA password.
- Click Launch.
Creating a Custom Workflow for Gateways or Routers
You can customize your workflows by adding actions to an existing Workflow or by creating your own workflow from the individual actions available in the left column of the Apply Workflow(s) window.
Click Show individual actions to display the list of available actions, and then drag and drop actions into the main window to create a workflow.
To remove an action, click its “bin” icon ( ![]() ) or drag the action back into the left-hand column.
) or drag the action back into the left-hand column.
Most of the individual actions are described in the sections above, and include:
- Configure communication
- Install Firmware
- Apply Labels
- Install Application
- Reboot System
- Set ACEmanager Password
- Set AAF Password
- Set AVTA password
- Apply Template
- Before selecting a configuration template to apply to your system(s), you must create an ALEOS configuration template in AirVantage.
- To create a template, go to the Configure > Templates page. Click the + to begin the process. You have the option to create a new template from an existing device (select From a System) or From an Application (from Scratch).
The following individual actions may appear when applying a workflow to multiple systems:
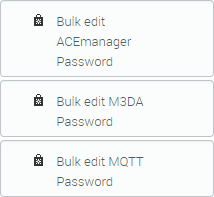
- Bulk edit ACEmanager Password
- Bulk edit M3DA Password
- Bulk edit MQTT Password
Bulk editing passwords in a custom workflow for Gateways or Routers
Before launching a workflow that includes a “bulk edit passwords” action, you must edit, save, and upload a .csv file that includes passwords for all affected systems.
The bulk edit password actions also appear in the pre-defined workflows when applying a workflow to multiple systems. For example, Bulk edit ACEmanager Password appears in the Basic Workflow, and Bulk edit M3DA Password appears in the Install AAF Application workflow. The procedure below applies to all “bulk edit passwords” scenarios.
To perform a “bulk edit passwords” action:
- Drag the desired action into the workflow, in the order you wish the action to be applied.
- Click Generate. AirVantage generates a .csv file based on the systems you previously selected.


- Click Download your template….

- Open the downloaded .csv file. The file is populated with system-identifying information, and includes an empty column for passwords.
Fill in the password column with the passwords you want to apply to your systems.
Ensure that you create unique passwords that include at least 1 letter, 1 number and 1 special character. Passwords must be at least 8 characters in length.
Save the .csv file.
On the Apply Workflow(s) screen, click + Select a CSV, select your file, and click Open.
AirVantage warns you about weak passwords if your .csv file contains passwords that don’t meet the minimum requirement.
If you have no other actions to configure for your workflow, click Launch.
Configuring Basic Workflow for Radio Modules
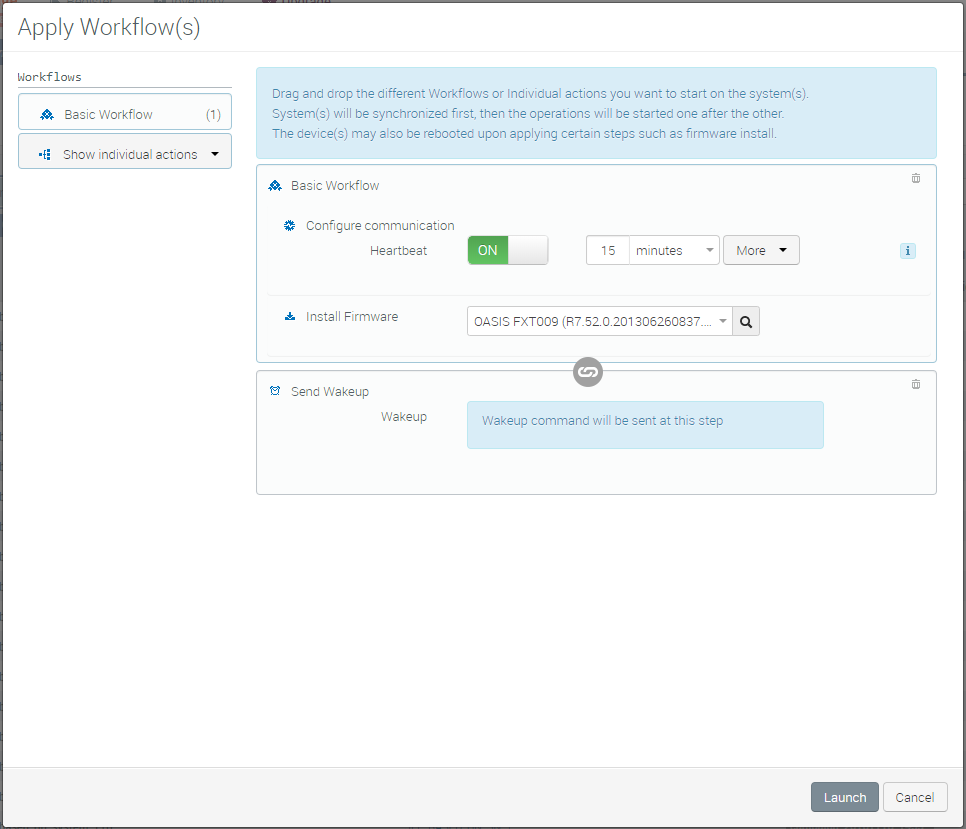
Configure device communication
Heartbeat is the time interval that the device will communicate to AirVantage.
All relevant jobs that are in queue are triggered based on the heartbeat. This timer cannot be set to less than 15 minutes. Note that the heartbeat will consume around 1.4 Kb of data.
Clicking More expands the window to show two additional timers that relate to the status icon that appears on the Upgrade > Systems page. You can enter a timeout value to change the green icon to amber and from amber to red.
Install Firmware
This option lets you apply a firmware update to the systems.
Prior to selecting this option ensure that you are selecting a valid upgrade version. Some older firmware versions have dependencies that may require an incremental update. In that case, apply the valid version. You will be able to apply the latest version once the systems are registered and communicating with AirVantage.
Creating a Custom Workflow for Radio Modules
You can customize your workflows by adding actions to an existing Workflow or by creating your own workflow from the individual actions available in the left column of the Apply Workflow(s) window.
Click Show individual actions to display the list of available actions, and then drag and drop actions into the main window to create a workflow.
To remove an action, click its “bin” icon ( ![]() ) or drag the action back into the left-hand column.
) or drag the action back into the left-hand column.
Most of the individual actions are described in the sections above, and include:
- Configure communication
- Install Firmware
- Apply Labels
- Send Wakeup: Wakes up a communication application that forces the system to communicate with AirVantage


