 Searching...
Sierra Wireless AirLink Registration Mobile App
Introduction
The Sierra Wireless AirLink Registration mobile app guides you, step by step, through installation and setup of an AirLink XR Series (XR80 or XR90) router. Sierra Wireless has created the app with the novice user in mind. A background in IT or experience with wireless networking aren’t required. If you need your new router to provide cellular connectivity (primary or backup) to keep your small business online, the AirLink Registration mobile app will help you with a successful deployment.
Using the app, you can:
- Sign in and verify your ALMS account
- Configure the router’s cellular connection
- Configure the router’s Wi-Fi connection
- Verify the router’s end-to-end performance
- Send a router Health Check (status) report to your account administrator
The Mobile App is available for both iOS 13 or later and Android 7 or later devices.


Before you begin
Use of the AirLink Registration app has prerequisites. You will need:
- ALMS account login credentials, as supplied by your account administrator
- You must have an ALMS account that supports XR Series routers.
- AirLink XR Series (XR80 or XR90) router with AC power supply or DC power cable
- The XR Series router must be registered into the account prior to activation with the AirLink Registration mobile app.
- We suggest pre-registering devices in bulk to the account to ensure you have them named and labeled in the ALMS account.
- Activated SIM card
- If your SIM requires a custom APN for connectivity, have that information available.
- Cellular, Wi-Fi and LPWA (OOBM) antennas
- Mobile phone with an internet connection and the Sierra Wireless AirLink Registration mobile app installed
- Ethernet cable
- Small Phillips screwdriver (for removing the router’s SIM card slot cover)
If you have any questions about using the app, please contact Sierra Wireless customer support.
Using the app
- Download an install the app from the Apple App Store or Google Play Store. Please only obtain the app from these two official sources. Sierra Wireless does not recommend side loading from alternate app stores, as we have published to only these two sources.
- Open the app and log in with your ALMS account email and password (as supplied by your account administrator).
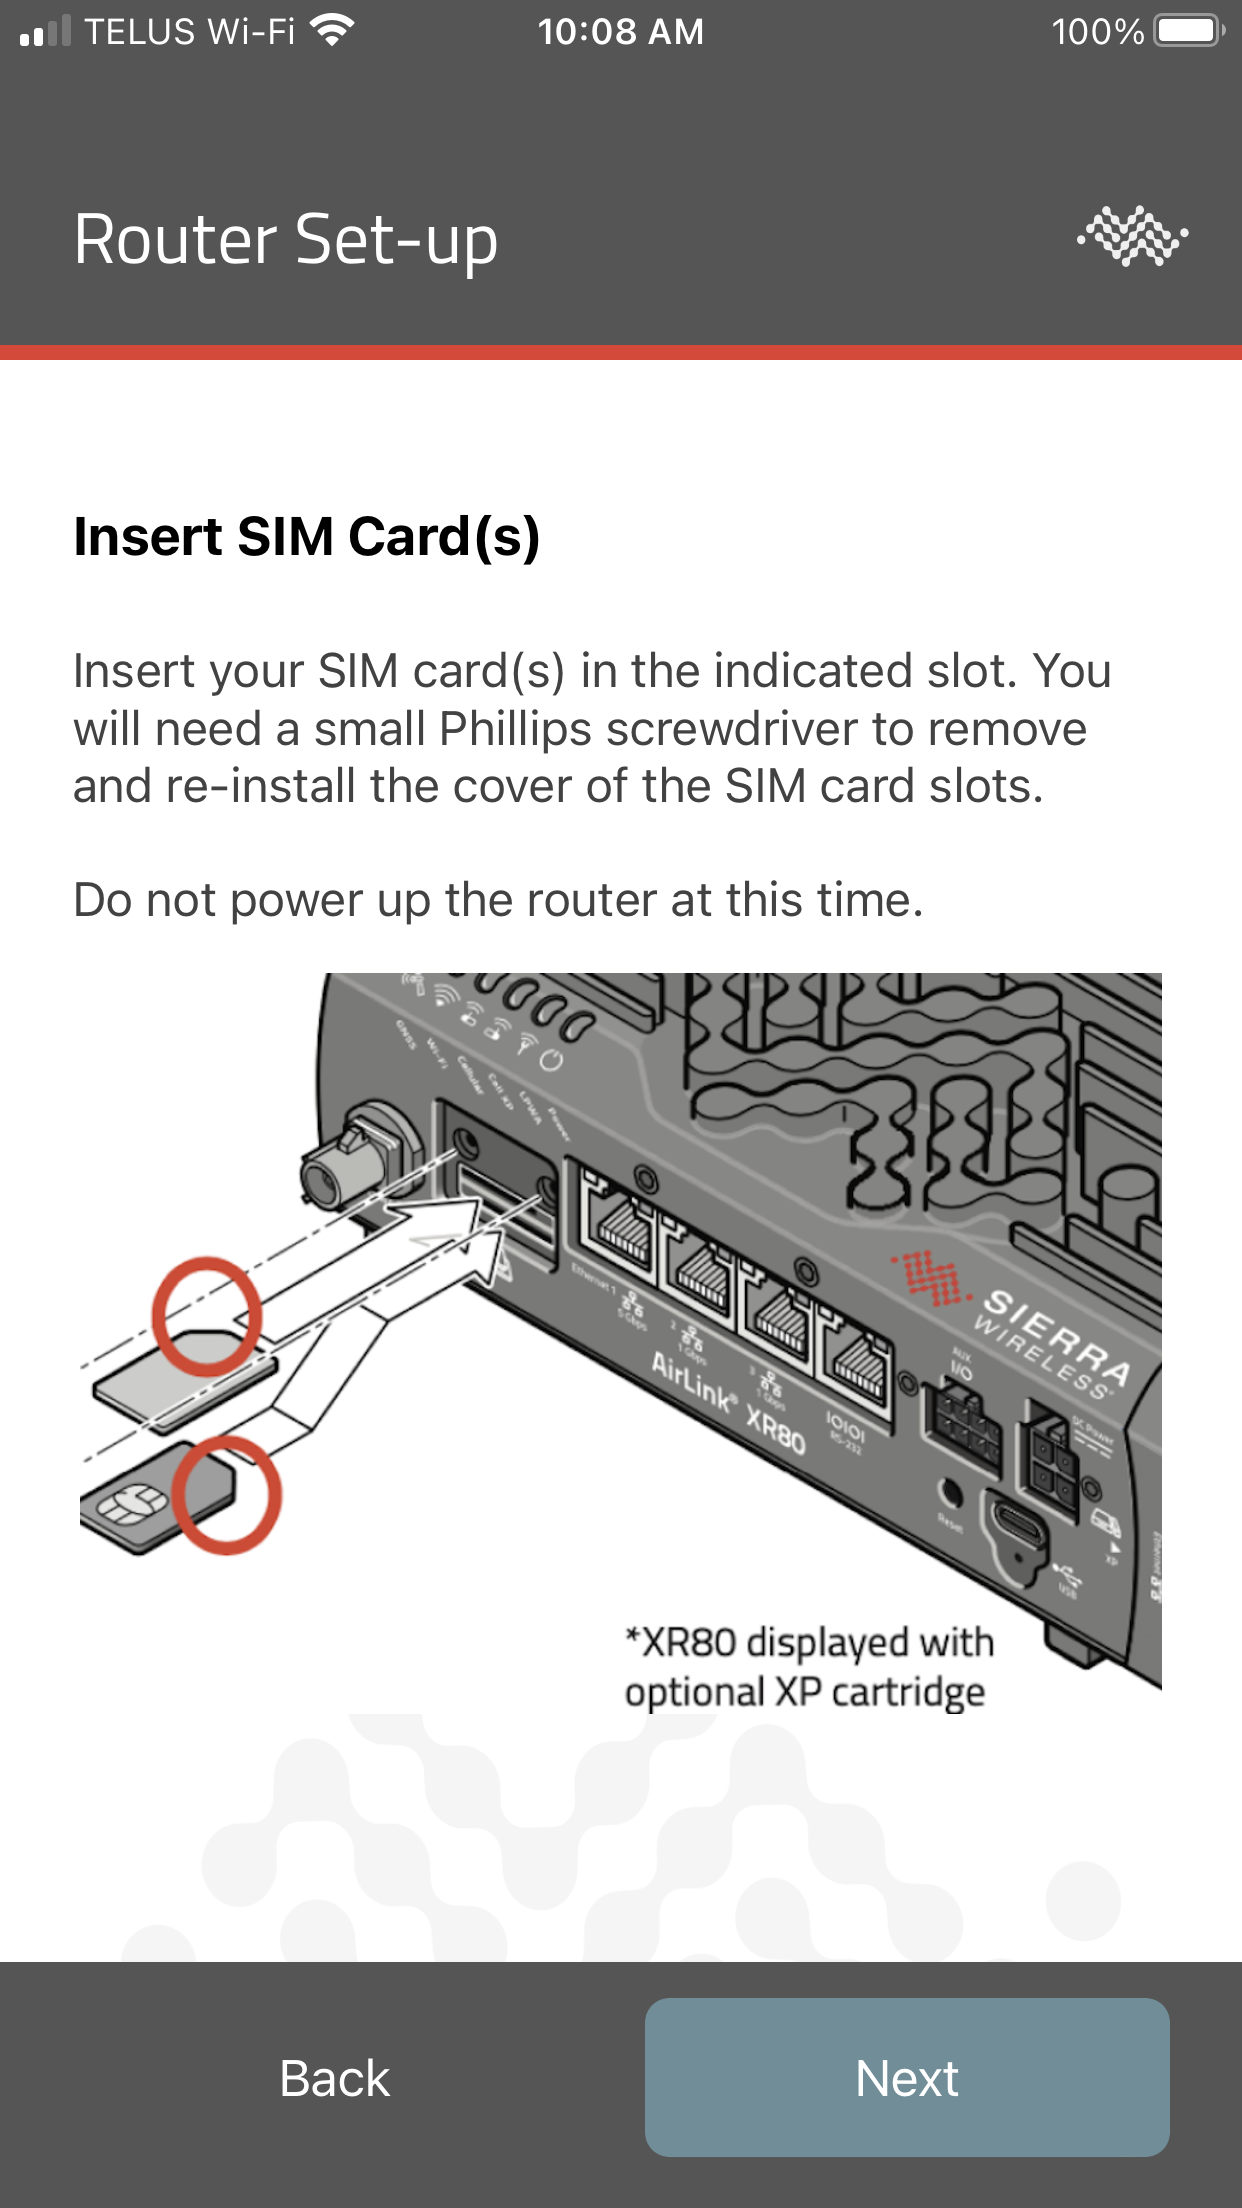
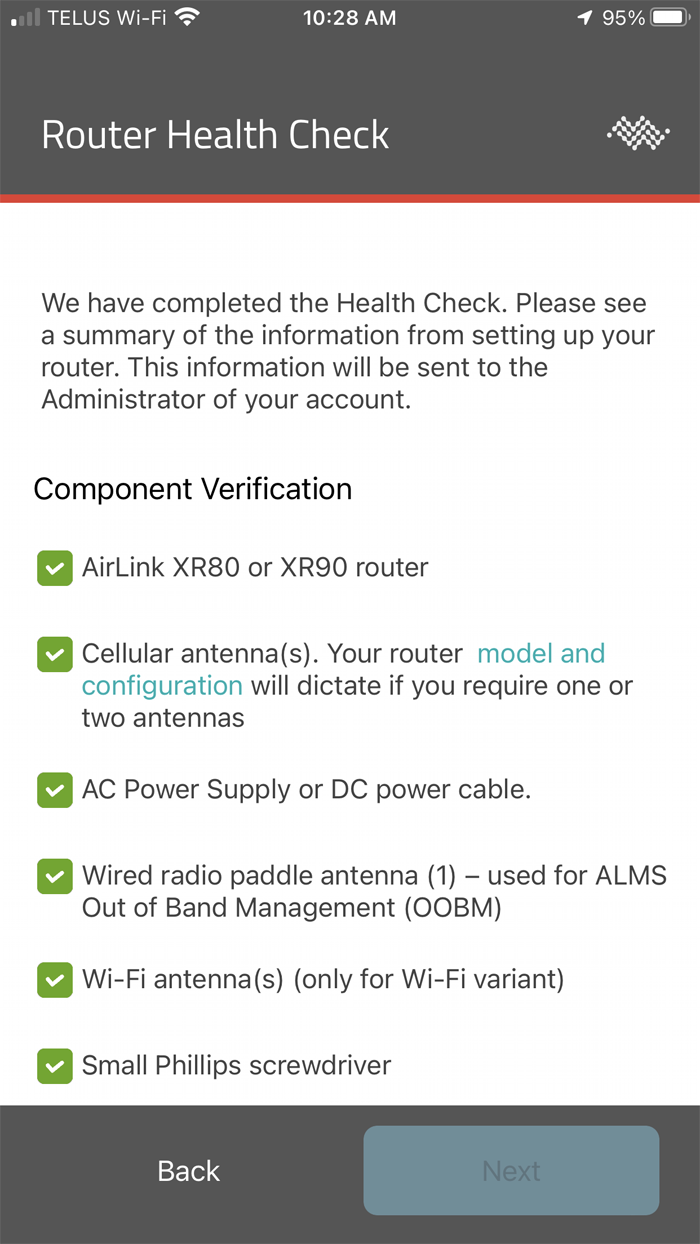
- Follow the router setup instructions to verify components, insert SIM and connect antennas.
- The components will be added to the Health Check Report at the end, so that your ALMS Administrator knows what components you had available to do the set-up.
- If you only have a single SIM card, ensure it is installed in the top SIM card slot.
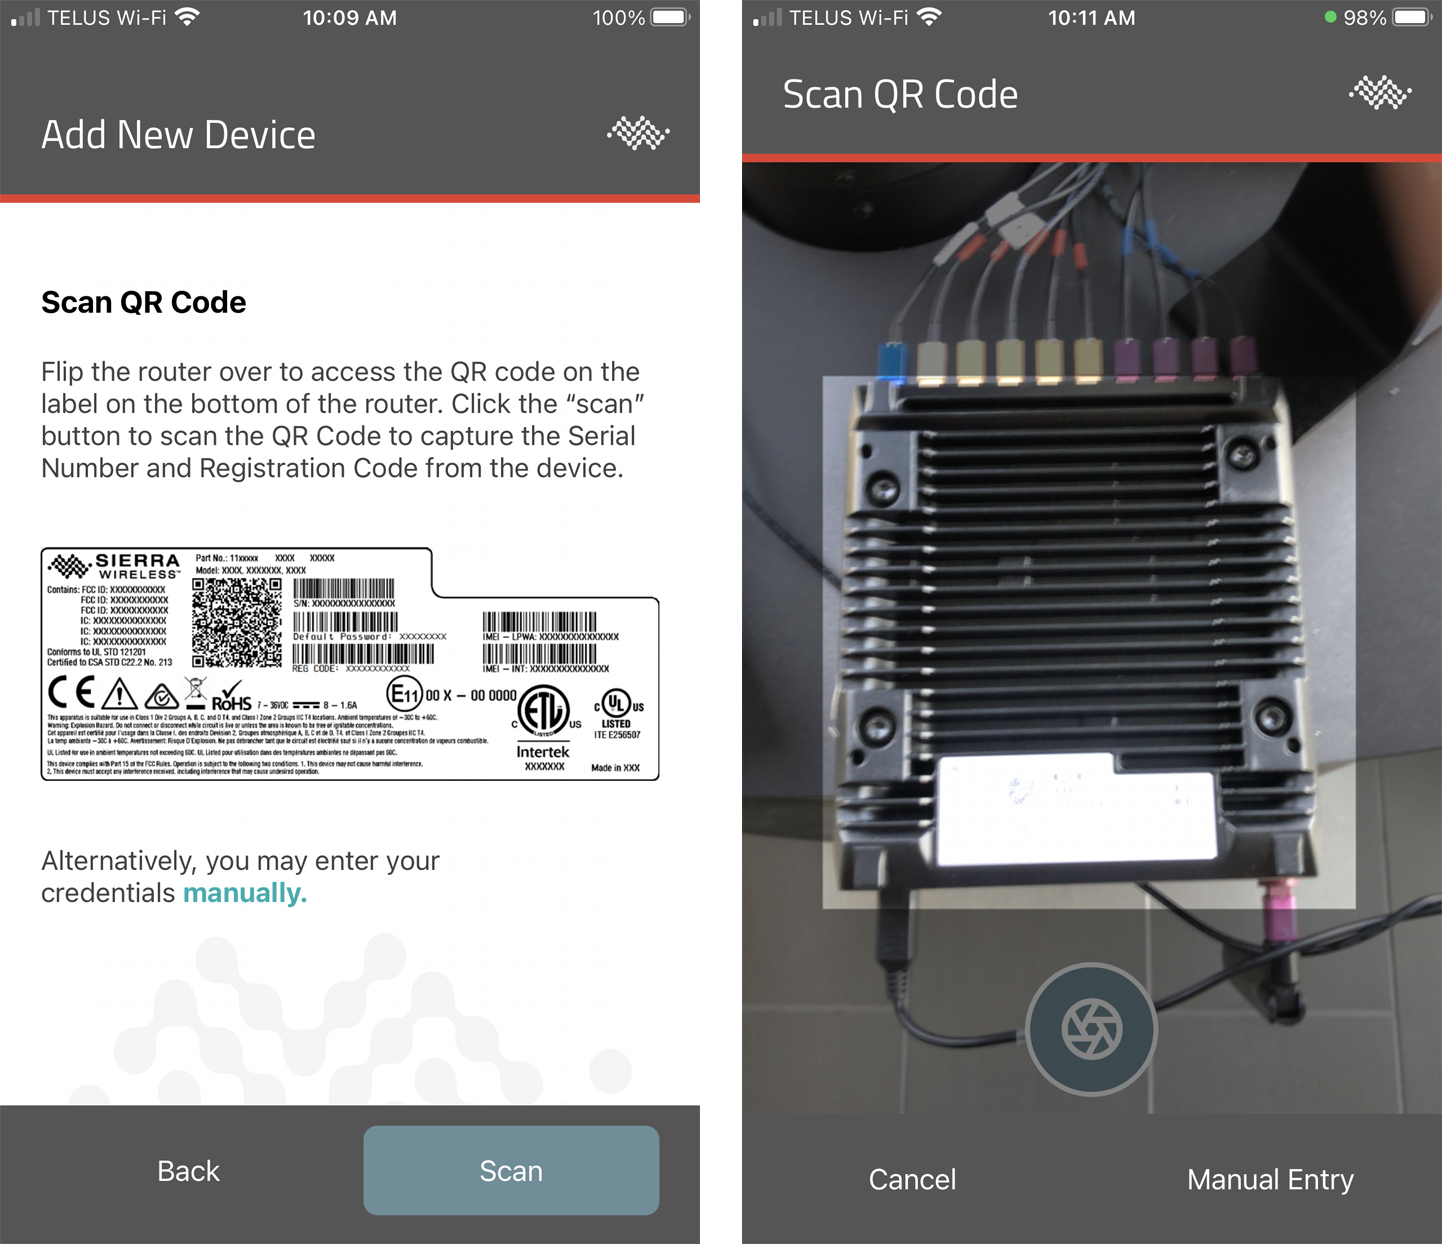
- Scan the label QR code (or enter the registration code and serial number manually if scanning isn’t possible).
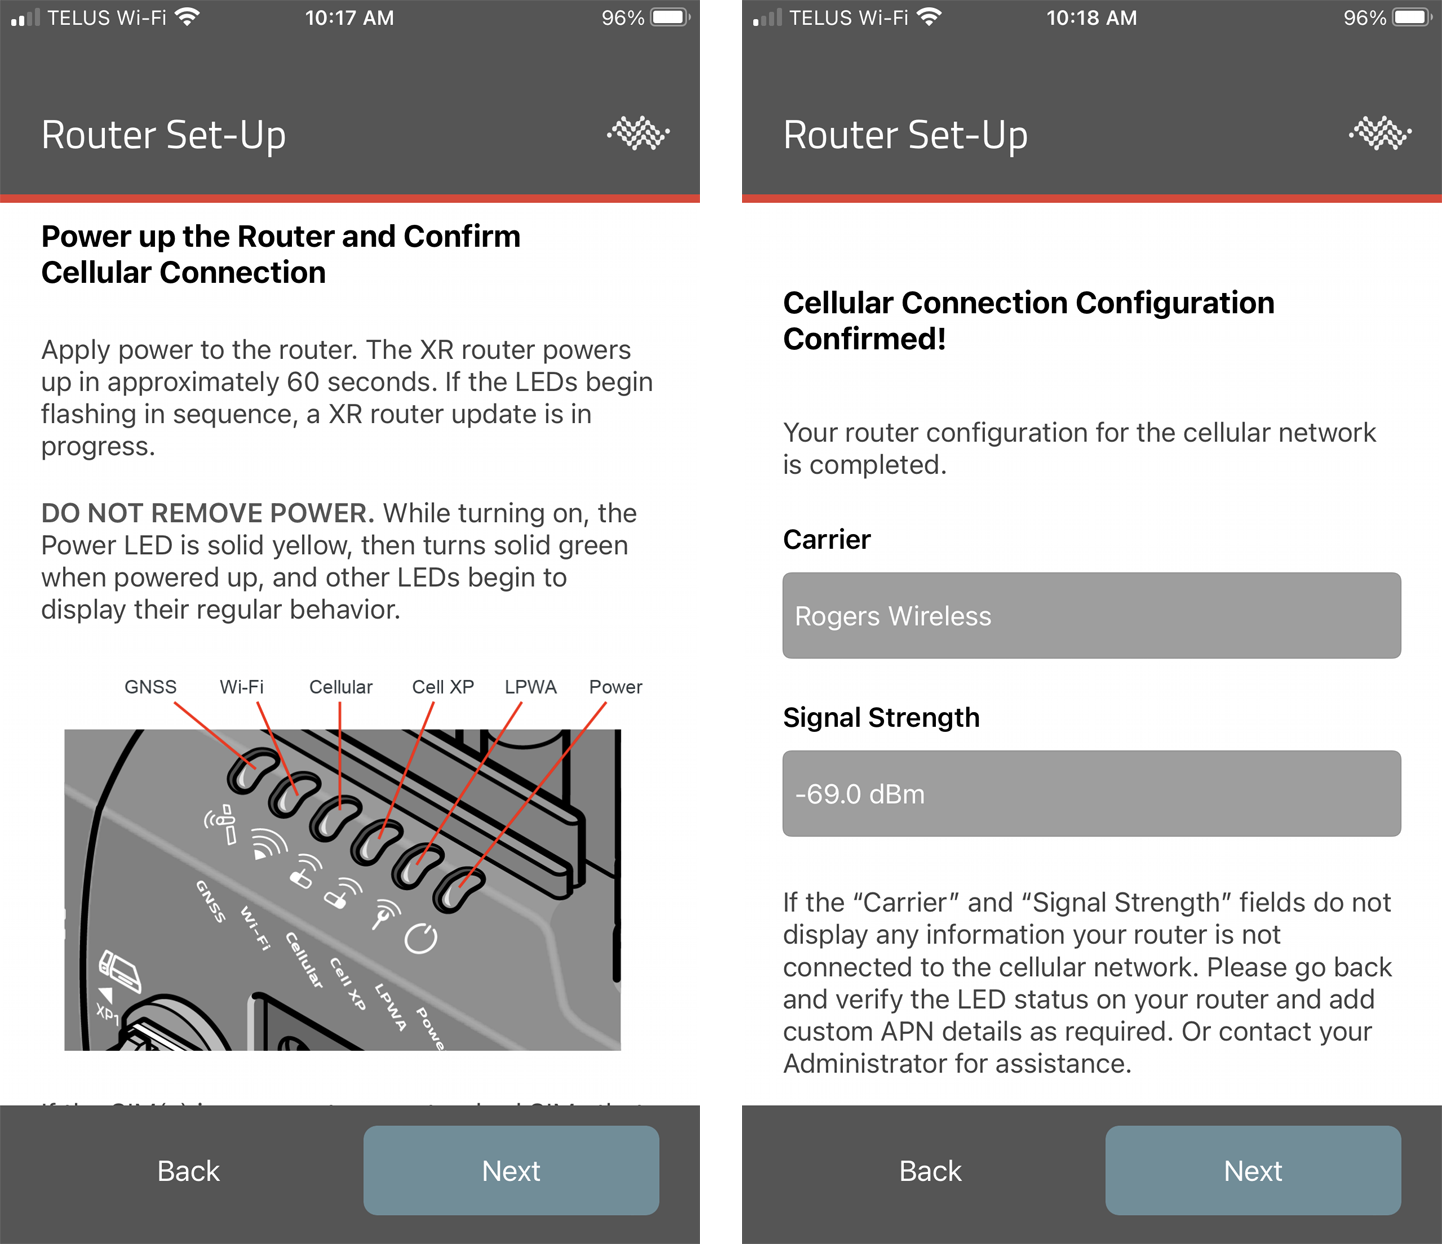
- Power up the router and confirm the cellular connection via the router LEDs. The router should connect to the cellular network using the APN (Access Point Name) from the SIM. However, if the APN is not in the library stored on the router, you may need to manually enter a custom APN using the “Yes, I need to configure a custom APN” link on this screen.
- The XR Series router requires access to the internet to connect with ALMS to complete the configuration of the device. For users with SIM cards that require a custom APN, the device will not have connectivity on the primary cellular radio. In most cases, the OOBM radio should provide this connectivity.
- If you experience issues with configuration, we suggest plugging the XR Series router into an alternate internet connection via Ethernet to complete the setup.
The first power-up screen also has a link to the Sierra Wireless Source, where you can download the XR Series Hardware Guide. The Hardware Guide has additional information about LED operation and router installation.
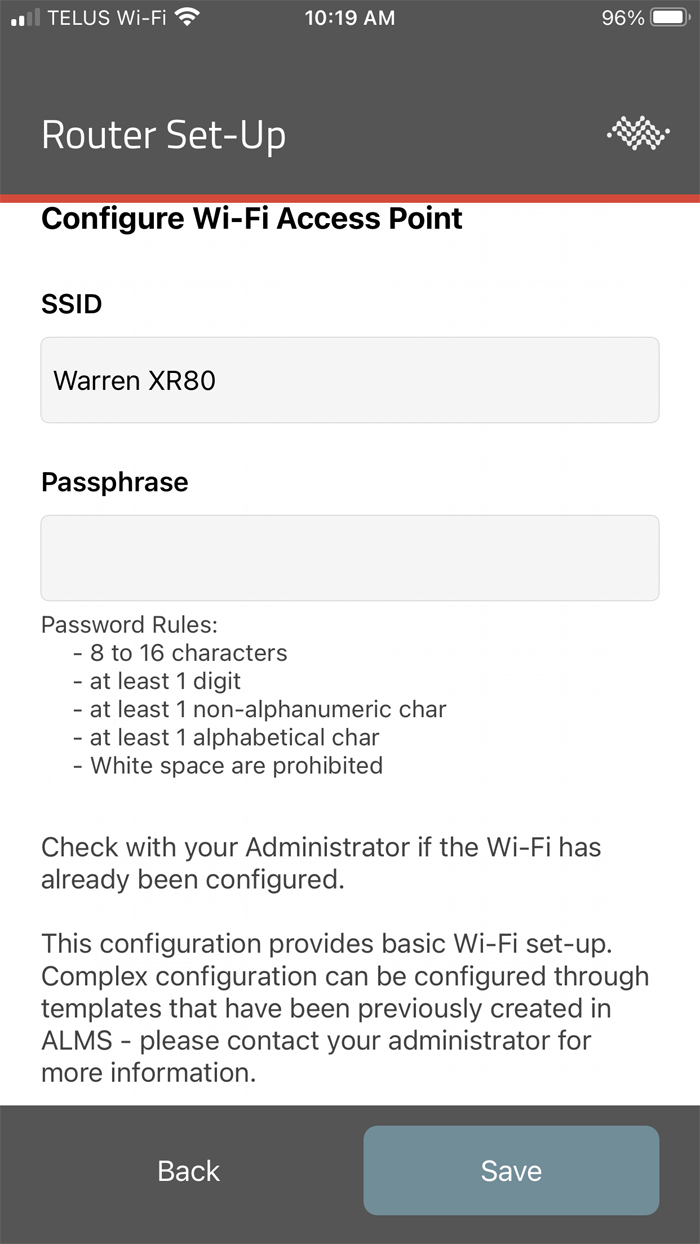
- Set up the router as a Wi-Fi access point by configuring its SSID and passphrase. Once these are set, the router can provide Wi-Fi to devices in your building or office.
- When configuring the Wi-Fi, you may get a screen indicating that the configuration change was not accepted. We suggest hitting the “Retry” button once or twice. If this issue persists, you may have connectivity issues to ALMS, and we suggest you contact Sierra Wireless Customer Support.
- The Wi-Fi configuration is done using the default settings for WPA2/WPA3 Transition Mode. There are password restrictions as required by this level of security.
- If you require a different Wi-Fi configuration, those settings should be changed from ALMS directly.
- Complete the setup process by sending a router Health Check to your system administrator. The report is sent by default to all Admins on the ALMS account. You can enter additional email addresses as required (to send yourself a copy of the report, for example). As part of the Health Check, you can:
- Run a performance test for your router’s current operation.
- This will verify that your router is connected to the cellular network, that you can attach to the Wi-Fi hotspot you just set-up and confirm the end-to-end connection for speed and latency.
- Take and attach a picture of your router’s installation.
- This is valuable to help troubleshoot issues with connectivity if you have them. You can take multiple photos, and we suggest showing the router in the environment where it is installed, as well as close ups to show the antenna configuration.
- Enter additional email addresses that will receive a copy of the report.
- You only need to add additional email addresses if you want to send the report to someone other than your ALMS Administrators.
- Run a performance test for your router’s current operation.
This completes your router setup. We’d appreciate any feedback you want to provide in the app’s Feedback section. Let us know what we can do to improve the app!
You can also use the AirLink Registration Mobile App as an easy way to change the Wi-Fi configuration on your router if you want to change the SSID and/or password in the future.
How-Tos
This section provides you with helpful procedures for common tasks.