How to manage a large number of systems?
AirVantage is a centralized console designed to manage a large number of systems.
Follow this tutorial to learn how to use of filters, labels and sorting methods to manage your entire fleet, or specific groups of systems.
- To watch the video version, click on the screen above.
- Or, if you prefer, follow the steps below at your own pace.
Managing your fleet (hundreds or even thousands of gateways) can quickly become time-consuming if your management tool has not been designed for large deployments. AirVantage has a number of powerful features that make it easy for IT departments to monitor and update any number of deployed gateways in the field. Specifically, filters, labels and sorting features are highly effective tools, yet very simple to use.
Step 1: Filters
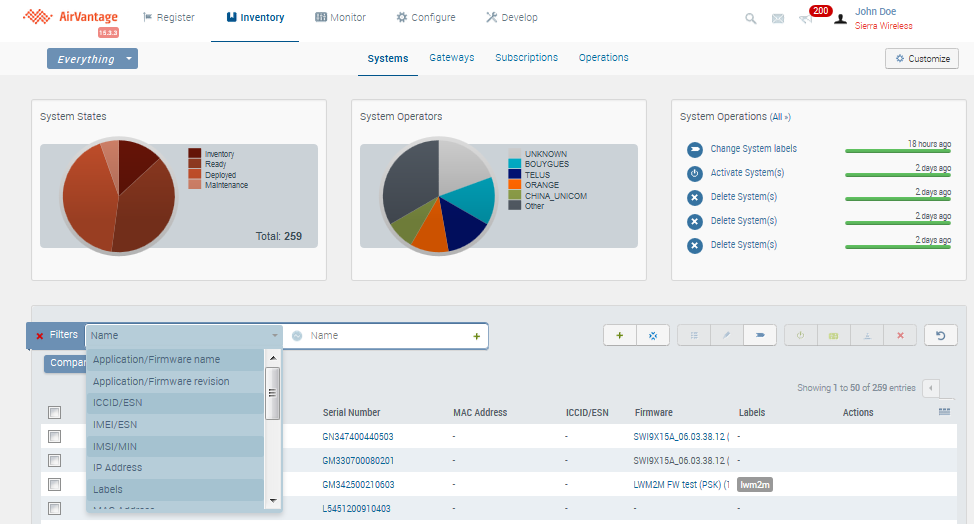
Let’s start with filters. Every list or table in AirVantage can be filtered. Available filtering criteria depend on which list you are currently viewing.
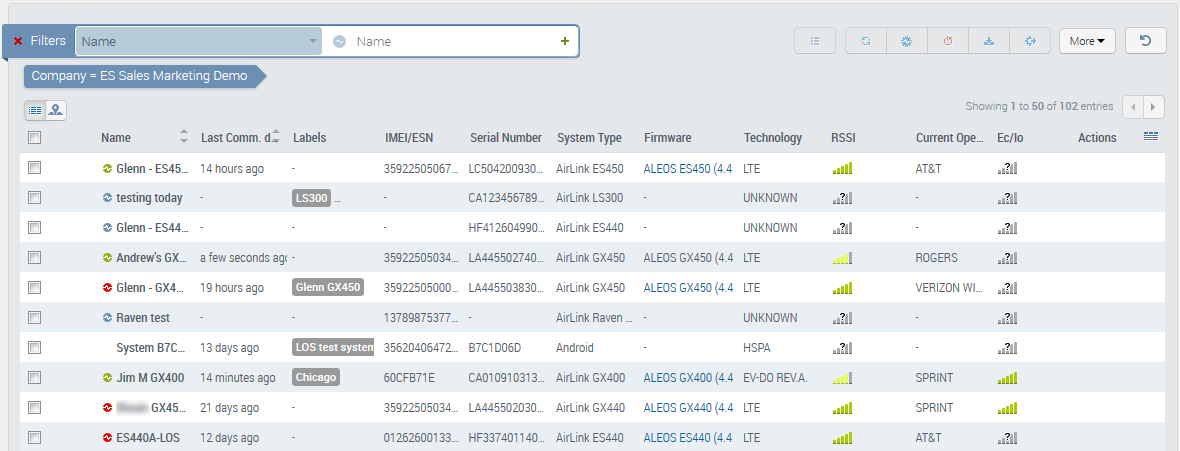
For instance, when viewing Systems, the list can be filtered using any attribute of a system, from the name or label to the serial number of the gateway.
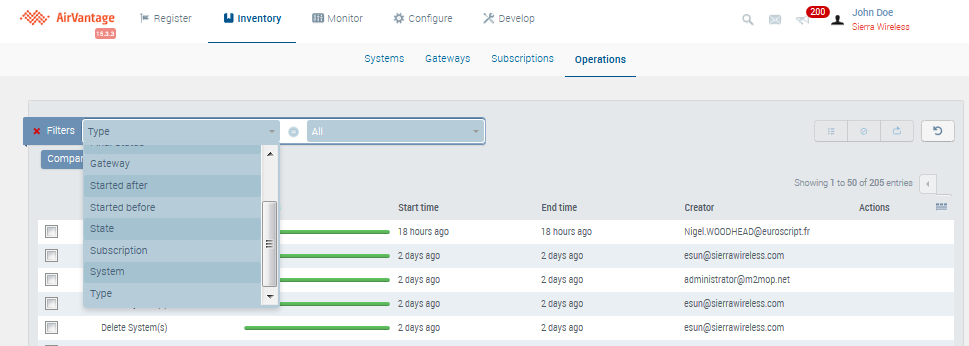
When viewing the list of Operations, we are presented with a different set of relevant filtering criteria, such as the type of operation and operation dates.
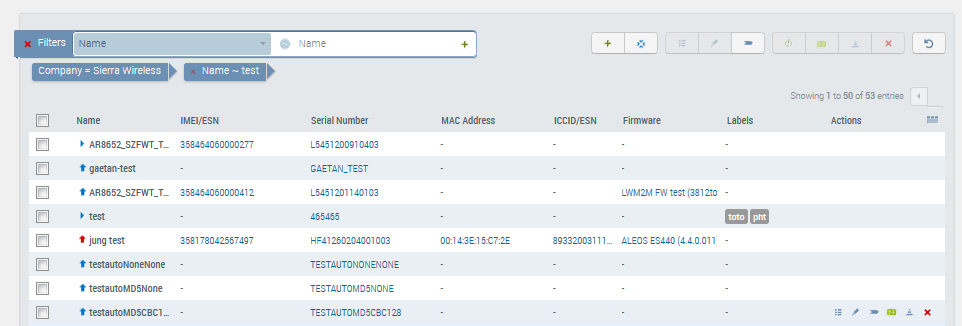
Back on the Systems page, the Name attribute is the default filter criteria. By entering the name of the system or simply part of its name, you can quickly find the system you’re interested in. For example, “test” systems:
You can also apply multiple filters simultaneously. For instance you could add a filter based on the Serial No. (for example systems whose Serial No. begins with L5) to refine your search.

Any applied filters are shown graphically above the current list. You can remove any applied filter by clicking on its x box. Return to the unfiltered list of systems by removing all the filters.
Filtering using pie charts
In addition to manually filtering lists, all the graphical widgets found on the dashboard act as shortcuts to apply filters.
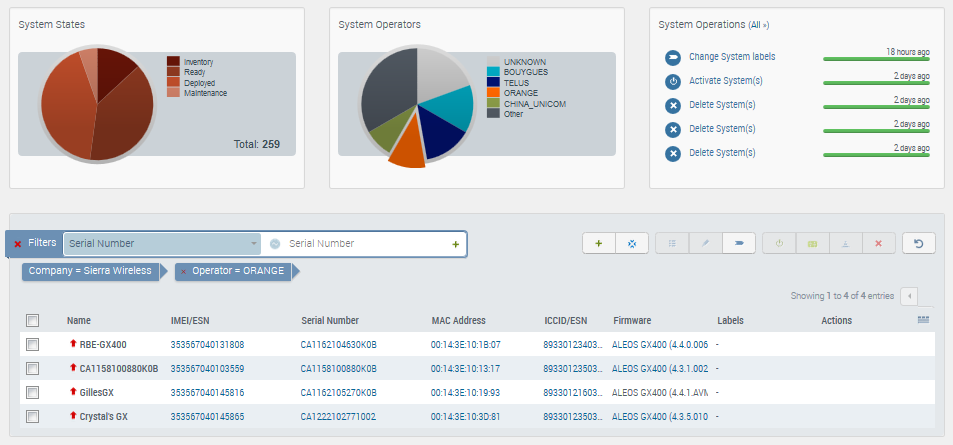
For example, to display only the list of systems currently using the Orange Operator network we can select the Orange slice from the System Operator widget.
This applies the appropriate filter to our list. We can also use the widget to remove the filter and return to the original list.
Any of our dashboard widgets throughout the application work in the same fashion.
Step 2: Labels
Labels provide another efficient way to quickly organize and find your systems.
Labels are the AirVantage equivalent of tags. These are user-defined tags that you can apply to your systems to organize them in any way you see fit. For example, you can create labels based on the geographic location of systems, their intended use, or both.
You can apply as many labels to a system as you need, to include it in different groups.
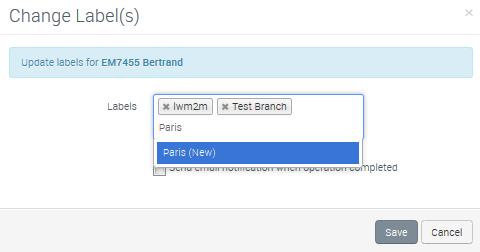
Labels can be easily edited by clicking on a system’s Change Labels button…
- Remove an unwanted label by clicking on the x box next to it.
- Or select an existing label to add it to the system.
- Or create a new one altogether by simply typing a name, for example “Paris”, to denote a location.
Apply changes when you’re satisfied with your labels.
You can then use your labels as filter criteria to organize your list of systems.

Step 3: Sorting
Lastly, the sortable table columns in AirVantage can also be used to quickly find what you are looking for.
These are indicated by arrows in table headers.
Click on the arrow to sort the column in the increasing or decreasing order. Try it out on a sortable column, such as “Last communication date”. Use it to toggle the list to show you either the systems that have communicated the most recently, or those that have not communicated in some time.
 Searching...


