 Searching...
How to Stage Multiple AirLink Routers or Gateways at One Time Using a Switch and an ALMS Template
The Problem? How to Most Efficiently Configure Multiple AirLink Routers or Gateways?
One of the common problems that our Partners and Customers experience is how to quickly and easily configure dozens, or even hundreds of AirLink routers or gateways before sending them out to be deployed in the field. Most of our users are familiar with ACEmanager, the ALEOS configuration tool that we use to configure the software on the gateway. But using ACEmanager to manually configure even dozens of devices is a time-consuming and inefficient process for configuration before deployment. In addition, by doing an initial firmware update over Ethernet from AirLink Management Service (ALMS), you are not using any cellular data which would be required if you waited for the devices to be deployed before completing the update. This could be significant for Customers on limited data plans.
This document describes a way to preconfigure your AirLink gateways or routers via the Ethernet port on the gateway or router by connecting multiple devices to an Ethernet switch connected to the Internet, and using ALMS and a template to configure the devices.
Prerequisites and Assumptions
Before getting started with this project, there are a number of things that you need to have in place:
- An ALMS Account with at least one active user
- If you do not have an ALMS account, you can create an account to try this process. Sign-up for your ALMS account here .
- Multiple AirLink Gateways
- For this example, we have 11 RV50 AirLink gateways with no SIM cards.
- While you could do this exercise with gateways with SIM cards installed, the process is easier without them.
- At least one active gateway of the same type registered into the account. Make sure you have performed at least one complete synchronization of the gateway with ALMS to ensure all of the relevant details are on the platform.
- This will ensure that the firmware version(s) you require are active in the account, and that you can create a template against this firmware version.
- An ALMS template with the device configuration. There are two ways you can create a template to use:
- Create from scratch in ALMS: Use ALMS to create a new template, and configure all the required parameters.
- Configure a gateway with ACEmanager, sync to ALMS: You can then use that gateway to create a template with all of the parameters you have configured.
- Either process will work; you just have to decide which process is best for you. For detailed instructions, log into ALMS and follow the instructions in the documentation:
- Please note that a saved template file from ACEmanager cannot be used in ALMS.
Register your List of Gateways or Routers
The first step is to pre-register your devices with ALMS.
Log into ALMS.
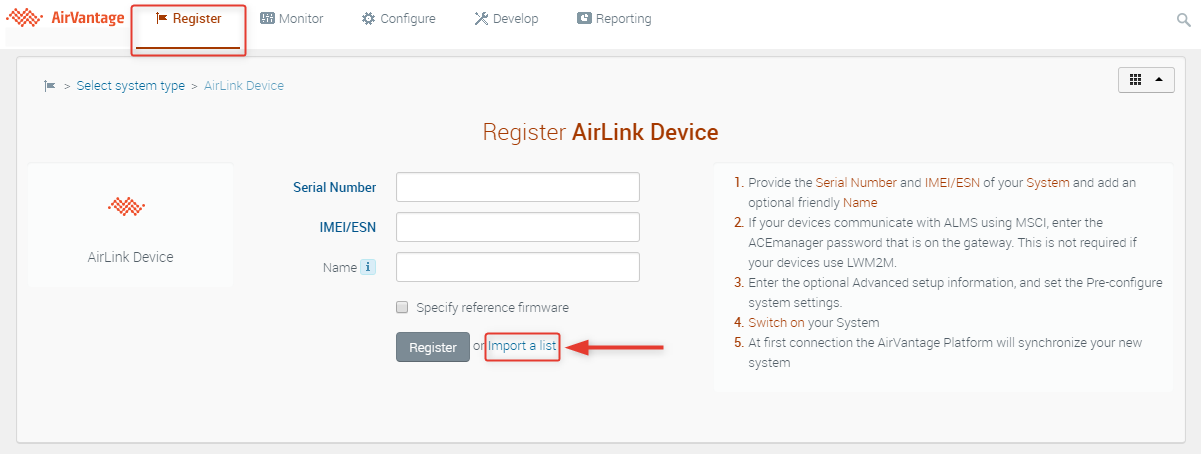
Click the Register tab.
Click Import a list.
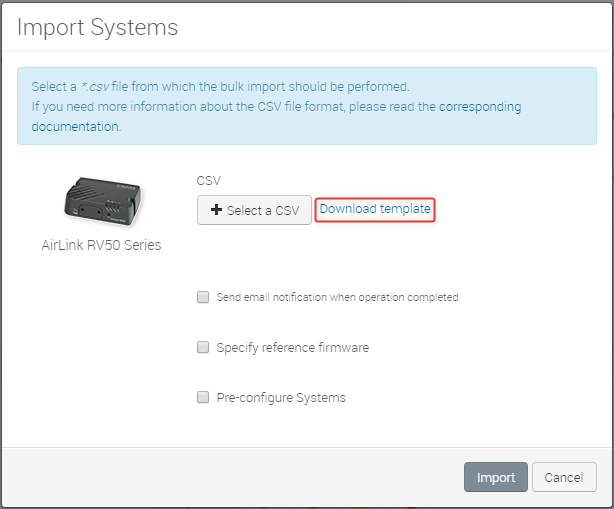
ALMS opens a new dialog box, where you can click Download template to download the .CSV file you will populate.
Once the template is downloaded, you will need to take your fleet of gateways and populate the IMEI, Serial Number, Password, Friendly Name for the gateway and any labels you want to apply in ALMS.
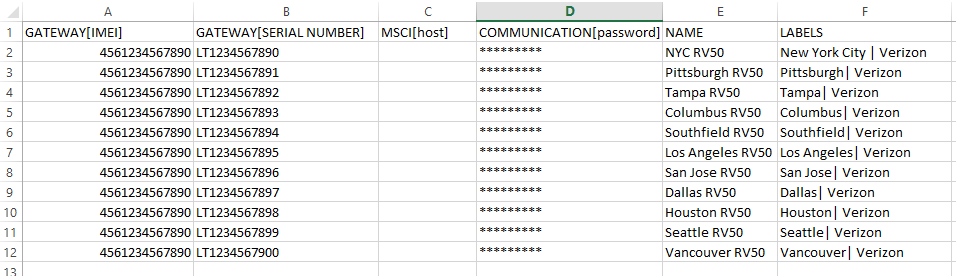
In the above example, we have populated information that does not conform to the standards required for an AirLink gateway, and have masked any passwords. To populate IMEI and Serial Number, you can manually enter the information, or capture it using a bar code scanner or similar device. Letters in the serial number must be in UPPER CASE. Alternatively, you may be able to reach out to the Sierra Wireless Partner you purchased your gateways from and request a list of the Serial Numbers and IMEIs of the gateways they have shipped you.
Once your spreadsheet is populated, save it as a CSV file somewhere accessible.
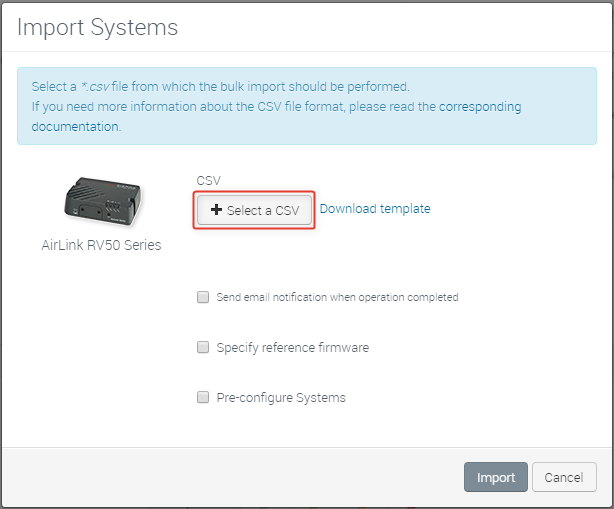
In ALMS, click Select a CSV and select the CSV file you just saved.
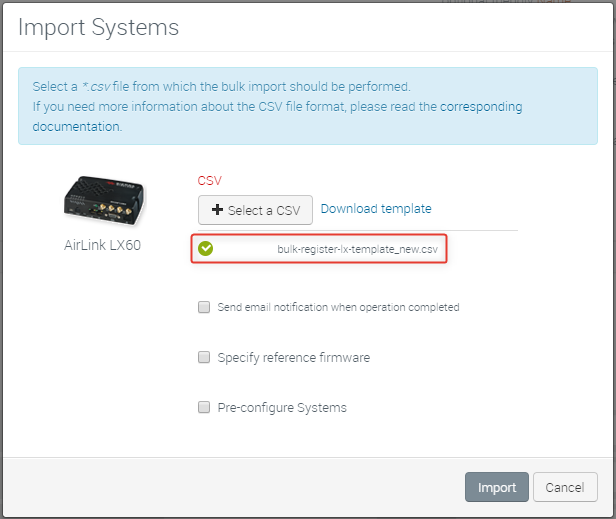
The file will be identified. Select Pre-configure Systems.
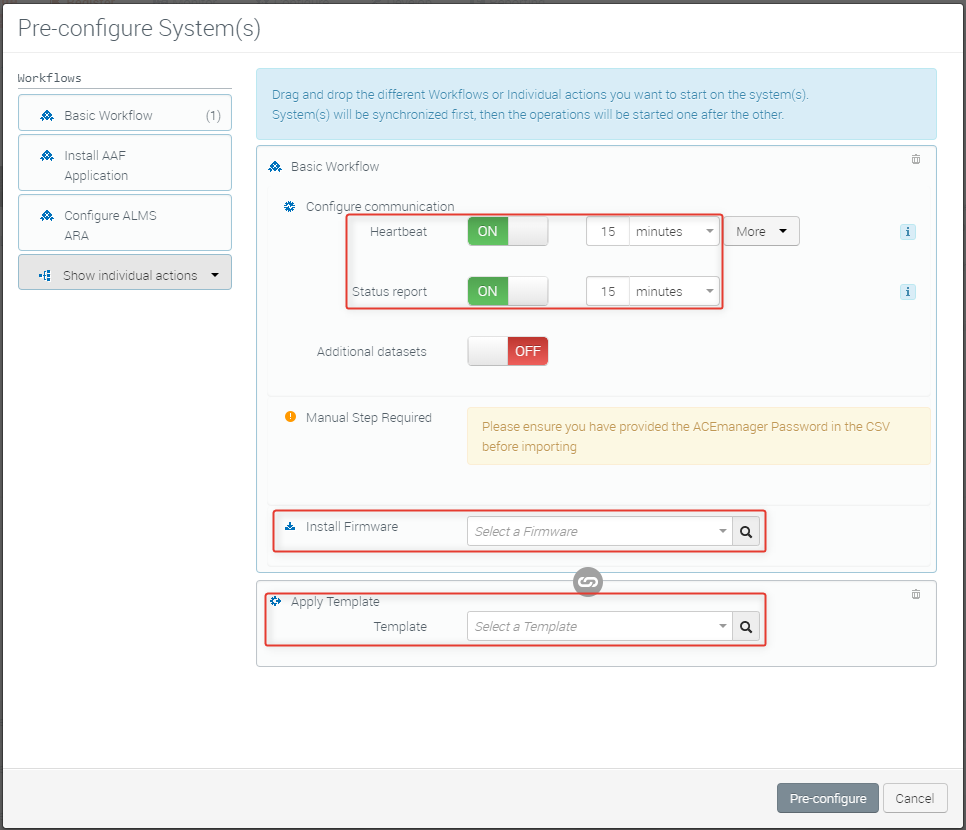
When you click Pre-configure Systems, a secondary dialog will appear. Make the following selections:
- Turn on Heartbeat and Status report. Set the frequency to something appropriate for the communication you want the gateways to have. In this example, it was set to 15 minutes. More frequent is better for this initial configuration, and you can always reset the communication frequency from ALMS after the gateways are set up.
- For Install firmware, select the most recent version for your gateway. This will force the gateways to update to the latest version, when they check in.
- For Apply template, select the template you just created in ALMS.
- Click Pre-configure.
You are presented with a summary screen that confirms all your choices. Click Start. The file will upload, and your devices will be registered in ALMS, ready for them to communicate for the first time.


Configuring Multiple Gateways
At this stage, you will want to get your hardware environment set up. Ideally, you will have access to a bench area where you can set-up a multi-port Ethernet switch, along with power supplies for the gateways. Please note that many AirLink gateways are designed for industrial or mobile environments and do not ship with an AC power supply. Speak with your Sierra Wireless Partner to order the power supplies needed for your model(s) of gateways. If this process is one where you will be repeating this task on a regular basis, consider a permanent set-up where you leave the Ethernet cables and power supplies plugged in permanently. This will allow you to swap gateways in and out quickly and easily.

When assessing your network configuration, please note that the devices must also be able to access a DHCP server that will serve up an IP address and allow them to access the Internet. In our default configuration, the DHCP Mode in ALEOS is set to “Auto”. If the device does not see a DHCP server on its Ethernet connection after a period of time, it will switch the DHCP mode back to the gateway being a DHCP server, which will prevent this process from working correctly.
Leave the Ethernet switch and power supplies turned off. Plug in the power supply and Ethernet cable to each modem. In this example, we had 11 gateways plugged into a 24 port switch. There is essentially no limit to how many you can configure simultaneously, although there are practical limits.
Once all the gateways are plugged in to power and Ethernet, and you have confirmed that you can access the Internet through the switch, turn on the power to the gateways and the switch.
At this stage the gateways will power up and access the Internet. By default, they will connect to ALMS and received instructions from ALMS to update to the latest firmware, and apply the template you have selected. You will observe the gateways reboot a number of times during this process.
Log into ALMS to see the gateway operations progress, or you can walk away and leave them to complete their installations, upgrades and configuration. The whole process should take a little more than 30 minutes.
After sufficient time, you can log in to ALMS to confirm that your devices have successfully completed the configuration process