The router can monitor network connections and attempt to recover when a high-level communication failure is detected on a WAN or LAN connection. For example, when the router is connected to an Ethernet WAN link but the link stops passing traffic, the router can switch to another available WAN link and restart its Ethernet port in order to attempt to recover connectivity.
The Network Watchdog detects connection failures and recovers the connection by periodically checking against its preconfigured parameters for conditions such as a minimum number of connection failures and timeouts.
To configure the network watchdog:
Go to Networking > Network Watchdog > Monitoring Rules.
Click CREATE MONITORING RULE to create a new rule, or click Edit ( ) in the RULES table to update an existing rule.
Begin configuring the Monitoring Rule.
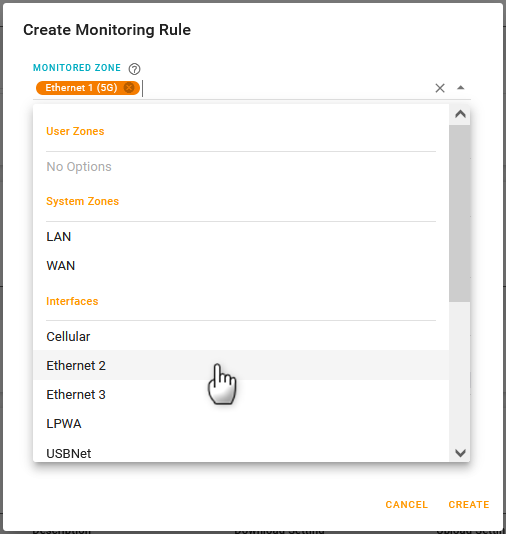
Click the MONITORED ZONE field to choose which Zones (System Zones or your own defined zones) or interfaces you want to monitor. Zones are a group of interfaces. Add as many Monitored Zones as you want.
WARNING : When selecting the MONITORED ZONE, ensure that you do not select an interface or zone that already has a network monitoring rule applied. Multiple networking monitor rules are not supported on the same interface.
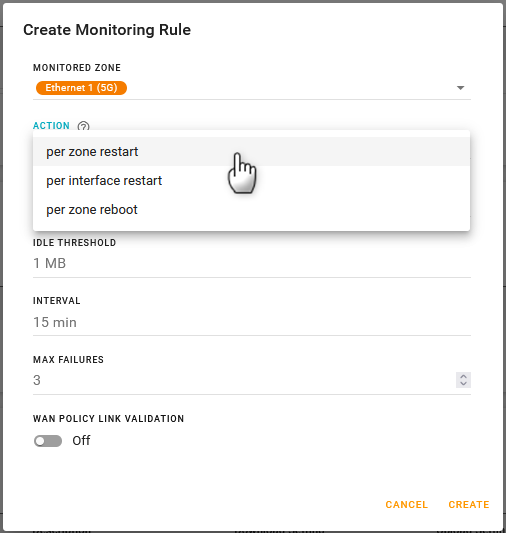
Select the ACTION the router will take when the watchdog detects a failure:
per zone restart restarts all interfaces in the monitored zone when all interfaces in the monitored zone are down.
per interface restart restarts an interface in the monitored zone when that interface is down.
per zone reboot reboots the router when all interfaces in the monitored zone are not working.
Select the monitoring METHOD:
idle traffic allows you to monitor without sending a ping. AirLink OS monitors traffic (TX/RX bytes per second) to determine whether the selected interface(s) are operating. This method is suitable for satellite links, where you want to minimize monitoring-related traffic (such as pings or DNS lookups used by other methods).
After selecting the idle traffic method, configure the IDLE THRESHOLD. This is the threshold at which traffic is considered to be “idle”. You can raise or lower the threshold depending on the interface being monitored. For example, if a Wi-Fi interface has “idle” noise levels of 500B/s (TX) and 95KB/s (RX), you can set the threshold to 100KB/s.
ICMP ping: sends ping traffic at a configured interval whether the interface is idle or carrying traffic.
ICMP ping on idle traffic: sends a ping when the router detects idle traffic (no increase in RX/TX values is detected).
After selecting the ICMP ping on idle traffic method, select the IDLE THRESHOLD. See above for description.
DNS lookup: attempts to resolve host names at a configured interval whether the interface is Idle or carrying traffic.
DNS lookup on idle traffic tries to resolve the hostname when traffic is considered idle. Some firewalls do not allow ICMP pings through, so DNS lookup is the best option in that case.
After selecting the DNS lookup on idle traffic method, select the IDLE THRESHOLD. See above for description.
Select the INTERVAL. Depending on the monitoring method you’ve selected, the interval determines:
How often a ping is sent. Frequent pings are used especially for Wi-Fi links.
How often the router checks TX/RX bytes to determine if traffic is idle.
Select the MAX FAILURES (from 1 to 10) to set the number of successive failures (failed pings or idle traffic detected, depending on your monitoring method) before the router takes the specified action.
For monitoring methods other than idle traffic, set the following fields (both fields accept hostname [FQDN] or IPv4 or IPv6 address):
Primary Host
Secondary Host (optional, used if the Primary Host fails)
Enable or disable WAN POLICY LINK VALIDATION. This setting is not directly related to the Network Watchdog, but it is used in Multi-WAN Policy as an additional check to determine whether a WAN link/interface can reach a DNS server (the Primary Host or Secondary Host you have configured) and be considered a usable link by any of the Multi-WAN policies. In some situations, a WAN link comes up and connects but it can’t pass traffic due to the lack of DNS. When WAN POLICY LINK VALIDATION is enabled, the router sends pings or DNS requests to validate the link. You can leave this setting disabled if the router uses only a single WAN link.
For WAN Policy Link Validation, set the following fields (both fields accept hostname [FQDN] or IPv4 or IPv6 address):
Primary Host
Secondary Host (optional, used if the Primary Host fails)
Click CREATE.
If you are using your router in a non-cellular application, ensure that you disable the router’s cellular interface(s) under Hardware Interfaces > Cellular Interfaces > Configuration. Note that the Network Watchdog is preconfigured to restart the WAN zone after an ICMP ping detects a failure. Because the default WAN zone includes the Cellular interface, a device without a SIM card will restart its cellular interface continuously. Do not disable the Cellular LPWA interface, because this will affect the connection to ALMS and your ability to remotely configure the router.
 Searching...

 ) in the RULES table to update an existing rule.
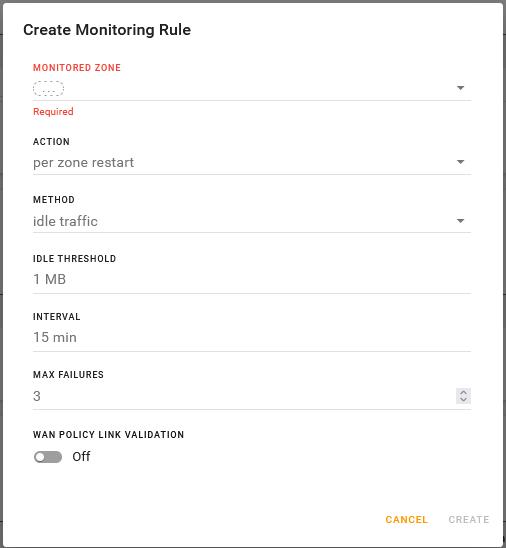

 ) in the RULES table to update an existing rule.