How to write an application with AirVantage
Handling data with AirVantage requires you to define an
application modelwhich describes how the device interacts with AirVantage and what are the data: it’s a contract between the device and AirVantage. Data are identified using dataId which identifies a data from the device until the REST API.This tutorial explains you how to edit this contract, what are the impact on the embedded application source code and how to handle data within REST API.
Step 1: Define the contract
An application model aims to explain to AirVantage how to deal with the device about communication and authentication and managing the data: variable, settings or commands. If you don’t supply such information, the server will ignore all the communication from your device.
This section is a short introduction about the application model.
Identify your application
Three fields identify your application uniquely:
- type is an internal field used by AirVantage to identify the application.
- name is a field to allow user to identify the application easier than the type field.
- revision identifies one version among all ones for an application. For each change in your application model, increase the revision number.
Configure your communication
Specify the protocol you want to use and how to identify your device:
- SERIAL to use the Serial Number (default)
- IMEI to use the IMEI
If you want to use TLS, configure accordingly:
- For server authentication based on user/password, the application model must include this security parameter:
<protocol comm-id="SERIAL" type="MQTT" >
    <parameter name="mqtt-security" value="USER_PASSWORD"/>
</protocol>
- For mutual authentication, the application model must include this security parameter:
<protocol comm-id="SERIAL" type="MQTT" >
    <parameter name="mqtt-security" value="x509"/>
</protocol>
Define your data
To be able to send and receive data, you have to describe your data to AirVantage. Two kinds of data are available:
- variable is a data sent from the device to AirVantage. It’s a data about the device, the asset/machine you want to monitor. On an AirVantage point of view, you can not modify a variable (only the device can send a value).
- setting is a data to configure the behaviour of your device or asset/machine. Both user from AirVantage and device can modify a setting.
A data is defined by a label to be displayed in the AirVantage UI, a type (double, int, string, boolean, binary) and a path.
Data Id is the full path of your data, to be sure it identify uniquely your data. That means the path has to start with the asset-id. Have a look to your application model (the above xml file which describes your data).
You will find something like that:
<asset default-label="FTP Monitoring" id="greenhouse">
   <node path="data" default-label="Data">
      <variable path="temp" type="int" default-label="Temperature"/>
      <variable path="hum" type="int" default-label="Humidity"/>
   </node>
   <variable path="temp" type="int" default-label="External Temperature"/>
</asset>
The dataId are greenhouse.data.temp which identifies the Temperature. But you can get greenhouse.temp which identifies the External Temperature.
Define your command
A command is an action sent from AirVantage to act on the embedded side. You can specify parameters.
<command path="setMessage" default-label="Set message">
  <parameter id="message" default-label="Message" type="string" />
</command>
A full Application Model example
<?xml version="1.0" encoding="ISO-8859-1"?>
<app:application
        xmlns:app="http://www.sierrawireless.com/airvantage/application/1.0"
        type="com.demo.airvantage.app"
        name="AirVantage Greenhouse"
        revision="1.0">
 <capabilities>

  <communication>
   <protocol comm-id="SERIAL" type="MQTT" />
  </communication>

  <data>
    <encoding type="MQTT">
      <asset default-label="Greenhouse" id="machine">
        <variable default-label="Temperature" path="temperature"
                                      type="double"/>
        <variable default-label="Luminosity" path="luminosity"
                                      type="double"/>
        <setting default-label="Threshold" path="threshold"
                                      type="int"/>
        <command path="setMessage" default-label="Set message">
          <parameter id="message" default-label="Message" type="string" />
        </command>
      </asset>
    </encoding>
  </data>
  </capabilities>
</app:application>
Step 2: Import a new application in AirVantage
Once you have declared your application features, import it in AirVantage and use it with your systems.
Generate an application model
You can modify the <data> area according to your business. Once it matches your needs, save everything as model.app.
- Zip this file, mine is named model.app.zip
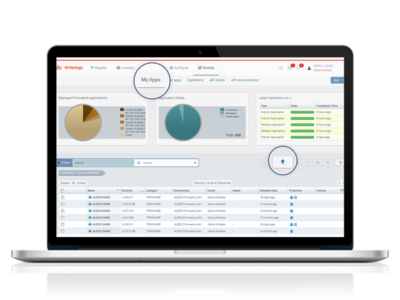
- Go on Develop Activity > My Apps
- Click on the Release button
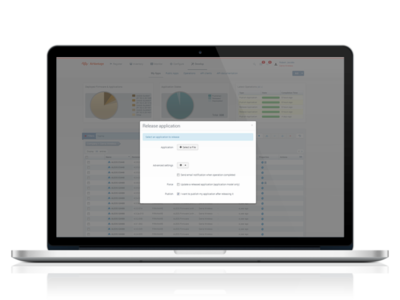
Release your application
- Select your file model.app.zip
- Open Advanced settings and select I want to publish my application after releasing it
- Finally, click on Start
Your application is ready to be associated to any system.
Step 3: Using your data
This step helps you where to modify a sample code and how to handle data within REST API.
Using your data in an embedded application
Have a look to our howto & samples code supplied for each type of hardware, step Design which explains you how to modify the source code for various hardwares and languages:
For each these samples code, you have to adapt the data id sent using the protocol. Keep in mind to always use the asset-id defined in the application model to start the data id.
Using your data in AirVantage
AirVantage allows you to get data from a system using Dataset or modify settings using template and supplies API to manipulate raw & aggregated data values.
Data sending from the device to AirVantage can be done in two ways:
- Your systems send data to AirVantage which stores them (device initiated).
- You can use Dataset to ask the system to send data to AirVantage (server initiated).
In this last case, AirVantage asks to the system to send the value of this set of data (have a look to the API called ‘Retrieve Data’ in System section and all API in the System > Data section).
Read this tutorial for more information about how to retrieve data using a dataset
You want to get the data values stored in AirVantage using the API:
- Last datapoints
- Multi Raw datapoints
- Multi Aggregated datapoints
- Fleet Aggregated datapoints
- Export datapoints
All these API use data id as described above.
To understand how to use API, have a look to the API Getting Started .
 Searching...


