Reporting
Advanced Mobility Reporting (AMR) is an ALMS offering that provides data analysis and historical reporting for your AirLink gateways and routers. AMR is available as part of AirLink Premium with supported devices.
AMR provides lightweight AVL and fleet management capabilities with its extensive telemetry data collection and reporting features. For better insight into your device status and vehicle behavior, AMR is an ideal low-cost, cloud-based solution. The Reporting section of ALMS is currently available only to AMR users.
 Initializing Table Of Contents...
Summary of Available Reports
AMR offers historical reports for:
-
Shows you system network connectivity status during trips within the reporting period. Supports single and multi-radio routers.
-
Shows you WAN signal strength during trips within the reporting period for routers with a single cellular radio.
-
Shows you the specific connectivity status for multiple radios (cellular interfaces) during trips within the reporting period. For routers running AirLink OS only.
-
Help keep your drivers safe and manage performance, measuring driving habits such as hard acceleration, hard deceleration, cornering and speeding.
-
Schedule maintenance and repairs with a summary of engine faults detected, including time of fault, diagnostic code, total time and distance driven with the MIL activated. Requires an OBD-II connection to the vehicle.
-
Provides a summary of device status and connectivity over time; ideal for identifying connectivity issues that occur at specific times of day. For routers running AirLink OS only.
-
Retrieve the distance traveled for a vehicle during a specified period. You can also define a zone for odometer reports, so that any travel within a zone can be included or excluded from the report. Requires an OBD-II connection to the vehicle.
-
Provides an indication of when the driver’s side seat belt is not engaged while the vehicle is moving. You can set a speed threshold for vehicles to be included. Requires an OBD-II connection to the vehicle.
-
Shows you an animated view of a vehicle trip.
-
Know what your fleet of vehicles has been doing with a historical view of vehicle location, with stop locations, speeding relative to posted limits, and network connectivity status data. Supports single and multi-radio routers.
-
Save time in tracking which routers are installed in which vehicles with an inventory of all routers in vehicles, providing the device serial number, the vehicle’s VIN and the total miles driven for each vehicle. Requires an OBD-II connection to the vehicle.
-
Get a complete picture of vehicle utilization including total engine time, trip time, idle and PTO time. Requires proper vehicle installation of GPIO and an OBD-II connection to the vehicle.
-
Provides a summary of time spent (in hours/minutes and as a percentage) and distance travelled in one or more Zones.
Each pre-defined report contains unique content focused on a specific purpose. Each report contains tabular and/or map-based results. You can configure any report to schedule the report delivery (daily, weekly, monthly) or run reports on demand; confine the report to a pre-defined region with Zones (geofencing), export reports as PDF, Excel or KML files, and output reports for printing.
Prerequisites: What you need to use AMR
Because AMR is primarily focused on vehicle telemetry reporting, there are a number of hardware and software requirements you must have in place before you can use AMR features. Running reports on other AirLink routers may not yield expected results.
AirLink Routers
AMR reports vehicle data for AirLink routers connected to a vehicle. This includes ALEOS-based devices (AirLink GX450 gateways connected using a B&B OBD-II scanner, or MP70, LX60, XR90 and XR80 routers connected directly to a vehicle’s OBD-II or J1939 port) and AirLink XR60 and RX55 routers with vehicle telemetry features enabled.
An OBD-II connection between the vehicle and the router is required to collect CAN bus data for the following reports:
- Engine Fault Summary
- Odometer
- Seat Belt
- Vehicle
- Vehicle Utilization
AMR also reports routers’ WAN/Cellular usage and connection status, which can be displayed in the following reports:
- Coverage Trails
- Multi-Radio Coverage Trails
- Coverage Map
- Link Utilization
- Trips
- Trips Replay
AMR supports an external modem connected to a router’s Ethernet port for AirLink OS routers only. Semtech has done a custom integration to support HPUE cellular modems. When the external modem is configured and active as the primary WAN interface, it can be displayed in the same way as regular cellular interface. The HPUE modem is considered another cellular WAN interface to be reported upon in the same manner as the cellular interface(s) on the AirLink router. This provides the same set of link statistics that are currently reported for the cellular interface(s).
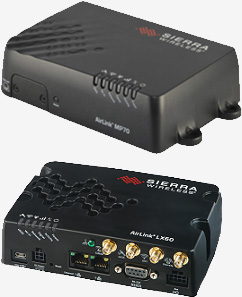
AirLink MP70 or LX60
The AirLink MP70 router, with its vehicle telemetry capability and inertial sensors, supports all features of AMR.
Not all LX60 models support vehicle telemetry. Ensure that your LX60 supports Wi-Fi and GNSS and Telemetry before configuring vehicle telemetry and AMR.
Driver behavior reports require inertial sensors on the router (as supported on the MP70), and will not be reported on an AirLink GX450 or LX60.
For optimum reporting performance, connect the router’s ignition line (white wire on the power connector) to the vehicle ignition and connect the router to the vehicle bus as described in the MP70 Hardware User Guide. Many reports will not function correctly if the router is not wired correctly.
In ALEOS, you must also enable:
- Vehicle Telemetry (by setting Direct Vehicle Bus Data Collection to Enabled: Connected to Ignition)
- Location Service
- Driver Behavior Detection (MP70 only)
- Dead Reckoning (MP70 only)
- ALEOS Application Framework
For more information, see the ALEOS Software Configuration User Guide for MP70 (for ALEOS 4.11.0 or later) or the ALEOS Software Configuration User Guide for LX60 (for ALEOS 4.13.0 or later).
MP70 and LX60 routers can collect CAN bus data through an OBD-II (J1979) or J1939 connection from the vehicle’s diagnostic port to the router’s Aux I/O port. See the MP70 Hardware User Guide and the LX60 Hardware User Guide for more information about cable connection and accessories. The OBD-II connection is required for the following reports:
- Engine Fault Summary
- Odometer
- Seat Belt
- Vehicle
- Vehicle Utilization
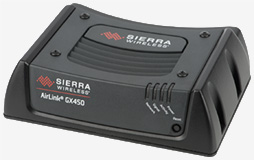
GX450 Gateway
The GX450 gateway supports some features of AMR. The gateway must be connected to the vehicle using a B&B OBD-II scanner and Vehicle Telemetry Kit, as described in the AirLink Vehicle Telemetry User Guide (AVTA 1.1.1 or later).
Connect the GX450 ignition line (white wire on the power connector) to the vehicle ignition and connect the gateway to the vehicle bus as described in the GX450 Hardware User Guide.
The GX450 supports the following types of reports when correctly installed and configured:
- Vehicle Reports
- Vehicle Utilization Reports
- Engine Fault Summary Reports
- Trips Reports
Other ALEOS-based devices may work with some reports (such as Link Utilization), but results will vary. For GPS-based reports, devices with Dead Reckoning will provide the best location accuracy.
AirLink XR90, XR80 and RX55 (Wi-Fi and Wi-Fi Plus) Routers
AirLink XR90 or XR80 routers, with their vehicle telemetry capability and inertial sensors, support all features of AMR.
RX55 routers do not have inertial sensors; therefore Driver Behavior reports are not supported on the RX55.
For optimum reporting performance, connect the router’s ignition line (white wire on the power connector) to the vehicle ignition and connect the router to the vehicle bus as described in the XR Series Hardware User Guide. Many reports will not function correctly if the router is not wired correctly.
XR90, XR80 and RX55 (Wi-Fi and Wi-Fi Plus) routers can collect CAN bus data through an OBD-II (J1979) or J1939 connection from the vehicle’s diagnostic port to the router’s Aux I/O port. See the XR Series Hardware User Guide and RX55 Hardware Guide for more information about cable connection and accessories. The OBD-II connection is required for the following reports:
- Engine Fault Summary
- Odometer
- Seat Belt
- Vehicle
- Vehicle Utilization
For instructions on how to enable reporting in AirLink OS, see the:
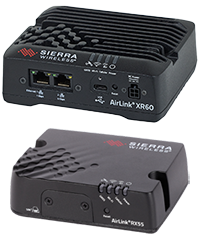
AirLink XR60 or RX55 (Base Model) Routers
AirLink XR60 or RX55 Base Model routers, with their more limited vehicle telemetry features, support AMR reports that don’t require data from the vehicle bus, including:
- Trips
- Zone Summary
- Trip Replay
- Coverage Map
- Coverage Trails
- Link Utilization
For optimum reporting performance, connect the router’s ignition line (white wire on the power connector) to the vehicle ignition as described in the RX55 Hardware User Guide and XR60 Hardware User Guide. Many reports will not function correctly if the router is not wired correctly.
For instructions on how to enable reporting in AirLink OS, see the:

Software and Applications
ALEOS
MP70 routers must be updated to ALEOS 4.11.0 or later.
LX60 routers must be updated to ALEOS 4.13.0 or later.
GX450 gateways must be updated to ALEOS 4.9.3 or later.
The AirVantage Telemetry Application (AVTA) version 1.1.2 or later must be installed from ALMS. The AirLink GX450 with ALEOS 4.9.3 must be used with AVTA 1.1.1.
AirLink OS
For optimal performance, Semtech recommends upgrading your routers XR90, XR80, XR60 and RX55 to AirLink OS 5.1.78 or later. For report compatibility, see the table below.
Supported Versions by Report
| REPORT NAME | SUPPORTS ALEOS | AVTA VERSION | SUPPORTS AIRLINK OS | MINIMUM AIRLINK OS VERSION |
|---|---|---|---|---|
| Coverage Map |
|
1.3.x or later |
|
4.1 |
| Coverage Trails |
|
1.4.2 or later |
|
4.1 |
| Driver Behavior |
|
1.3.x or later |
|
4.1 |
| Engine Fault Summary |
|
1.3.x or later |
|
5.0 |
| Link Utilization |
|
n/a |
|
4.1 |
| Odometer |
|
1.3.x or later |
|
4.1 |
| Seat Belt1 |
|
1.3.x or later |
|
4.1 |
| Trip Replay |
|
1.3.x or later |
|
4.1 |
| Trips |
|
1.3.x or later |
|
4.1 |
| Vehicle |
|
1.3.x or later |
|
4.1 |
| Vehicle Utilization |
|
1.3.x or later |
|
4.1 |
| Zone Summary |
|
1.3.x or later |
|
4.1 |
1 Support is vehicle dependent
Supported Router Models by Report
| REPORT NAME | AirLink XR90 | AirLink XR80 | AirLink XR60 | AirLink RX55 Wi-Fi Plus | AirLink MP70 | AirLink LX60 Wi-Fi+GNSS+Telemetry | AirLink GX450 |
|---|---|---|---|---|---|---|---|
| Coverage Map |
|
|
|
|
|
|
|
| Coverage Trails |
|
|
|
|
|
|
|
| Driver Behavior |
|
|
|
|
|
|
|
| Engine Fault Summary |
|
|
|
|
|
|
|
| Link Utilization |
|
|
|
|
|
|
|
| Odometer |
|
|
|
|
|
|
|
| Seat Belt1 |
|
|
|
|
|
|
|
| Trip Replay |
|
|
|
|
|
|
|
| Trips |
|
|
|
|
|
|
|
| Vehicle |
|
|
|
|
|
|
|
| Vehicle Utilization |
|
|
|
|
|
|
|
| Zone Summary |
|
|
|
|
|
|
|
1 Support is vehicle dependent
Reporting Dashboard
When you click Reporting on the top menu, the Report Templates page appears. This is your reporting dashboard, giving you access to all your reports.
The layout of the Report Templates page is user configurable. You can add widgets (as available), move or remove widgets.
See here for more information about ALMS dashboards in general.
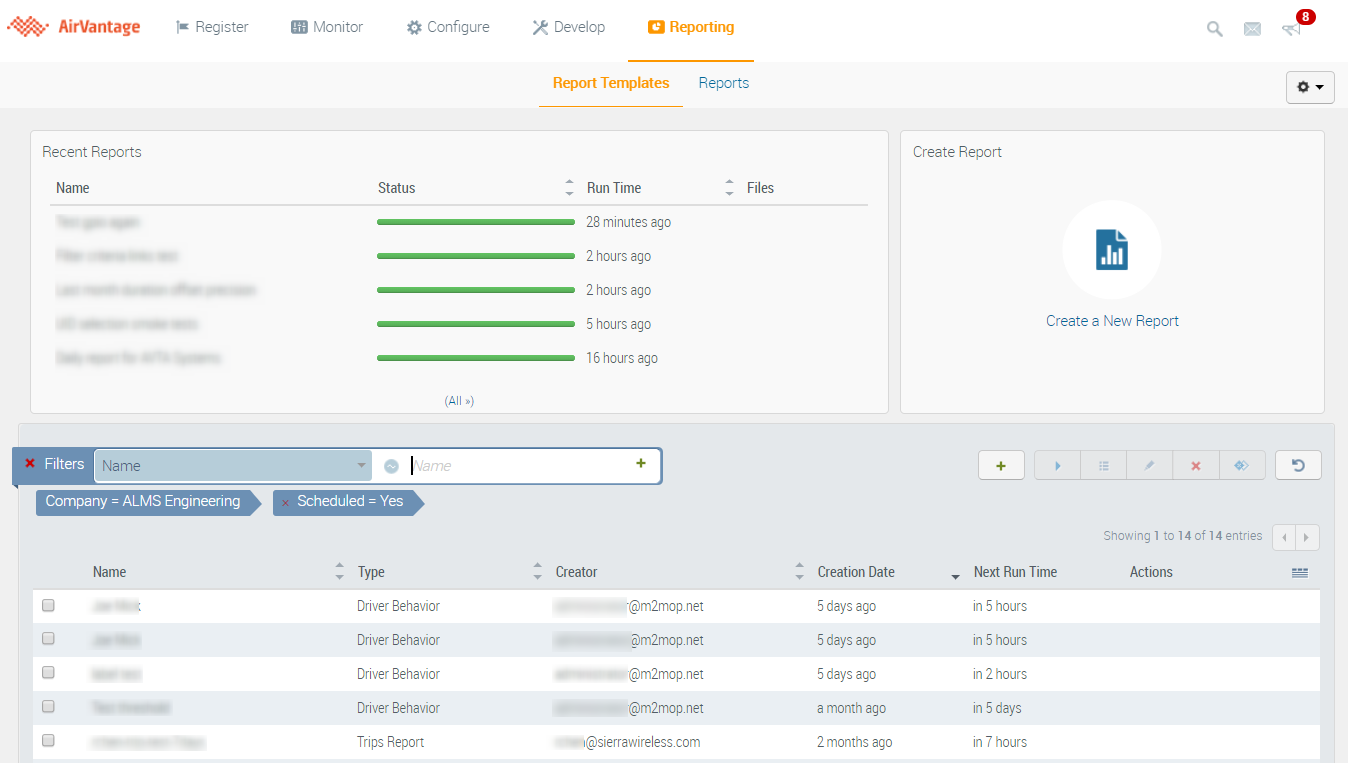
The Report Templates page is divided into three sections:
- The Recent Reports section. It provides access to the last 5 report instances along with their status, communications history, configuration and management.
- The Create Report button opens a blank report template. See here for more information about creating a new report.
- A list of Report Templates with additional information provided in columns. You can search for reports using filters.
Recent Reports
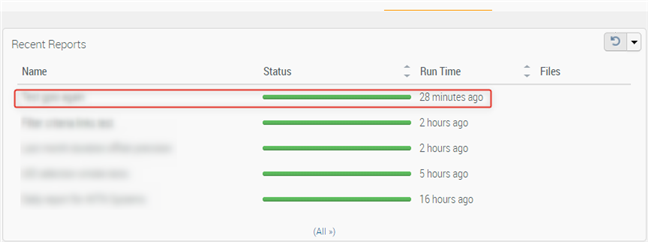
The Recent Reports widget shows you the last five reports that were run, along with their status and time of completion.
- To view a report, click the row for the desired report. See Viewing Reports below.
- Hovering your mouse over the Files column allows you to download the report in its available file format.
- Click the Refresh button on the top right to update the list
- Click All to show all the report instances on the Reports page

Please note that event datapoints are pre-processed in AirVantage on an hourly schedule before becoming available for AMR report purposes. Because of this, events occurring within the hour before the report execution time (scheduled or on-demand) may not be included in the report.
Report Status
Each report status is indicated by color.
 Generated successfully.
 Failed to generate.
 Failed to export.
 Processing.
 Timeout.
If you click a report that has failed to generate, a message will appear with a link that will take you to the report definition page, where you can edit the report if you wish. Error messages also appear when you click reports that have timed out or are still processing. If a report is still processing, wait until it has completed.
Error messages also appear when you click reports that have timed out or are still processing. If a report is still processing, wait until it has completed.
If you click an export file format icon, an error message appears if the file cannot be downloaded in the enabled formats (such as PDF/CSV/KML) because of a file export generation failure, timeout, cancellation, or report processing error. The example on the right shows a KML report generation/export error. Note that when a file export generation failure occurs (the report status is orange), you can still view the report in your browser, as described in Viewing Reports below.
Create Report
Click this widget to begin configuring a new report template. For more information, see How to create a new report .
Report Templates List
The Report Templates List shows you all the existing report templates for your selected company.
The columns displayed can be organized, resized and configured to show the parameters you want to see:

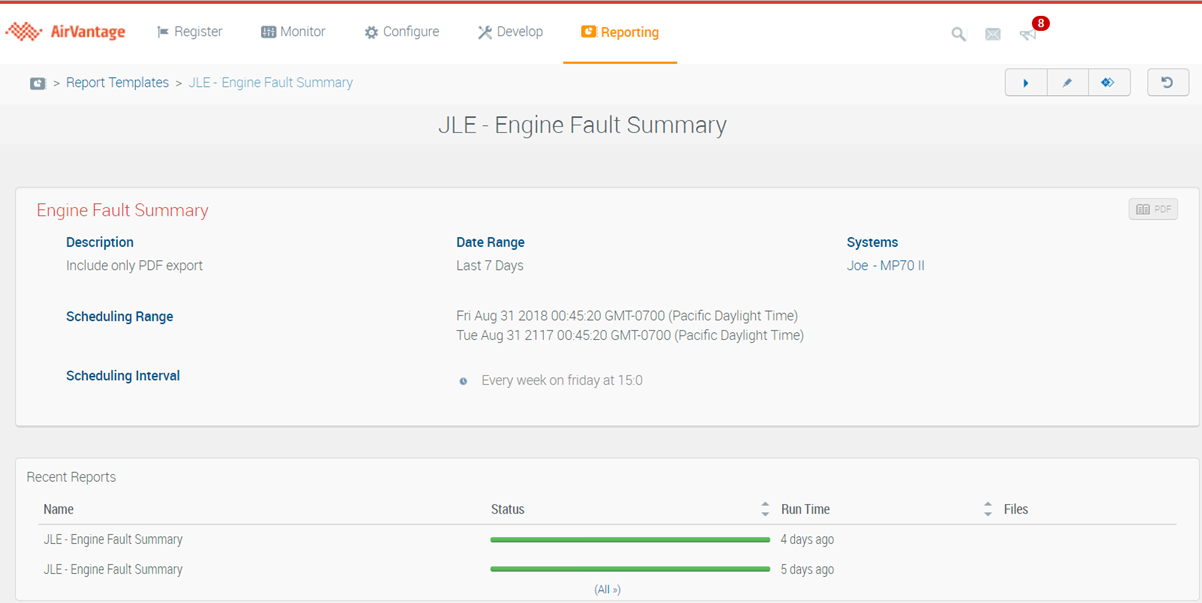
To view a report template and see any report instances that have been generated, click the row for the desired report template.
Manage large deployments
Finding a report or group of reports of interest is easy using filters. Filters can be applied for single or multiple variables: filter on report type, report name, creator, or scheduled (yes/no).
The result of the filtered list is displayed on multiple pages if needed.
See the example below:

Perform Report Actions
The icons along the top right of the Report Templates list and in the Actions column allow you to perform the actions described below:
| New Report | Create a new report template | |
| Run | Run the report, bypassing the report’s schedule | |
| View | View the complete report | |
| Edit | Edit the report template | |
| Delete | Delete the report from the list | |
| Clone | Duplicate the template of the selected report | |
| Refresh | Update the reports list |
You can also perform actions (such as Delete) for a specific instance of a report in the Actions column, as shown below.

Viewing Reports
To view a report:
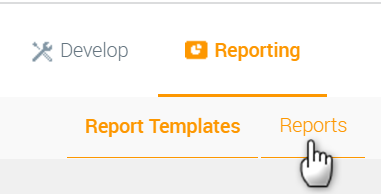
- Go to Reporting > Reports and then select a report from the table.
- On the Recent Reports widget, click the row for the desired report.
On the list of report templates, click the row for the desired report template.
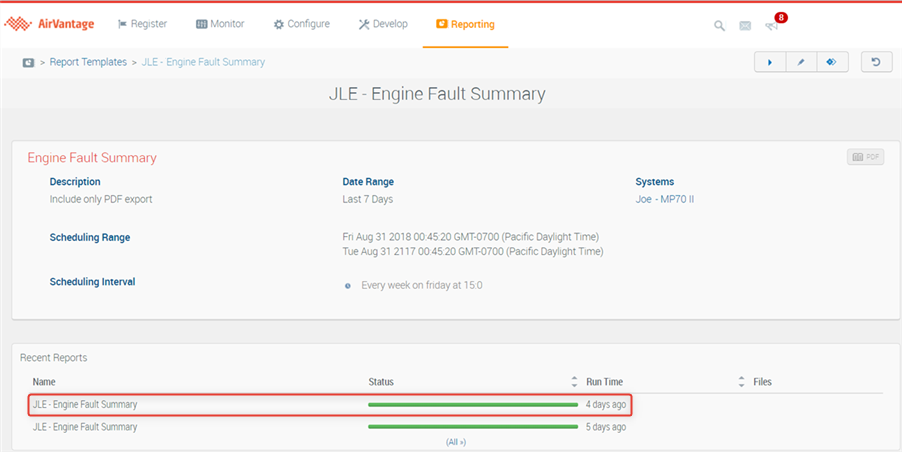
If multiple instances of the report have been generated, an interim page appears. It displays a summary of the report template settings along with a list of recently generated reports.
Click the row for the desired report instance to view the full report details.
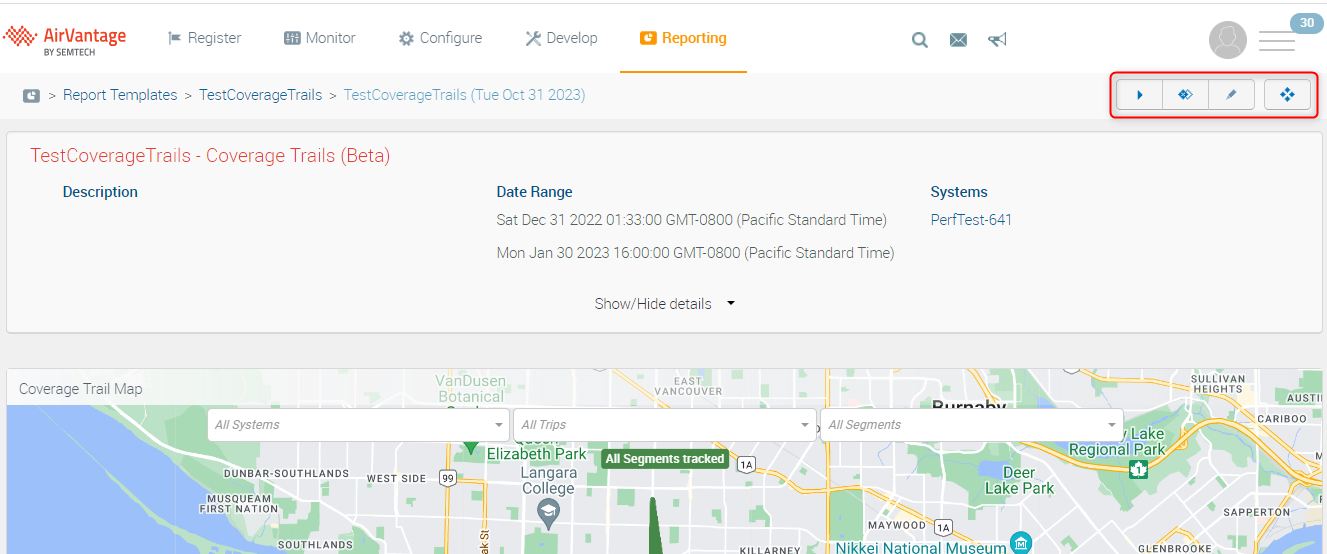
Perform Report Actions
The icons along the top right of the report allow you to perform the actions described below:
| Run | Run the report, bypassing the report’s schedule | |
| Clone | Duplicate the template of the selected report | |
| Edit | Edit the report template | |
| View raw data points | View the raw data points used to generate the report. See this page for more information. |
For more information about reports, see the How-Tos section below.
How-Tos
This section provides you with helpful procedures for common tasks.
